
32
Generate 10 QR Code Types with React
This article was originally published on my personal blog.
QR Codes are square codes that people can scan to perform an action. That action can be just viewing some text, going to a URL, opening a location on a map, viewing a social media account, and more.
QR Codes are generally either used digitally on websites and apps to make it easier for users to perform something or used in printing when marketing your products or company. By printing your company URL's QR Code on your business card, you eliminate the need for people to type in the website to see it.
In this tutorial, you'll learn how to generate 10 different types of QR Codes in JavaScript, particularly React. You can see the full code on this GitHub repository, and you can see it in live-action on this website.
To follow along with this tutorial, you need to have both Node.js and NPM installed. NPM will be automatically installed when you install Node.js.
To create a new React website, run the following command in your terminal:
npx create-react-app react-qr-generatorAfter this command is done, change to the newly created directory:
cd react-qr-generatorThen, install React Bootstrap for easy styling:
npm install react-bootstrap [email protected]For this tutorial, you'll use the library react-qr-code. This library provides a React component that, when you provide the text to be encoded into a QR Code, will display the QR Code for it.
To install the library run the following command:
npm install react-qr-codeBefore you start creating all different types of QR Codes, you'll setup the main layout for the home page.
Change
src/App.js to the following:import { useState } from 'react'
import 'bootstrap/dist/css/bootstrap.min.css';
import Container from 'react-bootstrap/Container'
import Tab from 'react-bootstrap/Tab'
import Row from 'react-bootstrap/Row'
import Col from 'react-bootstrap/Col'
import Nav from 'react-bootstrap/Nav'
import QRCode from 'react-qr-code'
function App() {
const [qrText, setQrText] = useState("");
return (
<Container className='mx-auto'>
<h1 className='my-4'>Qr Generator</h1>
{qrText.length > 0 && <QRCode value={qrText} />}
<h4 className='my-3'>Choose the type of QRCode format</h4>
<Tab.Container defaultActiveKey="text">
<Row>
<Col sm={3}>
<Nav variant="pills" className="flex-column">
</Nav>
</Col>
<Col sm={9}>
<Tab.Content>
</Tab.Content>
</Col>
</Row>
<Tab.Container
</Container>
);
}
export default App;Here, you create a custom vertical tab layout using React Bootstrap. This will allow you to show the different QR Code types on the left, and the content necessary for that type on the right.
You also create the state variable
qrText which will hold the text to generate a QR Code. When the qrText is not empty, the QRCode component from the library react-qr-code will show the QR Code for that text.In the next parts, you'll create components for 10 types of QR Codes. After creating each component, a tab will be added to it nested in
<Nav>, and the component will be added as a tab-pane nested inside <Tab.Content>.The components will be placed inside a new directory
components nested inside src, so make sure to create that directory.The most common QR Code type is a URL QR Code type. When a person scans the QR Code they'll be led to a webpage that this QR Code points to.
You can actually create a QR Code for any kind of text. It doesn't need to be a URL.
In this section, you'll create a component that takes text or URL and generate the QR Code for it.
Create the file
src/components/Text.js with the following content:import { useState } from "react";
import { Button, Form } from "react-bootstrap";
function Text ({ setQrText }) {
const [text, setText] = useState('');
function handleSubmit (e) {
e.preventDefault();
setQrText(text);
return false;
}
return (
<Form onSubmit={handleSubmit}>
<Form.Group className="mb-3">
<Form.Label>Text or URL</Form.Label>
<Form.Control type="text" value={text} onChange={(e) => setText(e.target.value)} />
</Form.Group>
<Button variant="primary" type="submit">
Generate
</Button>
</Form>
)
}
export default TextThe
Text component receives as a prop the function setQrText, which will be used to set the text to be encoded as QR Code. Then, a form with one input "Text or URL" will be shown to the user.Once the user enters the text or URL they want and clicks on the button "Generate", the text will be set with
setQrText. This will change the value of qrText in the App component, which will show a QR Code for that text.Next, add the link for this new tab in
src/App.js nested in <Nav>:<Nav>
<Nav.Item>
<Nav.Link eventKey="text">Text and URLs</Nav.Link>
</Nav.Item>
</Nav>And add the new Tab pane nested in
Tab.Content:<Tab.Content>
<Tab.Pane eventKey="text">
<Text setQrText={setQrText} />
</Tab.Pane>
</Tab.Content>Don't forget to import the new
Text component at the top of the file:import Text from './components/Text'Let's test it out. Run the server with the following command:
npm startThis will run the server on
localhost:3000 and the website will open in a browser. You should see one tab on the left and on the right a form that shows one text field with a button.
Try entering any text or URL. You should see a QR code generated at the top.
If you try to scan the QR Code with your phone, you should either see the text you entered or see a URL to go to.
QR Codes can be used to share a location with others. When the QR Code is scanned, the person will see the location on Google Maps.
The format of this QR Code's encoded value is as follows:
http://maps.google.com/maps?q={lat},{long}Where
{lat} is the latitude and {long} is the longitude of the location.In this section, you'll create a component that shows the user 2 fields Longitude and Latitude to allow them to generate a QR Code for that location. You'll also add the functionality to automatically add the latitude and longitude of their location.
Create
src/components/Geolocation.js with the following content:import { useState } from "react";
import { Button, Form, Spinner } from "react-bootstrap";
function Geolocation ({ setQrText }) {
const [lat, setLat] = useState('');
const [long, setLong] = useState('');
const [locationLoading, setLocationLoading] = useState(false);
function getCurrentLocation () {
setLocationLoading(true);
navigator.geolocation.getCurrentPosition((pos) => {
setLat(pos.coords.latitude);
setLong(pos.coords.longitude);
setLocationLoading(false);
}, (err) => {
alert(err.message);
setLocationLoading(false);
}, {
enableHighAccuracy: true
});
}
function handleSubmit (e) {
e.preventDefault();
setQrText('http://maps.google.com/maps?q=' + lat + ','+ long);
return false;
}
return (
<Form onSubmit={handleSubmit}>
<Form.Group className="mb-3">
<Form.Label>Latitude</Form.Label>
<Form.Control type="text" value={lat} onChange={(e) => setLat(e.target.value)} />
</Form.Group>
<Form.Group className="mb-3">
<Form.Label>Longitude</Form.Label>
<Form.Control type="text" value={long} onChange={(e) => setLong(e.target.value)} />
</Form.Group>
<Button variant="secondary" type="button" className="me-2" disabled={locationLoading} onClick={getCurrentLocation}>
{locationLoading && <Spinner animation="border" className="me-2 align-middle" />}
Set Current Location
</Button>
<Button variant="primary" type="submit">
Generate
</Button>
</Form>
)
}
export default GeolocationThis component, similar to the previous one, receives the
setQrText function as a prop. 3 state variables are defined. lat to hold the latitude value entered in the Latitude field, long to hold the longitude value entered in the Longitude field, and locationLoading to show a loading spinner when fetching the user's current location.the
getCurrentLocation is executed when the user clicks on Set Current Location. You first have to obtain the user's permission to get access to their location, then, when permitted, set the lat and long state variables based on the coordinates obtained.Finally, when the form is submitted, the
qrText is set using setQrText to the format shown before using lat and lang.You just need to add the new tab in
App.js just like you did in the previous section under <Nav>:<Nav.Item>
<Nav.Link eventKey="geo">GeoLocation</Nav.Link>
</Nav.Item>And add the new component as a tab-pane under
<Tab.Content>:<Tab.Pane eventKey="geo">
<Geolocation setQrText={setQrText} />
</Tab.Pane>And, of course, import the component at the beginning of the file:
import Geolocation from './components/Geolocation'Let's test it out. Run the server if it isn't already running. You'll see a new tab "GeoLocation". When you click on the tab, you'll see 2 fields with 2 buttons.

Try entering a Latitude and Longitude, or set your current location with the "Set Current Location" button. When you click "Generate", a new QR Code will be generated.
If you try scanning the QR Code and if you have Google Maps installed, you'll see that you can open the QR Code directly in Google Maps and you'll see the location specified in the QR Code's value.
QR codes can be used to add events to a calendar. Using this QR Code, you can make it easier for your users or customers to remember events by easily scanning the QR Code and adding the event to their calendar.
The text format for a Calendar QR Code is as follows:
BEGIN:VCALENDAR\nBEGIN:VEVENT\nDTSTART:{start-date}\nDTEND:{end-date}\nSUMMARY:{title}\nEND:VEVENT\nEND:VCALENDARThis looks like a bunch of gibberish at first glance, but you can see that you're just specifying the start date, the end date, and the title of the event. Note that the start and end date are of the format
YYYYMMDD with no separation between any of them.In this section, you'll create a component that shows the user 3 fields, one for the start date, one for the end date, and one for the title.
Create the file
/src/components/Calendar.js with the following content:import { useState } from "react";
import { Button, Form } from "react-bootstrap";
function Calendar ({ setQrText }) {
const [title, setTitle] = useState('');
const [dateStart, setDateStart] = useState('');
const [dateEnd, setDateEnd] = useState('');
function handleSubmit (e) {
e.preventDefault();
const dateStartFormatted = dateStart.replace(/-/g, "");
const dateEndFormatted = dateEnd.replace(/-/g, "")
setQrText(`BEGIN:VCALENDAR\nBEGIN:VEVENT\nDTSTART:${dateStartFormatted}\nDTEND:${dateEndFormatted}\nSUMMARY:${title}\nEND:VEVENT\nEND:VCALENDAR`);
return false;
}
return (
<Form onSubmit={handleSubmit}>
<Form.Group className="mb-3">
<Form.Label>Title</Form.Label>
<Form.Control type="text" value={title} onChange={(e) => setTitle(e.target.value)} />
</Form.Group>
<Form.Group className="mb-3">
<Form.Label>Start Date</Form.Label>
<Form.Control type="date" value={dateStart} onChange={(e) => setDateStart(e.target.value)} />
</Form.Group>
<Form.Group className="mb-3">
<Form.Label>End Date</Form.Label>
<Form.Control type="date" value={dateEnd} onChange={(e) => setDateEnd(e.target.value)} />
</Form.Group>
<Button variant="primary" type="submit">
Generate
</Button>
</Form>
)
}
export default CalendarThis component defines 3 state variables:
title, dateStart, and dateEnd. When the user enters the values into the fields and clicks "Generate", qrText will be set to the format stated above, with the values used in their specific places.Just like you did in previous sections, go to
src/App.js and add a new tab under <Nav>:<Nav.Item>
<Nav.Link eventKey="calendar">Calendar</Nav.Link>
</Nav.Item>Then, add the component as a tab-pane under
Tab.Content:<Tab.Pane eventKey="calendar">
<Calendar setQrText={setQrText} />
</Tab.Pane>And import the
Calendar component at the top of the file:import Calendar from './components/Calendar'Now, open the website. You should see a new tab "Calendar". Click on it and 3 fields will show up for the start date, end date, and title.

Try entering values for these fields then click "Generate". If you scan the QR Code generated you should be able to open your calendar and add an event with the title, start date, and end date you entered.
QR Codes can be used to allow your users or customers to easily email you. When they scan the QR Code, they can open a mail app with the to, subject, and message field already filled.
The format of a mail QR code is as follows:
MATMSG:TO:{to};SUB:{subject};BODY:{message};;Where
{to} is the email address this mail should be sent to, {subject} is the subject of the email, and {message} is the message to include in the body.In this section, you'll create a Mail component with 3 fields: To, Subject and Message. You'll then generate the QR Code using the values of these fields.
Create
src/components/Mail.js with the following content:import { useState } from "react";
import { Button, Form } from "react-bootstrap";
function Mail ({ setQrText }) {
const [to, setTo] = useState('');
const [subject, setSubject] = useState('');
const [message, setMessage] = useState('');
function handleSubmit (e) {
e.preventDefault();
setQrText(`MATMSG:TO:${to};SUB:${subject};BODY:${message};;`);
return false;
}
return (
<Form onSubmit={handleSubmit}>
<Form.Group className="mb-3">
<Form.Label>To Email</Form.Label>
<Form.Control type="email" value={to} onChange={(e) => setTo(e.target.value)} />
</Form.Group>
<Form.Group className="mb-3">
<Form.Label>Subject</Form.Label>
<Form.Control type="text" value={subject} onChange={(e) => setSubject(e.target.value)} />
</Form.Group>
<Form.Group className="mb-3">
<Form.Label>Message</Form.Label>
<Form.Control as="textarea" value={message} onChange={(e) => setMessage(e.target.value)} />
</Form.Group>
<Button variant="primary" type="submit">
Generate
</Button>
</Form>
)
}
export default MailSimilar to before, this creates 3 fields managed by 3 states, and when the "Generate" button is clicked the QR code will be generated using the format mentioned above.
Add the new tab in
src/App.js in <Nav>:<Nav.Item>
<Nav.Link eventKey="mail">Mail</Nav.Link>
</Nav.Item>Then, add the tab-pane in
<Tab.Control>:<Tab.Pane eventKey="mail">
<Mail setQrText={setQrText} />
</Tab.Pane>Finally, import the
Mail component at the top of the file:import Mail from './components/Mail'Open the website now and you should see a new Mail tab. Click on the tab and you'll see 3 fields with a button.

Enter values in these fields then click Generate. If you scan the QR code that is generated, you'll see that you can open a mail app and send an email with these fields prefilled.
QR Codes can be used to let your users or customers easily call you just by scanning the QR code.
The format for Call QR Code is as follows:
TEL:{phone_number}Where
{phone_number} is the phone number that the person will call when they scan the QR code.In this section, you'll create a component that shows the user a field to enter their phone number, then generate the QR Code for it.
Create the file
src/components/Call.js with the following content:import { useState } from "react";
import { Button, Form } from "react-bootstrap";
function Call ({ setQrText }) {
const [phoneNumber, setPhoneNumber] = useState('');
function handleSubmit (e) {
e.preventDefault();
setQrText("TEL:" + phoneNumber);
return false;
}
return (
<Form onSubmit={handleSubmit}>
<Form.Group className="mb-3">
<Form.Label>Phone Number</Form.Label>
<Form.Control type="text" value={phoneNumber} onChange={(e) => setPhoneNumber(e.target.value)} />
</Form.Group>
<Button variant="primary" type="submit">
Generate
</Button>
</Form>
)
}
export default CallSimilar to other components, this component has 1 state variable with a field to change its value. Then, on the form's submission, the text for the QR code is set to the format mentioned above.
Add in
src/App.js the tab for "Call":<Nav.Item>
<Nav.Link eventKey="call">Call</Nav.Link>
</Nav.Item>And add a tab-pane for the
Call component:<Tab.Pane eventKey="call">
<Call setQrText={setQrText} />
</Tab.Pane>Finally, import
Call at the beginning of the file:import Call from './components/Call'Open the website. You should see a new "Call" tab. If you click on it, you'll see one field for the phone number.

If you enter a phone number, click "Generate", then scan the QR Code, you'll be able to directly call the phone number.
QR Codes can be used to easily send SMS. You can show your users or customer a QR Code with your number and a prefilled message. When they scan it, they can directly open the messaging app and send a text message to the number with the message right away.
The format for SMS QR Codes is as follows:
smsto:{phoneNumber}:{message}Where
{phoneNumber} is the phone number to send the SMS to, and {message} is the prefilled message. The {message} is optional. So, you can just have the phone number and the user will be able to send you a message without prefilled content.In this section, you'll create a component that shows the user 2 fields, one for phone number and one for the message content.
Create
src/components/Sms.js with the following content:import { useState } from "react";
import { Button, Form } from "react-bootstrap";
function Sms ({ setQrText }) {
const [phoneNumber, setPhoneNumber] = useState('');
const [message, setMessage] = useState('');
function handleSubmit (e) {
e.preventDefault();
setQrText(`smsto:${phoneNumber}:${message}`);
return false;
}
return (
<Form onSubmit={handleSubmit}>
<Form.Group className="mb-3">
<Form.Label>Phone Number</Form.Label>
<Form.Control type="text" value={phoneNumber} onChange={(e) => setPhoneNumber(e.target.value)} />
</Form.Group>
<Form.Group className="mb-3">
<Form.Label>Message (Optional)</Form.Label>
<Form.Control type="text" value={message} onChange={(e) => setMessage(e.target.value)} />
</Form.Group>
<Button variant="primary" type="submit">
Generate
</Button>
</Form>
)
}
export default SmsJust like previous components, this component has 2 state variables for the phone number and message, then on form submission sets the text for the QR Code in the format mentioned above.
Add the tab in
src/App.js under <Nav>:<Nav.Item>
<Nav.Link eventKey="sms">SMS</Nav.Link>
</Nav.Item>And add the tab-pane for the
Sms component under Tab.Content:<Tab.Pane eventKey="sms">
<Sms setQrText={setQrText} />
</Tab.Pane>Finally, import the component at the top of the file:
import Sms from './components/Sms'Open the website now and click on the new "SMS" tab. You'll see 2 fields for phone number and message.
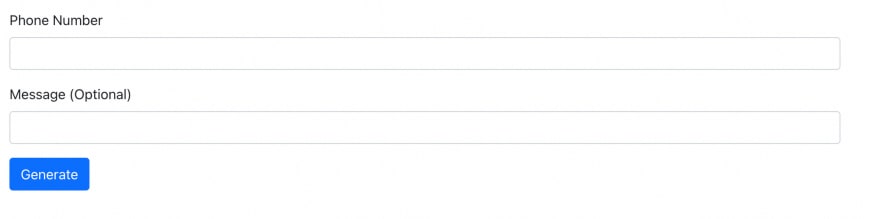
Enter the phone number and optionally the message, click Generate, then scan the QR code. You'll be able to open the messaging app with the number and the message (if you entered one) filled in.
QR Codes can be used to easily connect to a Wifi network. When a person scans the QR code, they can join the network.
The Wifi QR code has the following format:
WIFI:T:{authentication};S:{name};P:{password};H:{hidden};{authentication} can either be nopass, WPA or WEP. {name} is the name or SSID of the network. {password} is the password of the network and optional. {hidden} is a boolean value (true or false) that indicates whether this network is hidden or not.In this section, you'll create a component that shows the user 4 components for the 4 fields mentioned above, then generates the QR code for it.
Create
src/components/Wifi.js with the following content:import { useState } from "react";
import { Button, Form } from "react-bootstrap";
function Wifi ({ setQrText }) {
const [authentication, setAuthentication] = useState('nopass');
const [name, setName] = useState('');
const [password, setPassword] = useState('');
const [hidden, setHidden] = useState(false);
function handleSubmit (e) {
e.preventDefault();
setQrText(`WIFI:T:${authentication};S:${name};${authentication !== 'nopass' ? `P:${password};` : ''}H:${hidden};`);
return false;
}
return (
<Form onSubmit={handleSubmit}>
<Form.Group className="mb-3">
<Form.Label>Authentication type</Form.Label>
<Form.Select value={authentication} aria-label="Authentication" onChange={(e) => setAuthentication(e.target.value)}>
<option value="nopass">No Password</option>
<option value="WEP">WEP</option>
<option value="WPA">WPA</option>
</Form.Select>
</Form.Group>
<Form.Group className="mb-3">
<Form.Label>Network Name (SSID)</Form.Label>
<Form.Control type="text" value={name} onChange={(e) => setName(e.target.value)} />
</Form.Group>
<Form.Group className="mb-3">
<Form.Label>Password (Optional)</Form.Label>
<Form.Control type="password" value={password} onChange={(e) => setPassword(e.target.value)} />
</Form.Group>
<Form.Group className="mb-3">
<Form.Label>Hidden?</Form.Label>
<Form.Check
type={'checkbox'}
checked={hidden}
onChange={(e) => setHidden(e.target.checked)}
/>
</Form.Group>
<Button variant="primary" type="submit">
Generate
</Button>
</Form>
)
}
export default WifiAdd in
src/App.js the tab in <Nav>:<Nav.Item>
<Nav.Link eventKey="wifi">Wifi</Nav.Link>
</Nav.Item>And add
Wifi as a tab-pane in <Tab.Content>:<Tab.Pane eventKey="wifi">
<Wifi setQrText={setQrText} />
</Tab.Pane>Finally, import
Wifi at the beginning of the file:import Wifi from './components/Wifi'If you open the website and click on the Wifi tab, you should see 4 fields.
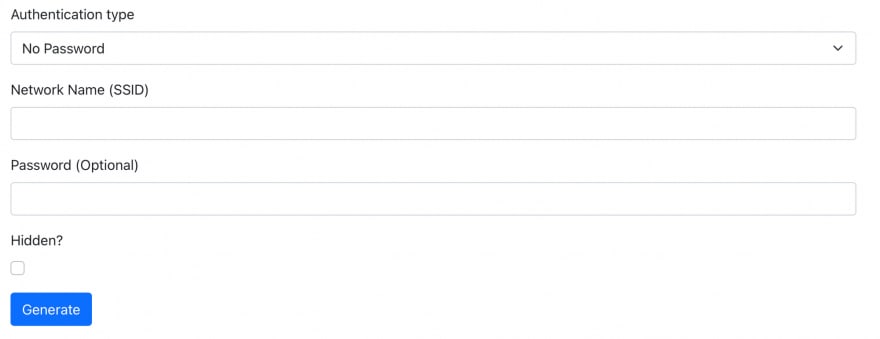
Enter values for the fields then click Generate. If you scan the generated QR Code, you'll be able to automatically connect to the Wifi network.
QR Codes can be used to easily open a YouTube video. They have the following format:
youtube://{videoId}Where
{videoId} is the ID of a video. You can obtain the ID of a video from the v parameter in the URL of the video:https://www.youtube.com/watch?v={videoId}You'll create in this section a component that shows a field for the video's ID then generate the QR code for it.
Create
js/components/Youtube.js with the following content:import { useState } from "react";
import { Button, Form } from "react-bootstrap";
function Youtube ({ setQrText }) {
const [videoId, setVideoId] = useState('');
function handleSubmit (e) {
e.preventDefault();
setQrText('youtube://' + videoId);
return false;
}
return (
<Form onSubmit={handleSubmit}>
<Form.Group className="mb-3">
<Form.Label>Video ID</Form.Label>
<Form.Control type="text" value={videoId} onChange={(e) => setVideoId(e.target.value)} />
</Form.Group>
<Button variant="primary" type="submit">
Generate
</Button>
</Form>
)
}
export default YoutubeAdd the new tab in
src/App.js inside <Nav>:<Nav.Item>
<Nav.Link eventKey="youtube">Youtube</Nav.Link>
</Nav.Item>And add the tab-pane for YouTube:
<Tab.Pane eventKey="youtube">
    <Youtube setQrText={setQrText} />
</Tab.Pane>
Finally, import the
Youtube component at the top of the file:import Youtube from './components/Youtube'Open the website and click on the Youtube tab. You'll see one field to enter the video ID.

Enter a video's ID then click Generate. If you scan the QR code, you can open the video in the YouTube app right away.
QR Codes can be used to lead people to your Instagram account. The format is just like a URL to your profile:
https://instagram.com/{username}Where
{username} is the username of the profile to open in the Instagram app.Create
src/components/Instagram.js with the following content:import { useState } from "react";
import { Button, Form } from "react-bootstrap";
function Instagram ({ setQrText }) {
const [username, setUsername] = useState('');
function handleSubmit (e) {
e.preventDefault();
setQrText('https://instagram.com/' + username);
return false;
}
return (
<Form onSubmit={handleSubmit}>
<Form.Group className="mb-3">
<Form.Label>Username</Form.Label>
<Form.Control type="text" value={username} onChange={(e) => setUsername(e.target.value)} />
</Form.Group>
<Button variant="primary" type="submit">
Generate
</Button>
</Form>
)
}
export default InstagramIn
src/App.js add the new tab under <Nav>:<Nav.Item>
<Nav.Link eventKey="instagram">Instagram</Nav.Link>
</Nav.Item>And add the new tab-pane for
Instagram under <Tab.Content>:<Tab.Pane eventKey="instagram">
<Instagram setQrText={setQrText} />
</Tab.Pane>Finally, import
Instagram at the top of the file:import Instagram from './components/Instagram'Open the website and click on the Instagram tab. You'll see a field to enter your username.

Enter a username and click on Generate. If you scan the generated QR code, you can open the username's profile right away in the Instagram app.
QR Codes can be used to lead people to your Twitter profile or to Tweet something.
The format to lead to a Twitter profile is as follows:
https://twitter.com/{username}This is similar to Instagram. When the QR Code for this text is scanned, the profile for
{username} will be opened in the Twitter app.The format to allow people to Tweet something with prefilled content is as follows:
https://twitter.com/intent/tweet?text={content}Where
{content} is the content of the tweet.In this section, you'll create a component with 2 fields, one to determine the type of Twitter QR Code, and one for the content of the text.
Create
src/components/Twitter.js with the following text:import { useState } from "react";
import { Button, Form } from "react-bootstrap";
function Twitter ({ setQrText }) {
const [type, setType] = useState('profile')
const [text, setText] = useState('');
function handleSubmit (e) {
e.preventDefault();
setQrText('https://twitter.com/' + (type === 'profile' ? text : 'intent/tweet?text=' + text));
return false;
}
return (
<Form onSubmit={handleSubmit}>
<Form.Group className="mb-3">
<Form.Label>Type</Form.Label>
<Form.Select value={type} aria-label="Type" onChange={(e) => setType(e.target.value)}>
<option value="profile">Profile</option>
<option value="tweet">Tweet</option>
</Form.Select>
</Form.Group>
<Form.Group className="mb-3">
<Form.Label>Username or Tweet Text</Form.Label>
<Form.Control type="text" value={text} onChange={(e) => setText(e.target.value)} />
</Form.Group>
<Button variant="primary" type="submit">
Generate
</Button>
</Form>
)
}
export default TwitterIn
src/App.js add the new tab in <Nav>:<Nav.Item>
<Nav.Link eventKey="twitter">Twitter</Nav.Link>
</Nav.Item>And add the
Twitter component in <Tab.Content>:<Tab.Pane eventKey="twitter">
<Twitter setQrText={setQrText} />
</Tab.Pane>Finally, import the
Twitter component at the top of the file:import Twitter from './components/Twitter'Open the website now and click on the Twitter tab. You'll see 2 fields.

Choose one of the types and enter the text based on what you chose, then click Generate. If you scan the QR code, based on the type you chose you'll either be led to the user's profile or to tweet something with the text you entered prefilled.
QR Codes simplify doing certain actions and allow people to easily interact with your websites, products, or services. These 10 QR code types are just some of the actions you can let users perform, and you can easily generate QR codes in JavaScript, specifically React, using the react-qr-code library.
32