
29
Understanding Axios POST requests
Written by Chimezie Innocent ✏️
Sending requests to a web server is one of the most common things we do on the frontend side of web development. Creating a Facebook post, uploading a new Instagram image, sending a tweet, or logging in and signing up on new websites: these scenarios all send requests to a server.
Axios is an open source library that helps us send all these kinds of requests by providing a promised-based HTTP client method called
POST. In this article, we’ll learn how to use the Axios POST method both in vanilla JavaScript and in a framework like React.The Axios library makes asynchronous HTTP requests to
REST endpoints in browsers and Node.js. Because Axios is a lightweight HTTP client for both Node.js and browsers, it gives users the ability to take advantage of JavaScript’s async await.Axios is also quite similar to the native JavaScript Fetch API. It offers a lot of methods like
POST, PUT, PATCH, GET, DELETE, and so on. However, in this article, we will only be looking at the POST method.To understand using the
POST method, let’s consider the following scenario:Take logging into Facebook, for example. When we first start using the app, it first asks us to either sign up or log in if we already have an account. To do both, we must fill in the required form details and send them to a server.
This server then checks what we entered and proceeds to take us into the main app or respond with an error message if the details are incorrect. Axios
POST is the Axios method that allows us to do that. Below is what an Axios POST request looks like:axios.post(url[, data[, config]])From the code above, Axios
POST takes three parameters: the url, data, and config.The
url is the server path we send the request to; note that it is in string format. The data then encapsulates the request body that we’re sending or parsing to the url. This is in object format, which means it has a key and value pair.The key is the schema the server accepts while the value is any data type we parse.
config is the third parameter where we specify the header content type, authorization, and so on; this is also in object format.Now that we understand a bit about what Axios is and what its
POST method does, let’s go ahead and see how to use it.Before proceeding, it is of utmost importance that you have an understanding of React and how React form elements work. You can read more about forms in React here.
You might wonder why you should use Axios over the native JavaScript
fetch() method. Comparatively, Axios has some advantages over fetch().First, Axios allows us to work with only one promise(
.then()) and with JSON data by default unlike in the Fetch API where we must first convert the request body to a JSON string in the first promise:// With Fetch
fetch(url)
.then((response) => response.json())
.then((data) => console.log(data))
.catch((error) => console.log(error));
// With Axios
axios.get(url)
.then((response) => console.log(response))
.catch((error) => console.log(error));Secondly, Axios can be used on the client as well as on the server, unlike the Fetch API.
Axios functions are also named to match the HTTP methods. To perform a
POST request, you use the .post() method, and so on:axios.post() // to perform POST request
axios.get() // to perform GET request
axios.put() // to perform PUT request
axios.delete() // to perform DELETE request
axios.patch // to perform PATCH requestOther reasons to use Axios
POST over the Fetch API include the following:fetch() does not allowEarlier in this article, we mentioned that we will cover how to use the Axios
POST method both in vanilla JavaScript and in React, so we will start with the former and then proceed to the latter.Note that most of this article will focus on working with React, and we will use the reqres.in dummy API for our calls.
To use Axios in vanilla JavaScript, we must first add the CDN link in the HTML before using it in the script file. Let’s start by creating two files to use:
index.html and index.js:// index.html
<!DOCTYPE html>
<html>
<head>
<title>Parcel Sandbox</title>
<meta charset="UTF-8" />
</head>
<body>
<div id="app">
<h1>Login Account</h1>
<form action="">
<label for="email">
Email
<input type="email" name="" id="email" />
</label>
<label for="password">
Password
<input type="password" name="" id="password" />
</label>
<button id="btn">Login</button>
</form>
</div>
<script src="https://unpkg.com/axios/dist/axios.min.js"></script>
<script src="index.js"></script>
</body>
</html>This HTML file creates a simple login page with two input fields, the email and the password fields, and a login button. At the bottom, just above the
index.js link, we added the Axios CDN.Next, we head over to our
index.js file that we created and get the email input, password input, and button elements using their Ids. We can then add an onClick event listener that triggers the function whenever we click the button:// index.js
const emailInput = document.getElementById("email");
const passwordInput = document.getElementById("password");
const btn = document.getElementById("btn");
btn.addEventListener("click", () => {
const email = emailInput.value;
const password = passwordInput.value;
axios.post("https://reqres.in/api/login", {
email: email,
password: password
})
.then((response) => {
console.log(response);
});
});From our reqres.in dummy API, use
[email protected] and cityslicka as the email and password values, respectively. If you click the login button, you will get a response token in your console with a 200 status code telling you the POST request was successful.
We can now perform the same
POST request we just did in the vanilla JavaScript example in React. To use Axios in React, we must install the Axios package using npm or yarn. In your terminal, install Axios by running either of the following commands:$ npm install axios
$ yarn add axiosWith Axios installed, let’s go to our
App.js file.Unlike in vanilla JavaScript, we must first import Axios from the Axios package we installed before using it. Then, in our
handleSubmit function, let’s call Axios with the POST method just as we did in the vanilla example:import React, { useState } from "react";
import axios from "axios";
const App = () => {
const [data, setData] = useState({
email: "",
password: ""
});
const handleChange = (e) => {
const value = e.target.value;
setData({
...data,
[e.target.name]: value
});
};
const handleSubmit = (e) => {
e.preventDefault();
const userData = {
email: data.email,
password: data.password
};
axios.post("https://reqres.in/api/login", userData).then((response) => {
console.log(response.status);
console.log(response.data.token);
});
};
return (
<div>
<h1>Login Account</h1>
<form onSubmit={handleSubmit}>
<label htmlFor="email">
Email
<input
type="email"
name="email"
value={data.email}
onChange={handleChange}
/>
</label>
<label htmlFor="password">
Password
<input
type="password"
name="password"
value={data.password}
onChange={handleChange}
/>
</label>
<button type="submit">Login</button>
</form>
</div>
);
};The above code is a practical example of where and how we can use the Axios
POST call. Let’s look at another example where we create a new user or register as a new user:// App.js
import React, { useState } from "react";
import './styles.css';
import axios from "axios";
const App = () => {
const [state, setState] = useState({
name: "",
job: ""
});
const handleChange = (e) => {
const value = e.target.value;
setState({
...state,
[e.target.name]: value
});
};
const handleSubmit = (e) => {
e.preventDefault();
const userData = {
name: state.name,
job: state.job
};
axios.post("https://reqres.in/api/users", userData).then((response) => {
console.log(response.status);
console.log(response.data);
});
};
return (
<div>
<h1>Register or Create new account</h1>
<hr />
<form onSubmit={handleSubmit}>
<label htmlFor="name">
Name
<input
type="text"
name="name"
value={state.name}
onChange={handleChange}
/>
</label>
<label htmlFor="job">
Job
<input
type="text"
name="job"
value={state.job}
onChange={handleChange}
/>
</label>
<button type="submit">Register</button>
</form>
</div>
);
};You can also create a
styles.css file and copy the CSS styling below to style the app. It’s nothing fancy, but makes the interface view a bit cooler:// styles.css
body {
padding: 0;
margin: 0;
box-sizing: border-box;
font-family: sans-serif;
}
h1 {
text-align: center;
margin-top: 30px;
margin-bottom: 0px;
}
hr {
margin-bottom: 30px;
width: 25%;
border: 1px solid palevioletred;
background-color: palevioletred;
}
form {
border: 1px solid black;
margin: 0 28%;
padding: 30px 0;
display: flex;
flex-direction: column;
align-items: center;
justify-content: center;
}
label {
width: 80%;
text-transform: uppercase;
font-size: 16px;
font-weight: bold;
}
input {
display: block;
margin-bottom: 25px;
height: 6vh;
width: 100%;
}
button {
padding: 10px 30px;
text-transform: uppercase;
cursor: pointer;
}With that, we have our registration app to utilize our
POST method.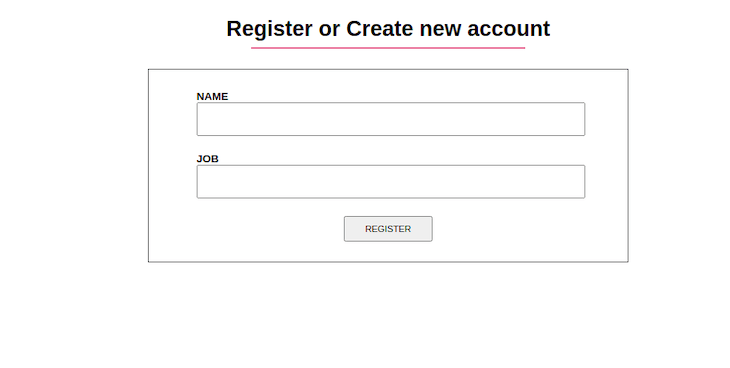
As previously stated, one of the advantages of using Axios over the native Fetch API is that it allows us to handle error responses better.
With Axios, it catches errors in the
.catch() block and allows us to check for certain conditions to see why the error occurs so we can know how to handle them. Let’s see how we can do that below using the first example:const App = () => {
const [data, setData] = useState({
email: "",
password: ""
});
const handleChange = (e) => {
const value = e.target.value;
setData({
...data,
[e.target.name]: value
});
};
const handleSubmit = (e) => {
e.preventDefault();
const userData = {
email: data.email,
password: data.password
};
axios
.post("https://reqres.in/api/login", userData)
.then((response) => {
console.log(response);
})
.catch((error) => {
if (error.response) {
console.log(error.response);
console.log("server responded");
} else if (error.request) {
console.log("network error");
} else {
console.log(error);
}
});
};
return (
<div>
<h1>Login Account</h1>
<form onSubmit={handleSubmit}>
<label htmlFor="email">
Email
<input
type="email"
name="email"
value={data.email}
onChange={handleChange}
/>
</label>
<label htmlFor="password">
Password
<input
type="password"
name="password"
value={data.password}
onChange={handleChange}
/>
</label>
<button type="submit">Login</button>
</form>
</div>
);
};In the first error condition, we check if there is a response, that is if our request was sent and the server responded.
The errors we can get here range from a
400 error telling us the user does not exist or there are missing credentials, a 404 error telling us the page was not found, to a 501 error telling us the page is unavailable, and so on.In the second error condition, we check to see if the request was made but no response was received from the server. A network error or offline internet network is usually the reason for this error.
And finally, if the error received does not fall under these two categories, then the last error block catches it and tells us what happened. We can also use
error.toJSON() to make our error response more readable.This section is a bonus section that covers how to perform multiple
GET requests concurrently using Axios with error handling. Since Axios returns a promise, we can perform multiple GET requests using Promise.all():const getFirstUsers = axios.get("https://reqres.in/api/unknown");
const getSecondUsers = axios.get("https://reqres.in/api/users?page=2");
Promise.all([getFirstUsers, getSecondUsers]).then((response) => {
const firstResponse = response[0];
const secondResponse = response[1];
});However, Axios has a built-in function called
.all() that works just as Promise.all():const firstRequest = axios.get("https://reqres.in/api/unknown");
const secondRequest = axios.get("https://reqres.in/api/users?page=2");
const thirdRequest = axios.get("https://reqres.in/api/users/2");
axios.all([firstRequest, secondRequest, thirdRequest]).then(
axios.spread((...res) => {
const firstRes = res[0];
const secondRes = res[1];
const thirdRes = res[2];
console.log(firstRes, secondRes, thirdRes);
})
)
.catch((error) => {
if (error.response) {
// the request was made and the server responded with a status code
console.log(error.response);
console.log(error.response.status);
} else if (error.request) {
// the request was made but no response was received
console.log("network error");
} else {
// something happened when setting up the request
console.log(error);
}
});You can perform the
GET request on any number of APIs of your choice by wrapping it all inside Axios.all() just like in Promise.all(). It then calls them as an array and returns a promise. Axios also allows you to spread the response.The above code, however, looks a bit long and unreadable, so let’s rewrite it using
Promise.all() and make it more readable:let API = [
"https://reqres.in/api/unknown",
"https://reqres.in/api/users?page=2",
"https://reqres.in/api/users/2"
];
Promise.all(
API.map((api) => {
return axios.get(api).then((res) => {
console.log(res);
});
})
).catch((error) => {
if (error.response) {
// the request was made and the server responded with a status code
console.log(error.response);
console.log(error.response.status);
} else if (error.request) {
// the request was made but no response was received
console.log("network error");
} else {
// something happened when setting up the request
console.log(error.toJSON());
}
});Now, it looks shorter and more readable. What we did here is simple: we added all the endpoints we tried to call in an array called
API. We then mapped through the API array and performed the GET request on each of them.All responses are now resolved under
Promise.all, which means that Promise.all() waits for all input promises to resolve before returning a promise.We have now seen what makes Axios better than the native Fetch API by performing Axios
POST requests in vanilla JavaScript and React. We also looked at how Axios allows us to handle our errors better and perform multiple requests using Axios.all and Promise.all.However, note that
Axios.all as it still works today has been deprecated and it’s advised to use Promise.all instead. This includes by extension the Axios.spread.Hopefully, you understood all we did in this article and can now perform
POST and concurrent GET requests comfortably. Gracias!Debugging React applications can be difficult, especially when users experience issues that are hard to reproduce. If you’re interested in monitoring and tracking Redux state, automatically surfacing JavaScript errors, and tracking slow network requests and component load time, try LogRocket.
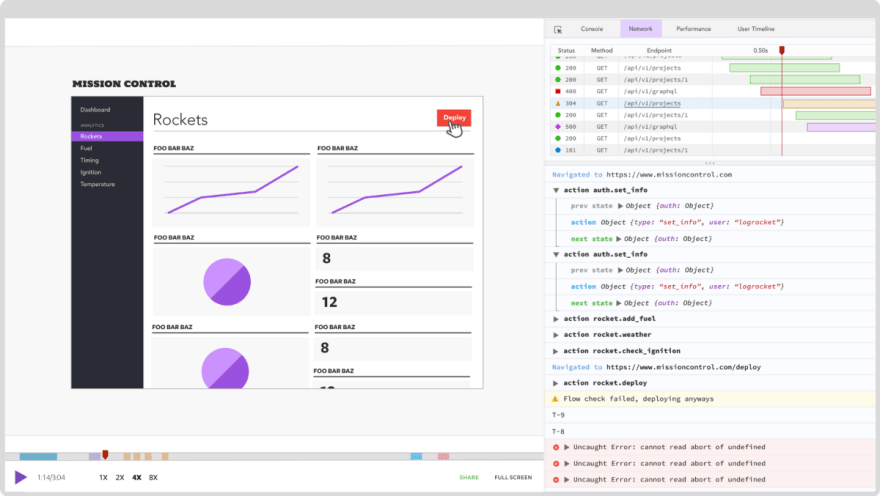
The LogRocket Redux middleware package adds an extra layer of visibility into your user sessions. LogRocket logs all actions and state from your Redux stores.
Modernize how you debug your React apps — start monitoring for free
29