
63
Starting a Prisma + TypeScript Project
In this article and throughout the rest of this series we'll be taking a deep dive into another option; One that offers tons of cool features, a unique "ORM" experience, and an active, dedicated team of developers supporting and working on it. That option is Prisma.
At the most basic level, Prisma provides a set of tools that enable you to access and interact with your database. While offering many of the same features a traditional ORM would, Prisma describes itself as a next-gen ORM because of its unique implementation of what is known as the "data-mapper" model of ORM and its careful consideration of Type-Safe interactions.
Along with offering a great ORM tool (the Prisma Client), Prisma also offers a database migration tool called
Prisma Migrate and a nice GUI that allows you to visualize and update data in your connected database called Prisma Studio. Our focus in this article and the rest of the series will be on the Prisma Client and its rich feature-set.As we learn more about how Prisma works in this series, we will get to play with a lot of the features that make Prisma so powerful and different from the other tools available.
If you'd like to learn more about the different types of ORMs and where Prisma fits in and differs from those, please give this page a read.
As much as I'd love to start going through all the benefits, downsides, use-cases, and don't-use-cases (that's a phrase right?) of Prisma, I'm sure you're anxious to get to the good stuff. Let's dive right into a super simple setup of Prisma so we can get some context into what Prisma is and take a look at the whats and why’s later on.
This tutorial will assume a basic knowledge of JavaScript and its development ecosystem, TypeScript, and Database Terminology. If you want to brush up on these, check out these pages on npm, TypeScript, and SQLite
For the example here we'll connect Prisma to a SQLite database, however Prisma currently also supports Postgres, MySQL, MSSQL, and MongoDB.
To start things off, let's create a folder for our project and initialize
npm inside of it, which we will be using to install various packages. (For all you yarn-lovers 🐈, feel free to use that instead)mkdir <my-project>
cd <my-project>
npm init -yNext, we'll install our development dependencies for TypeScript and Prisma
npm i -d prisma typescript ts-node @types/nodeWith all of our packages installed, we can now configure TypeScript by adding a
tsconfig.json file, a simple TypeScript file, and a script to our package.json that we can run to start our development server.// tsconfig.json
// This is just a basic setup, feel free to tweak as needed
{
"compilerOptions": {
"sourceMap": true,
"outDir": "dist",
"strict": true,
"lib": ["esnext"],
"esModuleInterop": true
}
}// main.ts
console.log("I'm Running!")In
package.json, add the following to the "scripts" section:"dev": "ts-node main",Now, in your terminal at the root of your project run
npm run dev...and you should see output similar to the following:

Our project is set up with TypeScript and ready to get fancy! Now we'll move on to setting up Prisma.
The steps to get Prisma going are pretty simple. We have the dependency installed already, so to start we'll just run Prisma's
init command and tell it we're going to use SQLite as our datasource. For a full list of options available to the init command, check out these docs.prisma init --datasource-provider sqliteYou'll notice a new folder in your project named
prisma as well as a .env file in your project's root. The contents of that folder should just be a file named schema.prisma, which is the file where we will define how the Prisma Client should get generated and model our data.Then you'll need to tell Prisma where to output the SQLite db file. In the
.env file let's make sure the DATASOURCE_URL env variable specifies a file location that makes sense (I'm outputting it directly into the prisma folder):DATABASE_URL="file:dev.db"Prisma allows us to access
.env variables using the env() function in a .schema file. You can see its usage by opening up prisma.schema and checking out the url attribute of the datasource block.There are various different kinds of blocks in a
.schema file that do different things and have tons of different options. We'll just set up a simple User model for the purposes of this tutorial.model User {
id Int @id @default(autoincrement())
firstName String
lastName String
email String
}In a future article we'll dive deeper into the contents of this file and how to model out your data
This defines a User table for Prisma so it will know how to generate a nice, typed client that allows us to interact with the data. Right now our database is empty though, we'll need to push our schema into the database to actually create that table. (This command should also generate the
Prisma Client after pushing the schema)prisma db push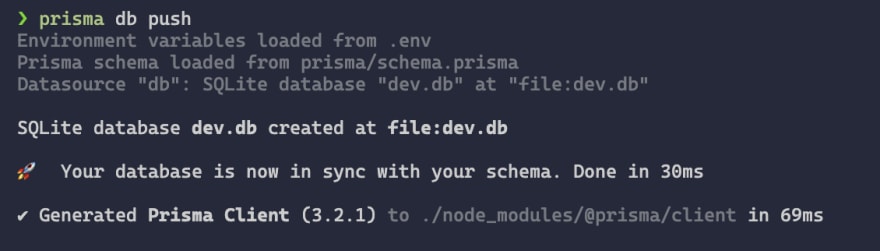
After running that, we can make sure our table was created using
Prisma Studio. Run this command to open up the studioprisma studioThis should open up a window at http://localhost:5555 and look something like this.

If you click on the
User model you should see a nice table view of your database table with options to search and add rows to the table. Pretty sweet! This tool definitely comes in handy working with your data. Now that we've got our data modeled, the model available in the database, our datasources set up, AND the client generated, let's put it to use!
The
Prisma Client is generated by default into your node_modules folder under @prisma/client. To start, go ahead and modify your main.ts. Import and instantiate the Prisma client.import { PrismaClient } from '@prisma/client'
const prisma = new PrismaClient()
async function main() {}
main()
.catch( e => { throw e })
.finally( async () => await prisma.$disconnect() )So what does this do? This imports and creates an instance of the
PrismaClient class that was generated by Prisma based off of the model definitions you gave it. Right now our main() function doesn't do anything, this is where we will add some code to interact with our data. The ending piece is important. Prisma opens up and handles connections automatically, however we need to tell it that when the application closes or reloads it should disconnect. If not, connections would be generated for each time your application starts and stay alive until manually disconnected.
If your application gets an error when you try to run it, it is likely the Prisma Client was not generated on the
db push. Go ahead and run the following command to generate the Prisma Client and try again.prisma generateWe can now start playing with some data! In your
main() function, lets try to print out all of the users in our database.async function main() {
const users = await prisma.user.findMany();
console.log(JSON.stringify(users));
}As you type that out, check out the awesome IntelliSense! Prisma generated a set of types and definitions for the Client to help make our lives easier.
Pretty awesome! Although you may notice after running this the results are empty... that's because we have no data yet! We can fix that, head back over to the
Prisma Studio and add a record to your User table.
Now if you run your code again, you should see your user outputted in the console!

This is just the beginning, Prisma has such a rich set of features and potential for so much more. In the coming series we will be taking a deep look at everything Prisma has to offer, design patterns, custom extensions, and more! So if you enjoyed this and Prisma is piqueing your interest, keep an eye out for the coming articles.
We managed to set up Prisma with TypeScript, a SQLite database, and an entire database client to connect to that database in this article with very little effort. That's pretty awesome to me. If you want to dig deeper and expand on what we talked about, check out the
Prisma Client docs.Thanks for reading, and happy coding!
63