
37
Remix: A guide to the newly open-sourced React framework
Written by Atharva Deosthale ✏️
Nowadays, it seems like there’s a React framework being introduced every day. And while every React framework has something special to offer, Remix stands out. Though it isn’t new, it recently became open source after initially being available on a paid subscription basis.
Remix is a React framework used for server-side rendering (SSR). This means that both the backend and the frontend can be made using a single Remix app. Data is rendered on the server and served to the client side with minimum JavaScript. Unlike vanilla React, where data is fetched on the frontend and then rendered on the screen, Remix fetches data on the backend and serves the HTML directly to the user.
In this article, we will discuss some cool things about Remix, then move on to create an SSR weather app using this new framework. Finally, I’ll share my personal views on Remix and whether I plan to use Remix for my future projects.
Remix, just like other frameworks, has some special built-in features that make it convenient for developers. Here are some of my favorites:
Any page inside a route folder is nested in the route instead of being separate. This means you can embed these components into your parent page, which also means less loading time.
Another advantage of doing this is that we can enforce error boundaries to these embedded pages, which will help with error handling.
Suppose you get an error in a Remix component or a nested route; the errors are limited to the component and the component will fail to render, or it will simply show an error. In other frameworks, it will break the entire page, and you will see a huge error screen.
While error boundaries can be implemented in Next.js as well, Remix has this built in, and I think it's a cool feature for production builds so that the user doesn’t get locked out of the entire page for a simple error.
Remix automatically handles all loading states for you; all you have to do is tell Remix what to show when the app is loading. In other frameworks like Next.js, you need to set the loading state using some state management library like Redux or Recoil. While there are libraries that can help you do the exact same thing in other frameworks, Remix has this built in.
Now we are going back when developers used PHP. We used to specify a form method and action with a valid PHP URL; we use a similar approach in Remix.
I know this doesn’t sound fun because we are used to
onClick, onSubmit, and HTTP calls. But Remix handles this situation in a completely different way by providing functions like action and loader to perform server-side operations. Form data is easily available in these functions. This means there’s absolutely no need to serve JavaScript to the frontend to submit a form.Suppose you have a fairly simple website and you don’t really need to serve JavaScript to the frontend. This traditional form method works the best in these situations. In other frameworks, you might need to serve JavaScript to make a
fetch or an axios call, but you don’t need to do that in Remix. It helps keep things simple.While Remix has plenty of benefits, there are some aspects of using the framework that might give you pause.
Remix is newly open-sourced. Because of this, there aren't many people using Remix in production projects at the moment.
When you get stuck with a problem while using Remix, it might be difficult to find a solution on the internet, and you may need to post questions on forums and wait for a while to get a response.
When I started out with Remix, I found the routing system confusing. I couldn’t understand the nested routes concept. That is because I’m used to other frameworks without this specific routing system, which means Remix has a bit of a learning curve.
At first glance, there doesn’t seem to be much of a difference between Remix and Next.js because both of them support SSR. However, while Next.js supports SSG and other awesome tools, Remix only focuses on SSR.
Now that we have seen some of the cool things Remix has to offer, let’s make a simple weather app using it. Before moving on with the tutorial, let’s look at the requirements:
If you get stuck somewhere in the tutorial, here’s the GitHub repository.
Navigate to a safe directory and use the following command in the terminal to initialize the installation of our Remix app:
npx create-remix@latest weather-appOf course, you can replace
weather-app with whatever project name is suitable to you. Once you hit Enter, you will see an interactive menu that will help you make a Remix app.
Just like the above picture, you will be asked where you want to deploy. We are just experimenting and won’t cover deployment in this tutorial, so we will be using Remix App Server.
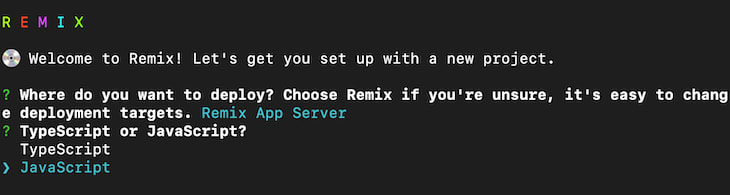
Next, you will be asked whether you want to use JavaScript or TypeScript. I’ll be using JavaScript for the sake of simplicity in this tutorial.
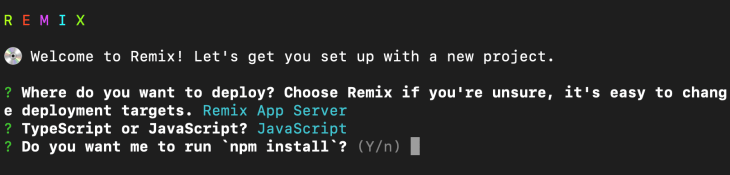
Then you will be asked if Remix should use
npm install. Type y. This will install the required dependencies for Remix to run.Now, navigate into the project directory and use the following commands to install some dependencies you will need for this project:
npm install axios dotenvWe are installing
axios so that we can send HTTP requests from our app to the OpenWeatherMap API. We will be using dotenv for storing our API key in an environment variable.Now let’s edit
package.json so that we can use environment variables in the development mode of Remix. Replace the dev script with the following:"dev": "node -r dotenv/config node_modules/.bin/remix dev"This will enable environment variables for your projects. Now, create a new file
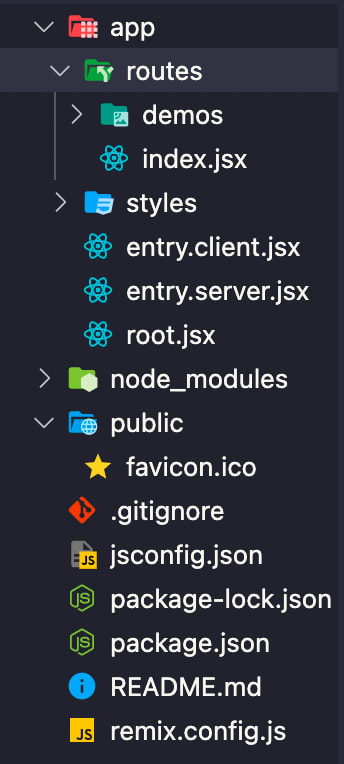
.env for our environment variables and store the API key in the following format:WEATHER_API_KEY={api key here}Now let’s have a look at the Remix folder structure:
The
app folder contains our main app logic. All the folders and files under the routes folder are exposed to the public and can be accessed with a URL. The styles folder contains all the CSS files, which are stored in a similar fashion as routes.entry.client.jsx and entry.server.jsx are managed by Remix, and it’s better not to touch entry files. Instead, create new files and work on them. The root.jsx file contains our general page layout.The
public folder contains our public assets like static images and favicons, and the remix.config.js file contains basic configuration for our Remix app, such as the port it should run on in development mode.When you first set up a Remix app, it’s not blank; Remix has some tutorials and demos built into the app. Let’s first clean them up so we can work on our weather app.
Go to
root.jsx and empty the default Layout component so that it looks like this:function Layout({ children }) {
return <div>{children}</div>;
}Now go to the
styles folder, remove the demos folder, and empty the contents of dark.css and global.css. This will clean up all the styling for us.Delete the
demos folder in the routes directory as well because we don’t need it.Now go to
index.jsx and empty everything. Just make sure it has a default exported component just like this:export default function Index() {
return <div></div>;
}Now let’s create a form in
index.jsx with the following layout:export default function Index() {
return (
<div>
<form action="/weather" method="get">
City: <input type="text" name="city" />
<input type="submit" value="Fetch weather" />
</form>
</div>
);
}Here, we created a form with method
get, and we have a name associated with the input field, which will be appended to the URL when the form gets submitted.Now let’s see how to use route nesting. Create a new file named
weather.jsx in the routes folder; it will handle the /weather route:import { Outlet } from "react-router";
export default function Weather() {
return (
<>
<h1>Weather App</h1>
<Outlet />
</>
);
}The
Outlet component will look for the weather folder inside the routes folder and embed the pages inside the main page. This should give you an idea on how page nesting works in Remix.Now create a new folder in
routes named weather, and create a new file index.jsx inside the weather folder. Let’s make a loader function that will run on the server side whenever the page is requested:export async function loader({ request }) {
try {
const url = new URL(request.url);
const search = new URLSearchParams(url.search);
if (!search.get("city")) return redirect("/");
const city = search.get("city");
const res = await axios.get(
`https://api.openweathermap.org/data/2.5/weather?q=${city}&appid=${process.env.WEATHER_API_KEY}&units=metric`
);
console.log(res.data);
return { city, type: res.data.weather[0].main, temp: res.data.main.temp };
} catch (err) {
console.error(err);
redirect("/");
return {};
}
}Here we are extracting the city name from the URL query, which was sent using a GET request. Then we make a request to the OpenWeatherMap API to get the weather in that city. Remember, we should return the data we need in our frontend so that the data is available to render on the screen.
Now let’s work on the layout of the result screen:
export default function Index() {
  const data = useLoaderData();
  return (
    <div>
      <h1>{data.city}</h1>
      <h2>{data.type}</h2>
      <h3>Temperature: {data.temp} °C</h3>
    </div>
  );
}
The
useLoaderData hook gets the data that was returned using the loader function so that we can render it on the frontend. If you did everything correctly, you should get your weather rendered like this: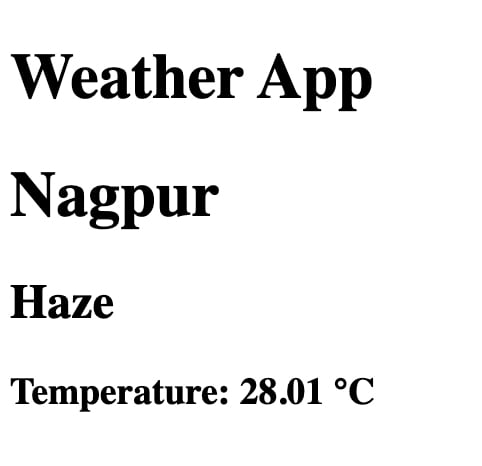
Congrats! You’ve made your first weather app using Remix!
I think the Remix is powerful and should gain further popularity in 2022. Will I use Remix instead of Next.js? Probably not, because Next.js has a huge community to back me up as compared to Remix, which is understandable because it is just newly open-sourced.
This doesn’t mean I didn’t like this framework. I might use this for my personal or fun projects. I want to experiment more with the error boundary features. In my opinion, Next.js would be a great option as of this writing, because when I try to Google some of the problems I faced with Remix, I couldn’t find a solution easily. Maybe in a few years things will change, and Remix will be a more powerful framework with a huge community backing.
Are you excited about trying out Remix now that it’s open source?
Debugging React applications can be difficult, especially when users experience issues that are hard to reproduce. If you’re interested in monitoring and tracking Redux state, automatically surfacing JavaScript errors, and tracking slow network requests and component load time, try LogRocket.
The LogRocket Redux middleware package adds an extra layer of visibility into your user sessions. LogRocket logs all actions and state from your Redux stores.
Modernize how you debug your React apps — start monitoring for free
37