
39
Getting started with React SyntheticEvent
Written by Oyetoke Tobi ✏️
In JavaScript, there is little unification regarding event naming conventions in different browsers, meaning developers are often forced to tailor builds to specific browsers. However, React
SyntheticEvent registers an event’s name in different browsers so you don’t have to. As a unified cross-browser wrapper around the browser's native events, React SyntheticEvent provides a unified API, prevents browser inconsistencies, and ensures that the event works across multiple platforms.In this tutorial, we’ll look into the inner workings of React’s
SyntheticEvent. We’ll cover the fundamentals of plain JavaScript events and React synthetic events, noting their similarities and differences. Afterward, we’ll look at a few examples of React synthetic events in different contexts. Let’s get started!JavaScript events essentially allow a user to interact with a web application and implement operations, like registering click, focus, mouseover, and keypress actions when they are fired inside the browser.
Each JavaScript event has an event handler that works with an event listener. The event listener listens for the particular event that should occur, while the event handler is a function that contains code blocks that will be executed once the event is either registered or fired.
React synthetic events are very similar to native events, however, with synthetic events, the same API interface is implemented across multiple browsers.
Both synthetic events and native events can implement the
preventDefault and stopPropagation methods. However, synthetic events and native events are not exactly the same thing. For example, SyntheticEvent will point to mouseout for onMouseLeave Event.You can always access native events with the
nativeEvent attribute if you need direct access. Other SyntheticEvent attributes include DOMEventTarget, currentTarget, boolean defaultPrevented, and string type, to name a few.At this point, we're fully aware that handling events with React elements is very similar to handling events with the native DOM element. However, significant differences persist.
For one, with React, we have to name events using the camelCase notation. For example, in plain JavaScript, the
click event is defined as onclick(), while in React, we access the same event using onClick()Additionally, when using JSX with React, we have to pass the function as an event handler instead of as a string. Let’s take things a step further by demonstrating how to use
SyntheticEvent in different contexts.Suppose we’re building an application that includes a list of books. We want to add a search functionality that allows the user to filter the list based on the author’s name. Let’s implement this functionality with both event types.
First, define the
input field with JSX, as shown below:// src/App.js/
class App extends Component {
// Some piece of codes...
render() {
return (
<div className="App">
<form>
<input type="text" />
</form>
{ this.state.list.map(item =>
// Some piece of codes
)}
</div>
);
}
}In this event system, a user would type in the
input field, temporarily filtering the list. To filter the list of books and update the state, you’ll need to get access to the value of the input field.With React
SyntheticEvent, we can access the event payload. In the input field, we define an onChange callback function, as shown below:// src/App.js/
class App extends Component {
// Some piece of codes...
render() {
return (
<div className="App">
<form>
<input
type="text"
onChange={this.onSearchChange}
/>
</form>
// Some piece of codes...
</div>
);
}
}Next, we’ll bind and define the method; the function is bound to the component, and it is a class method:
// src/App.js/

class App extends Component {

  constructor(props) {
    super(props);

    this.state = [
      list,
    ];

    this.onSearchChange = this.onSearchChange.bind(this);
    this.onDismiss = this.onDismiss.bind(this);
  }

  onSearchChange(){
    // Some piece of codes
  }

  // Some piece of codes...
}
With the method argument, we now have access to the synthetic React event. The event now has the value of the
input field and the event payload. Essentially, e is a synthetic event, giving us the ability to manipulate the state of searchName, as shown below:// src/App.js/
class App extends Component {
// Some piece of codes
onSearchChange(e){
this.setState({ searchName: e.target.value });
}
// Some piece of codes...
}We need to give
searchName an initial state in the constructor, as shown below:// src/App.js/
class App extends Component {
constructor(props) {
super(props);
this.state = [
list,
searchName: '',
];
this.onSearchChange = this.onSearchChange.bind(this);
this.onDismiss = this.onDismiss.bind(this);
}
// Some piece of codes...
}
Now that we’re familiar with the benefits of React
SyntheticEvent, let’s work on a project that uses synthetic events.Keep in mind that interfacing with different synthetic events is very similar to working with normal JavaScript events. React’s goal is for synthetic events to remain fairly similar to normal native events, for instance, by using the same properties.
Let’s create the React project for this demonstration using the React CLI. If you don’t have the React CLI installed, run the following command in your terminal:
npm install -g create-react-appNow, create the project and give it the name of your choice using the command below:
create-react-app <app-name>The command above creates a template to start building our application. You can see this template by changing into your new directory and starting the development server:
cd <app-name> && npm startIn your browser, head over to
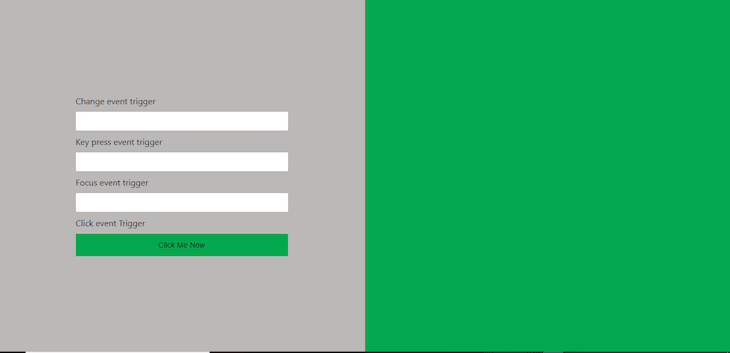
http://localhost:3000. We’ll work in the app.js file, which is automatically created when you run the create-react-app command. Go ahead and delete its content so that the page is blank, then paste the following code block in your empty app.js file:import './style.css';
function App() {
return (
<div className="main">
<div className="main__left">
<div className="form__container">
<form className="form" onSubmit={(e) => e.preventDefault()}>
{/* typing event */}
<label for="input__change">Change event trigger</label>
<input onChange={(e) => alert(` Change event occurred, value is ${e.target.value}`)} className="" name="input__change" className="input__change" type="text"></input>
{/* key typed event */}
<label for="input__keycode">Key press event trigger</label>
<input onKeyPress={(e) => alert(`KeyPress event occurred, key code is ${e.keyCode}`)} className="" className="input__keycode" type="text"></input>
{/* focus event */}
<label for="input__focus">Focus event trigger</label>
<input onFocus={() => alert(`Focus event occurred`)} className="input__focus" id="input__focus" name="input__focus" type="text"></input>
{/* Click event */}
<label for="input__click">Click event Trigger</label>
<button onClick={() => alert(`Click event occurred`)} className="input__click" id="input__click">Click Me Now</button>
</form>
</div>
</div>
<div className="main__right">
</div>
</div>
);
}
export default App;Each input field above works together with the button to track different events, some of which we established earlier. These include an
onSubmit event, a keyPress event, a click event, and lastly, a focus event.onSubmit uses the general preventDefault property to prevent default actions when the form is submitted. The preventDefault property is the same as the one found in native events.In the code block above, we are alerting the user when different events are triggered. For instance, clicking the button above will trigger an
onClick event, which will display the following message to the user:
We also used the
keyCode property for the keyPress event for the stylesheet as follows::root{
--color__primary : #03a84e ;
--color__secondary : rgb(187, 184, 184);
}
.main{
background:red;
display:grid;
grid-template-columns:1fr 1fr;
height:100vh;
}
.main__right{
background:var(--color__primary);
}
.main__left{
background:var(--color__secondary);
width:100%;
display:grid;
place-content:center;
}
form{
width:400px;
}
input{
width:calc(100% - 23px);
padding:10px;
display:block;
margin:auto;
margin:10px 0;
border:None;
outline:none;
}
button{
display:block;
outline:none;
border:none;
background:var(--color__primary);
padding:.8rem;
font-size:.9rem;
margin-top:10px;
width:calc(100% - 3px);
cursor:pointer;
}
@media (max-width: 800px){
.main{
grid-template-columns:1fr;
}
.main__right{
display:none;
}
}Finally, let's add the
Capture suffix to each of our events so that we can quickly capture our event without moving it through the bubbling phase:import './style.css';
function App() {
return (
<div className="main">
<div className="main__left">
<div className="form__container">
<form className="form" onSubmitCapture={(e) => e.preventDefault()}>
{/* typing event */}
<label for="input__change">Change event trigger</label>
<input onChangeCapture={(e) => alert(` Change event occurred, value is ${e.target.value}`)} className="" name="input__change" className="input__change" type="text"></input>
{/* key typed event */}
<label for="input__keycode">Key press event trigger</label>
<input onKeyPressCapture={(e) => alert(`KeyPress event occurred, key code is ${e.keyCode}`)} className="" className="input__keycode" type="text"></input>
{/* focus event */}
<label for="input__focus">Focus event trigger</label>
<input onFocusCapture={() => alert(`Focus event occurred`)} className="input__focus" id="input__focus" name="input__focus" type="text"></input>
{/* Click event */}
<label for="input__click">Click event Trigger</label>
<button onClickCapture={() => alert(`Click event occurred`)} className="input__click" id="input__click">Click Me Now</button>
</form>
</div>
</div>
<div className="main__right">
</div>
</div>
);
}
export default App;Now, our event is captured immediately after a trigger.
SyntheticEvent allows events in React to easily adapt to different browsers, solving an issue that has caused unnecessary frustration for developers.In this tutorial, we took a detailed look at React
SyntheticEvent, comparing it to plain JavaScript events and running through a few examples. Then, we built our own application using both synthetic events and JavaScript events. Now, you should have a better understanding of how to use synthetic events to improve your developer experience. I hope you enjoyed this tutorial!Debugging React applications can be difficult, especially when users experience issues that are hard to reproduce. If you’re interested in monitoring and tracking Redux state, automatically surfacing JavaScript errors, and tracking slow network requests and component load time, try LogRocket.
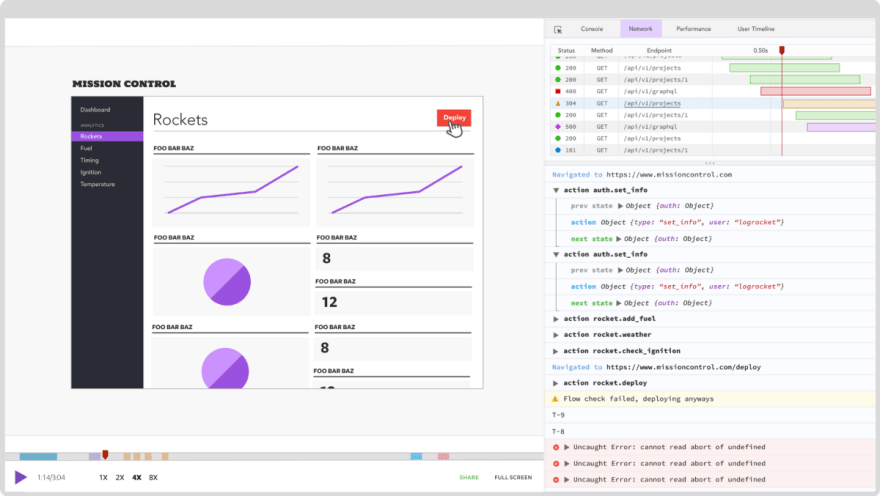
The LogRocket Redux middleware package adds an extra layer of visibility into your user sessions. LogRocket logs all actions and state from your Redux stores.
Modernize how you debug your React apps — start monitoring for free
39