
75
Azure AD Authentication using MSAL and Next.js (React)
Microsoft Authentication Library (MSAL) for Javascript enables client-side web applications to authenticate users using Azure Active Directory (Azure AD), using security tokens acquired from the Microsoft Identity platform. It is particularly helpful if you want to specify which users can sign in to your application, e.g., your organization or school. You can learn more about it here.
To get started, we need to register our application in the Microsoft Identity Platform (Azure AD). We will register a single-page application (SPA) and use the recommended authentication flow, MSAL.js 2.0, which supports the authorization code flow with PKCE. More on this can be found here.
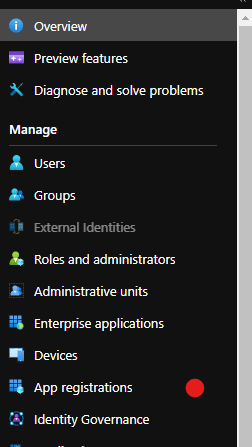
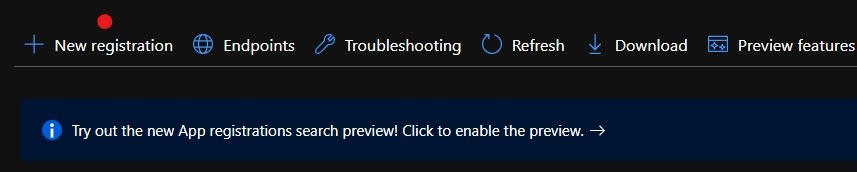
Under Manage in the side menu, find and select App Registration
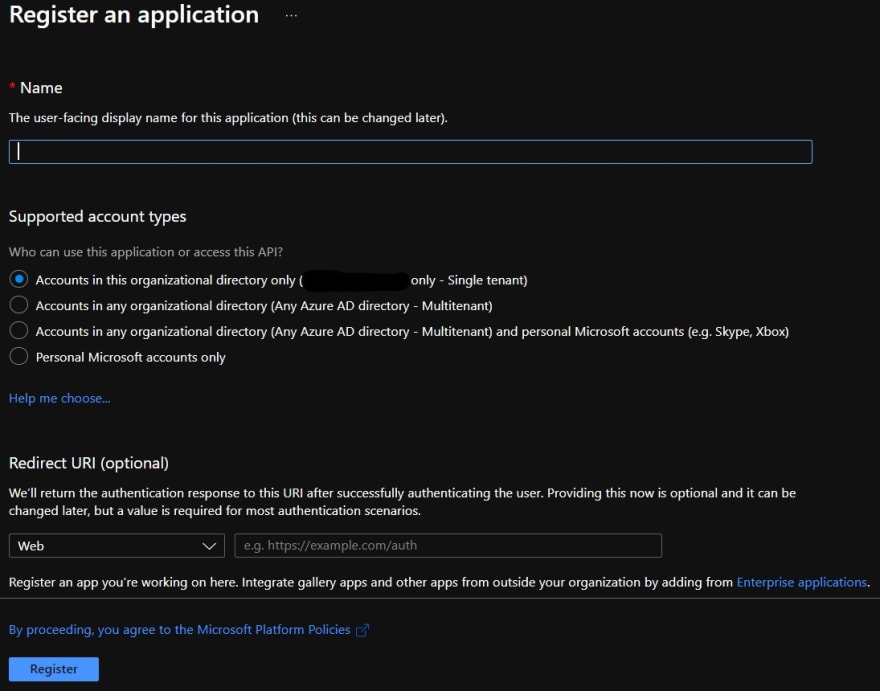
Create a New Registration and fill in the form by entering the name of the app (can be changed later) and selecting the support account types (I used the single-tenant option, the first option in the screenshot below). DO NOT enter a Redirect URI for now.
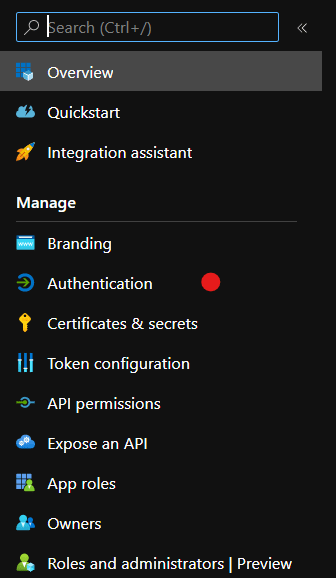
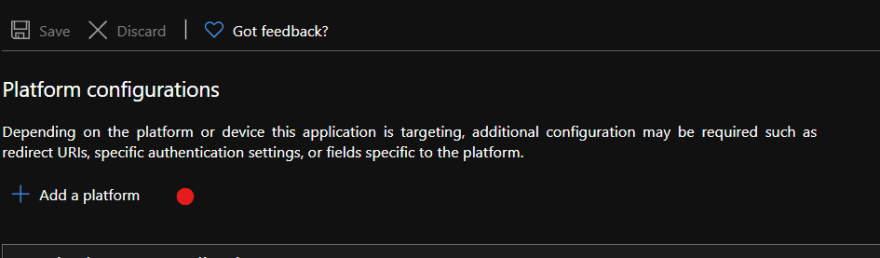
Select the newly created application and then select Authentication > Add Platform under the Manage menu
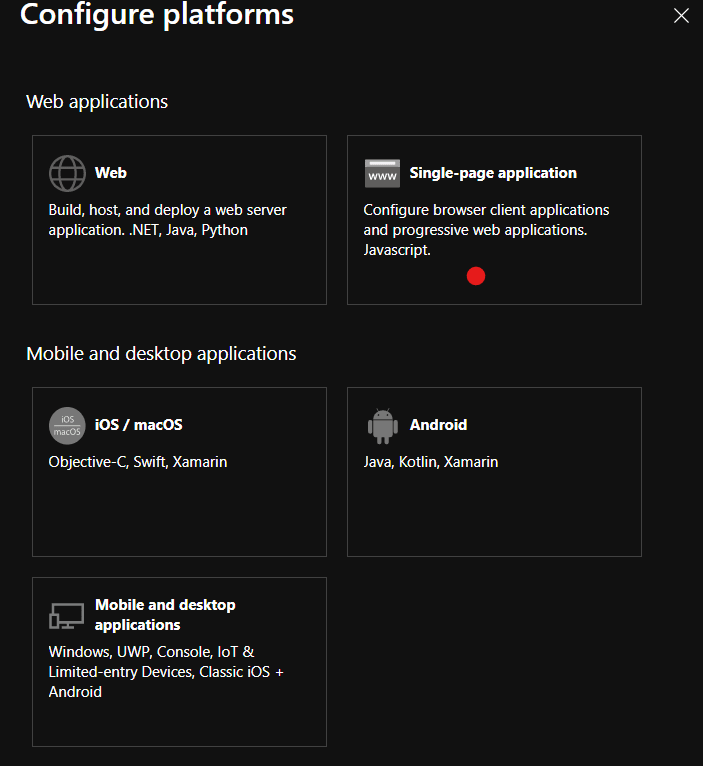
Select the Single-Page Application tile under the Web applications heading
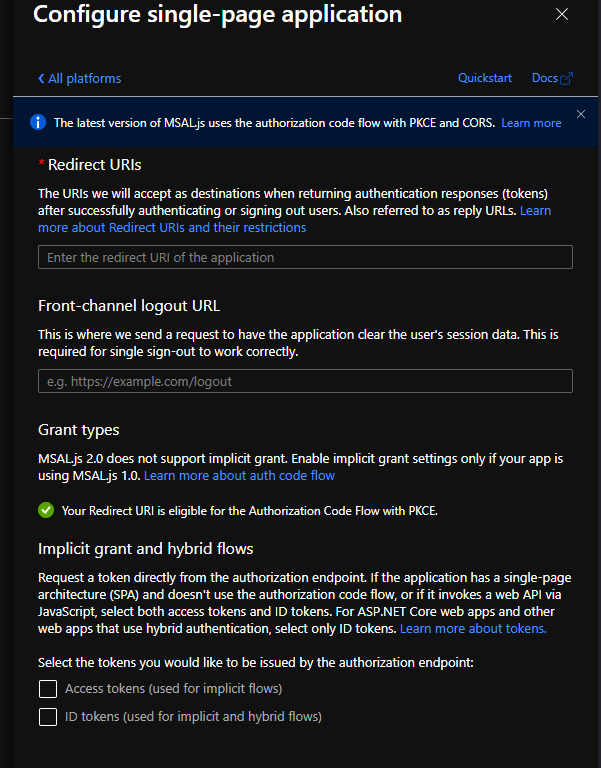
Enter a redirect URI. I'll be using http://localhost:3000/. DO NOT check the boxes under Implicit grant and hybrid flows heading
Click on the Configure button to finish.
Note You can add more than one redirect URI, for instance, for different environments, development, staging, production, etc.
Open your terminal and create a Next.js app
npx create-next-app msal-next-auth --use-npm

cd msal-next-auth
The only dependencies that you will need are the MSAL react and browser libraries.
npm install @azure/msal-react @azure/msal-browserCreate a file
services/msal.js in the root of the project and add the following codeimport * as msal from "@azure/msal-browser";
const msalConfig = {
auth: {
clientId: process.env.NEXT_PUBLIC_AZURE_AD_CLIENT_ID,
authority: `https://login.microsoftonline.com/${process.env.NEXT_PUBLIC_AZURE_AD_TENANT_ID}`,
redirectUri: '/'
}
};
const msalInstance = new msal.PublicClientApplication(msalConfig);
export { msalInstance }You can find your CLIENT ID AND TENANT ID in the Azure portal. Select the app you registered and copy and paste the actual values from the Overview page (under Essentials) into an environment variables file,
.env.local, in the root of the project folder..env.localNEXT_PUBLIC_AZURE_AD_CLIENT_ID='your-client-id'
NEXT_PUBLIC_AZURE_AD_TENANT_ID='your-tenant-id'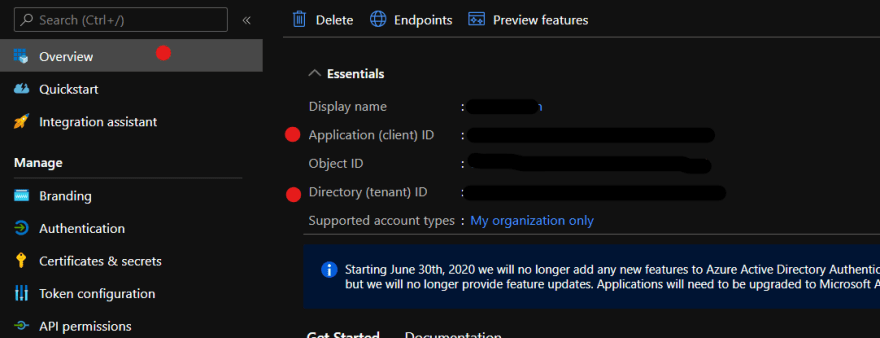
We'll be using React's Context API to provide/share the MSAL service instance to all our components/pages. To do that, make the following changes to
pages/_app.jsimport { MsalProvider } from '@azure/msal-react';
import { msalInstance } from '../services/msal';
import '../styles/globals.css';
function MyApp({ Component, pageProps }) {
return (
<MsalProvider instance={msalInstance}>
<Component {...pageProps} />
</MsalProvider>
);
}
export default MyApp;The MSAL React library allows us to protect our pages and components by wrapping them with the
MsalAuthenticationTemplate component. Paired with UnauthenticatedTemplate, this can be useful when rendering specific content to authenticated or unauthenticated users respectively. Update our home page
pages/index.js, with the following codeimport {
AuthenticatedTemplate,
UnauthenticatedTemplate,
useMsal,
} from '@azure/msal-react';
import Head from 'next/head';
import styles from '../styles/Home.module.css';
function SignInButton() {
// useMsal hook will return the PublicClientApplication instance you provided to MsalProvider
const { instance } = useMsal();
return <button onClick={() => instance.loginRedirect()}>Sign In</button>;
}
function WelcomeUser() {
const { accounts } = useMsal();
const username = accounts[0].username;
return <p>Welcome, {username}</p>;
}
export default function Home() {
return (
<div className={styles.container}>
<Head>
<title>Azure AD Authentication using MSAL and Next.js</title>
</Head>
<AuthenticatedTemplate>
<p>This will only render if a user is signed-in.</p>
<WelcomeUser />
</AuthenticatedTemplate>
<UnauthenticatedTemplate>
<p>This will only render if a user is not signed-in.</p>
<SignInButton />
</UnauthenticatedTemplate>
</div>
);
}If you run the application (
npm run dev), you should see the following in the browser.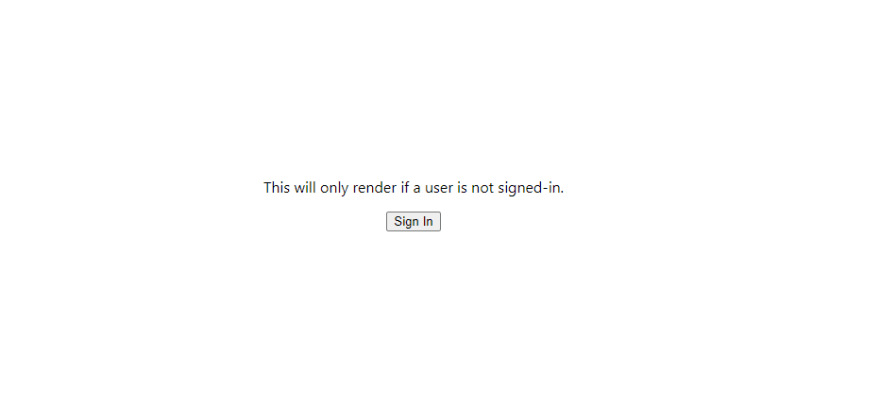
When you click the sign in button, you will be prompted to sign in and accept requested permissions...
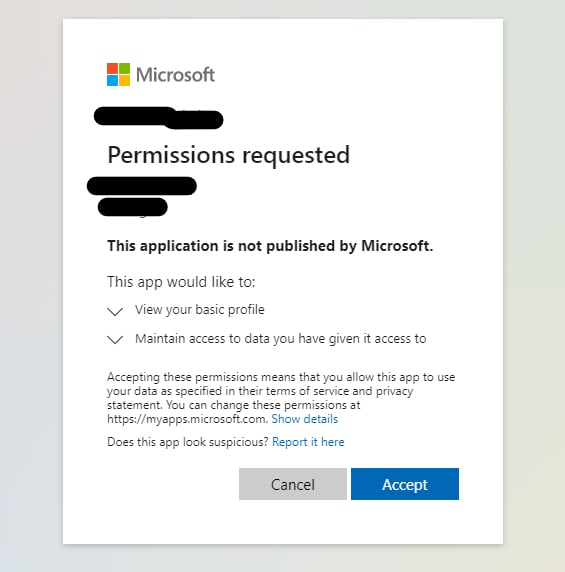
... and then you will be redirected back to the application.
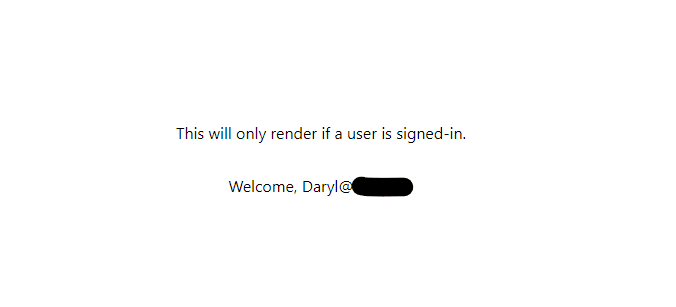
Notice the change in content rendered, when unauthenticated to authenticated. This is determined by the
UnauthenticatedTemplate and AuthenticatedTemplate wrappers.MSAL React also provides an alternative way to determine a user's authentication status using hooks, specifically the
useIsAuthenticated hook. Learn more hereMake the following changes to
pages/index.js...
// Define sign out button
function SignOutButton() {
const { instance } = useMsal();
return <button onClick={() => instance.logoutRedirect()}>Sign Out</button>;
}
...
export default function Home() {
return (
<div className={styles.container}>
<Head>
<title>Azure AD Authentication using MSAL and Next.js</title>
</Head>
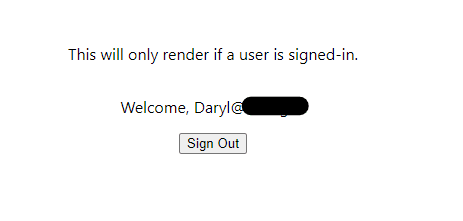
<AuthenticatedTemplate>
<p>This will only render if a user is signed-in.</p>
<WelcomeUser />
<SignOutButton /> // <-- Add to authenticated content
</AuthenticatedTemplate>
...Run the app again, if not already running,
The authenticated render should now look like this...
npm run dev. The authenticated render should now look like this...
Clicking the sign-out button will redirect and prompt you to select the account to sign out from...
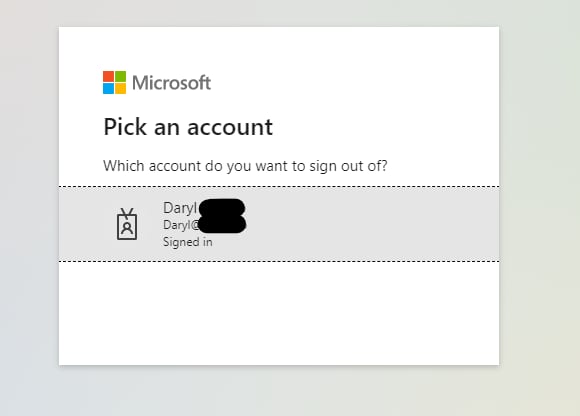
You can read more about Sign in and sign out functionality here.
We have successfully built a simple Next.js app with MSAL authentication. We can now acquire access tokens which can be used to call APIs securely. Let me know if you would like me to write another guide like this one about how you acquire and use tokens in Next.js. Leave a comment below or tweet me
Check out the full source code on Github.
75