
40
Building a User Dashboard with Redwood
There's a dashboard for just about every application you log in to these days. Most of them are built with modern frameworks like React or Angular and they have some kind of back-end to support them. Users depend on these dashboards to check their account info, make updates to their businesses, and handle a number of other actions.
In this tutorial, we'll be making a user dashboard for a management system with Redwood. It'll have a few actions that a user can take to add other users to the account with different roles. The dashboard will also let a user add new items to their inventory and the items will be attached to different locations.
Let's kick it off with a little background on Redwood.
Redwood is a full-stack framework built with Prisma, React, and GraphQL. It comes with a lot of features with a few commands that we'll be using to make this app quickly. If you're interested in learning more about Redwood, make sure to check out their docs.
Now let's jump into getting our dashboard set up. We'll bootstrap this app by running the following command. Just a heads up, it might take a few minutes for it to finish, but it'll be worth the wait.
yarn create redwood-app ./redwood-dashboardWhen the command has finished executing, you'll notice you have quite a few folders and files. The most important folders are the
api directory and the web directory. The api directory holds all of the code for the back-end and database while the web directory holds everything for the front-end.Before we start working on the app, you should run it to see how it works first. Use the following command to start both the front-end and back-end.
yarn rw devHere's what you should see in your browser.

Since you've seen the app in action, let's start taking advantage of some Redwood commands to work on the back-end. We'll start by making a Prisma model for the dashboard. This is how our app will connect to a Postgres database. Inside of the
api > db, open the schema.prisma file.This is where we'll make the schema for the tables we want in our database using a few different kinds of relations. You'll see that Redwood already has a few configs set and an example of a user model.
We'll be changing the
datasource db provider to postgresql which you can see in the code snippet below.datasource db {
provider = "postgresql"
url = env("DATABASE_URL")
}Then we'll remove the
TODO and update the example user model.model User {
id Int @id @default(autoincrement())
email String @unique
name String
role String
}Our updated
User model has a few columns for information we want to store about a user. The email field has a constraint that it always has to be a unique value. The same email address can't be in the database multiple times. Next, we'll add a new model for our Item and Location tables. These need to be created at the same time because they have a relationship with each other.model Item {
id Int @id @default(autoincrement())
sku String @unique
name String
location Location @relation(fields: [locationId], references: [id])
locationId Int
}
model Location {
id Int @id @default(autoincrement())
name String
district Int
Item Item[]
}Then we'll update the
seed.js file so that there are a few values present before we start our app. This is common on product dashboards for populating dropdown options or initializing tags that users can add to different settings. We'll be adding a user, an item, and one location to seed our database. Just a heads up, I've deleted a lot of comments from this file./* eslint-disable no-console */
const { PrismaClient } = require('@prisma/client')
const dotenv = require('dotenv')
dotenv.config()
const db = new PrismaClient()
async function main() {
console.warn('Please define your seed data.')
await db.user.create({
data: { name: 'Kaiya', email: '[email protected]', role: 'inventory' },
})
await db.location.create({
data: { name: 'Compound North', district: 1 },
})
await db.item.create({
data: {
name: 'Morning Glory',
sku: 'hf8029ht8942ht8429pht8p942p',
locationId: 1,
},
})
}
main()
.catch((e) => console.error(e))
.finally(async () => {
await db.$disconnect()
})With the schema and seed data in place, we're almost ready to run our first migration. Before we do that, we need to be connected to the database. So in the
.env file at the root of the project, update the DATABASE_URL to match your Postgres instance. It'll look similar to this.DATABASE_URL=postgres://postgres:admin@localhost:5432/dashboardIf you don't have a local Postgres instance to work with, you can download it here pretty quickly.
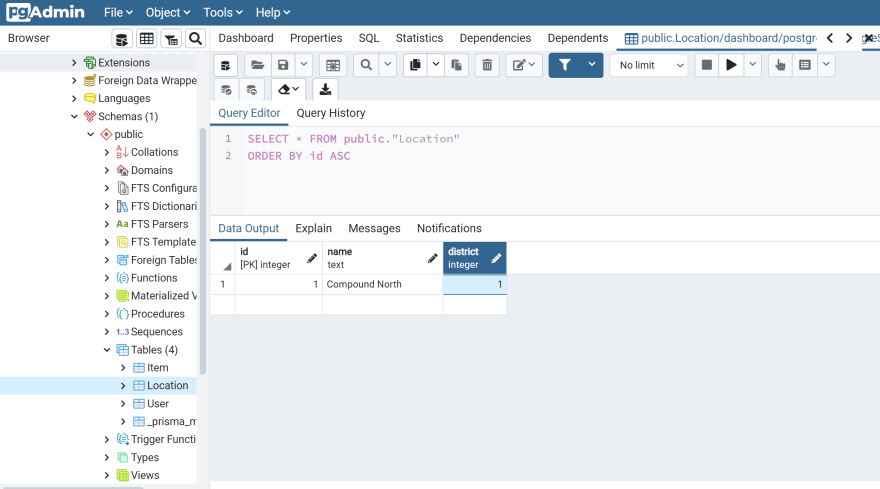
Now we're going to run the migration with:
yarn rw prisma migrate devThis will prompt you for a migration name, create the database and the tables, and add the seed data. If you look at your database through pgAdmin, you'll see something like this.
Now that you have your database ready to store and send the values we need, let's move on to our back-end and front-end.
Redwood has one particular command that does a lot of work for us. It will create the entire CRUD for a table from the front-end components and routes to the back-end GraphQL queries, types, and mutations. We're going to take advantage of that to make most of our dashboard. Let's start with the following command.
yarn rw g scaffold userThis will generate several pages and components and GraphQL files to handle all of the CRUD actions for the user's portion of the dashboard. Take a look in
web > pages. You should see a new directory called User. This has all of the pages we need to handle everything about users.Now take a look in
web > components. There will be another User folder. This one contains the components we use to interact with the GraphQL server. Most of the data is fetched in these components and requests are sent from these components.The
web > layouts folder will also have a new directory containing a layout file for your User pages. This is how you can create styles for a specific set of pages.In the
Routes.js file, you'll see there is a new set of routes for users wrapped in the UserLayout. All of the pages generate also have their routes automatically added to this file inside of their parent layout.There were also some new files generated in the
api directory. If you look inside api > src > graphql, you'll find the GraphQL schema for all the CRUD operations you need and the types have been defined by the model in the schema.prisma file.Then inside
api > src > services, you'll find all of the GraphQL resolvers for the queries and mutations defined in the schema.All of these pages, components, types, and resolvers were generated by that one Redwood command. Let's run the app with
yarn rw dev so you can see all of this working. If you go to the users page in the browser, you should see something similar to this.The home page will return a 404 right now because we haven't added a component for that route. We'll do that a bit later, but the
/users page will still work.
You can add a new user, update the current user, or delete the current user with the buttons on the page.
We're going to run that
scaffold command two more times to generate the CRUD for the items and locations.yarn rw g scaffold location
yarn rw g scaffold itemNow we have all of the actions we need for our user dashboard. There are a couple of things we need to do to give this dashboard a more realistic feel. We'll add a home page and a layout to help us navigate between parts of the dashboard.
Let's start by adding the
styled-components package because we're going to use it to style a few things. First, go to the web directory in your terminal. That's where this package will need to be installed.yarn add styled-componentsNow let's run one of those magic Redwood commands to generate the home page and its routing.
yarn rw g page home /This will create a new directory in
web > src > pages for the HomePage component and it'll add a new route to Routes.js. You can re-run your app here to see the new home page. It'll look like this in the browser.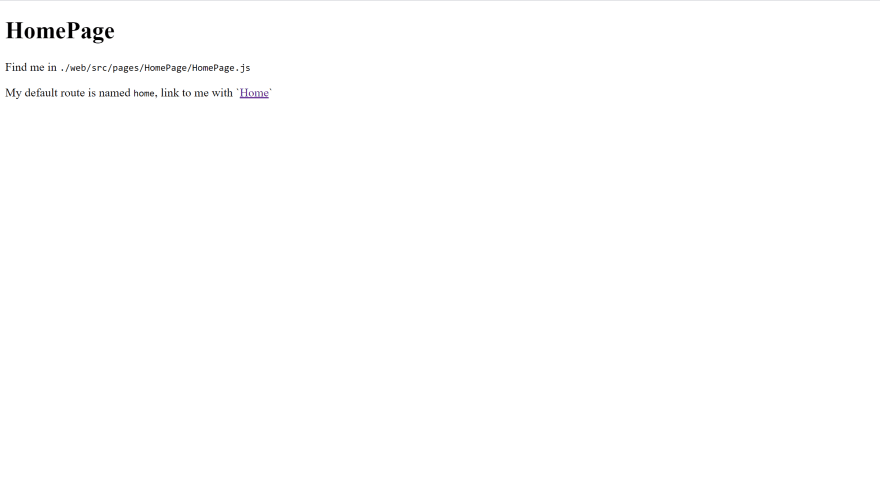
Now that we have a home page in place, let's make a layout that will apply to this and all the other pages we have so far. Of course, there's a Redwood command to handle that.
yarn rw g layout homeThis will create a new folder in
web > src > layouts for our home page. We're going to use a few styled components in the HomeLayout component to create a side navigation menu and give the dashboard a little definition. We'll also be using Redwood routing to add links to the other pages in the side navigation.import { Link, routes } from '@redwoodjs/router'
import styled from 'styled-components'
const HomeLayout = ({ children }) => {
return (
<FlexBox>
<SideNav>
<LinkContainer>
<Link to={routes.users()}>Users</Link>
</LinkContainer>
<LinkContainer>
<Link to={routes.locations()}>Locations</Link>
</LinkContainer>
<LinkContainer>
<Link to={routes.items()}>Items</Link>
</LinkContainer>
</SideNav>
<FullPage>{children}</FullPage>
</FlexBox>
)
}
const FlexBox = styled.div`
display: flex;
`
const FullPage = styled.div`
height: 100vh;
width: 100%;
`
const LinkContainer = styled.div`
padding: 12px;
> * {
color: #000;
font-family: sans-serif;
font-size: 18px;
text-decoration: none;
}
> *:hover {
color: #5b5b5b;
}
`
const SideNav = styled.nav`
border-right: 1px solid;
width: 250px;
`
export default HomeLayoutNext, we need to apply this layout to all of the pages in our app. We'll do that in the
Routes.js file. This means adding a <Set> component around all of the existing routes like below....
<Router>
<Set wrap={HomeLayout}>
<Route path="/" page={HomePage} name="home" />
<Set wrap={ItemsLayout}>
<Route path="/items/new" page={ItemNewItemPage} name="newItem" />
<Route path="/items/{id:Int}/edit" page={ItemEditItemPage} name="editItem" />
<Route path="/items/{id:Int}" page={ItemItemPage} name="item" />
<Route path="/items" page={ItemItemsPage} name="items" />
</Set>
<Set wrap={LocationsLayout}>
<Route path="/locations/new" page={LocationNewLocationPage} name="newLocation" />
<Route path="/locations/{id:Int}/edit" page={LocationEditLocationPage} name="editLocation" />
<Route path="/locations/{id:Int}" page={LocationLocationPage} name="location" />
<Route path="/locations" page={LocationLocationsPage} name="locations" />
</Set>
<Set wrap={UsersLayout}>
<Route path="/users/new" page={UserNewUserPage} name="newUser" />
<Route path="/users/{id:Int}/edit" page={UserEditUserPage} name="editUser" />
<Route path="/users/{id:Int}" page={UserUserPage} name="user" />
<Route path="/users" page={UserUsersPage} name="users" />
</Set>
<Route notfound page={NotFoundPage} />
</Set>
</Router>
...Now if you run
yarn rw dev, you'll see something like this.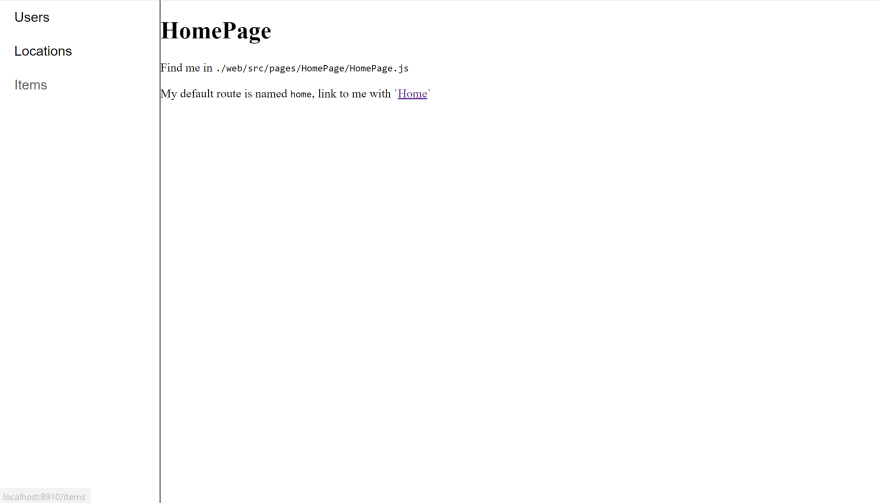
If you go any of the links in the side navigation, you'll see something like this.

I'll leave the extra styling to you. Styling this could be a completely separate tutorial!
This might feel like a cliffhanger since we didn't actually write much code, but that's what I like about Redwood. You can get big apps up and running quickly and things just work.
You can check out the front-end without the connection to the back-end here on this Code Sandbox.
If you want all of the code for the front-end and back-end, check out the
redwood-user-dashboard in this Git repo!Dashboards are a major part of many apps so it's helpful to know how to create one quickly. Redwood is a framework that will help you get started with advanced projects like these and it makes it fast to generate complex structures.
40