
47
VueJS App with HarperDB
Making sure users can access and update their information is an important part of any app. You can do this with API calls, third party services, and even directly with database queries.
HarperDB gives you a way to interact with your database with a client-side app. The HTTP API lets you submit database queries in JSON format, which makes it easier for you to dynamically generate your queries.
We'll be using HarperDB with Vue to create a simple dashboard a user could login to and interact with.
First, we'll need to set up a HarperDB instance. Head over to the site and sign up for a free HarperDB Cloud Instance. Once you're signed up and logged in, we're going to create a new instance in our dashboard by clicking the button below.
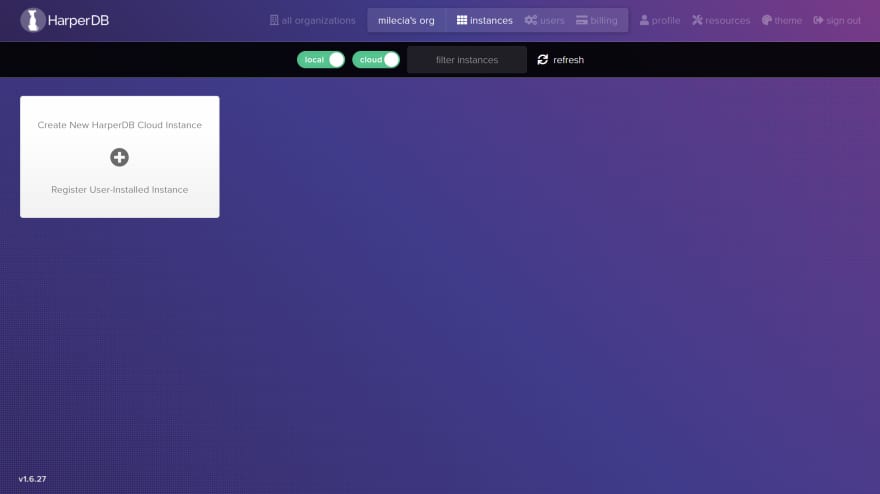
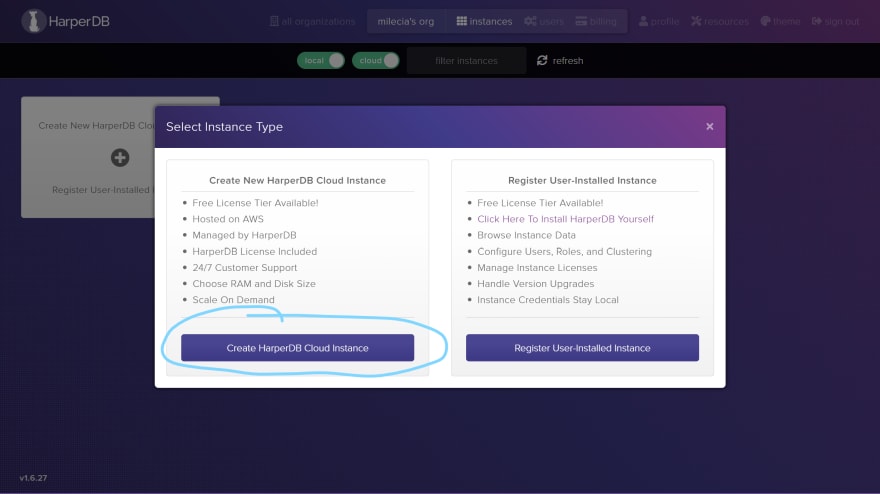
Then we'll create a HarperDB cloud instance. Remember, this is completely free to use!
You can update the name of your cloud instance and set the user name and password needed to authenticate access in the following screen.

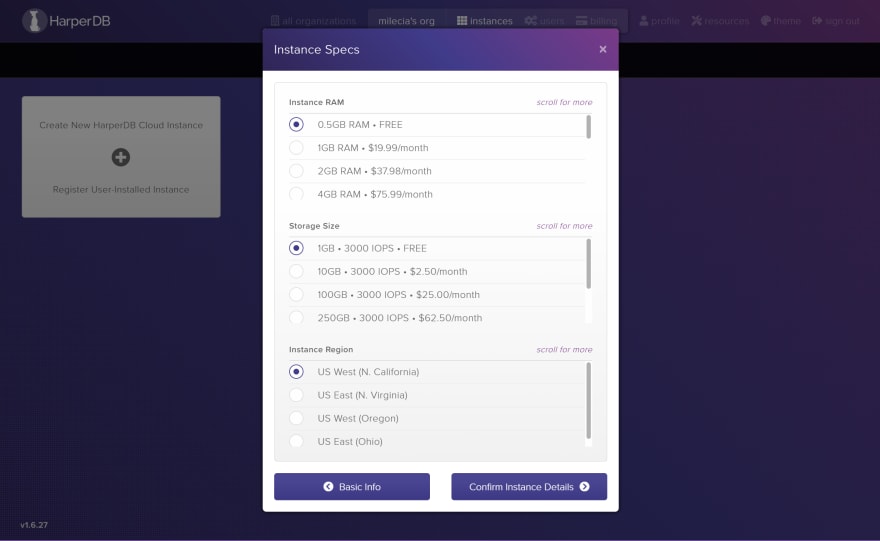
Next, you'll need to select the specs for the instance you want to create. The default selections are the free tier.
Lastly, you get to review all of the details you entered before creating this new instance.
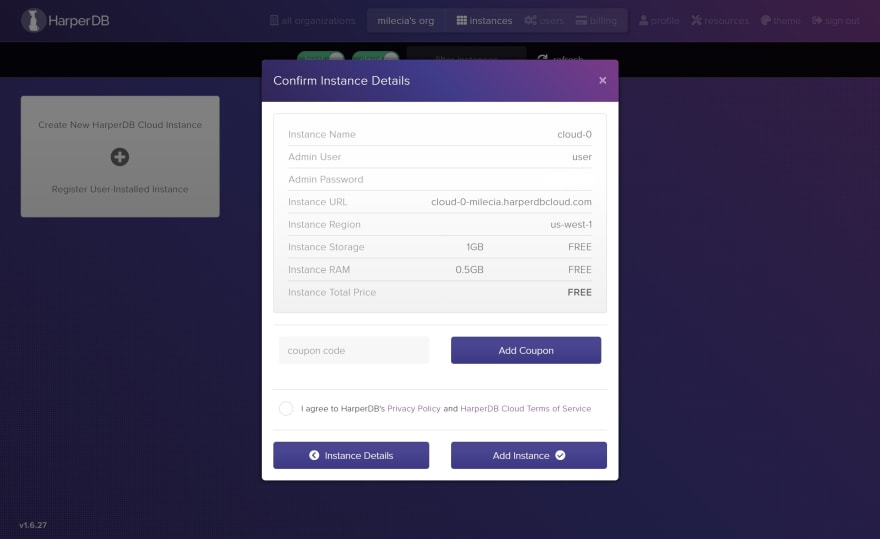
Once you've confirmed all of your choices, your instance will be created. It'll take a few minutes for the instance to get up and running, but when it does you should see something similar to this.

Now that we have a running cloud instance, let's add a schema to our database. We'll call it
staging.
Then we'll add a new
users table. It'll be an empty table with a few columns.
The
hash_attribute is the primary key for the table. It's the unique identifier for each row so it should be named something simple to work with. That's why I called it id here. With this new table in place, we can start working on our Vue app.We're not going to do anything super fancy for the UI (user interface) here. We're making a table and adding a button to the page. This is to mimic the functionality of a more complex dashboard that users can access to change who has the ability to interact with their account, but we'll just be adding new users.
You can clone the project from this GitHub repo in the
vue-harperdb directory or you can make a new Vue app yourself. Vue is a front-end framework that allows developers to build SPAs quickly. To start working with Vue, you'll need to install the Vue CLI tools. Once the CLI tools are installed, we can start building our Vue app by running the following command in a terminal:vue create user-dashboardChoose the default Vue 3 option when you're prompted in the terminal. Then go to the user-dashboard directory in your terminal.
With our app set up, we can start deleting some of the files that are created with the CLI command. So feel free to delete the
HelloWorld.vue component and remove the references to it in App.vue. Your App.vue file should look like this.<template>
</template>
<script>
export default {
name: 'App',
components: {
}
}
</script>
<style>
#app {
font-family: Avenir, Helvetica, Arial, sans-serif;
-webkit-font-smoothing: antialiased;
-moz-osx-font-smoothing: grayscale;
text-align: center;
color: #2c3e50;
margin-top: 60px;
}
</style>Now that we have a clean starting point, let's add a new
Users.vue file to the components directory. This is where we'll display the table, a button to add new users, and handle our connection to HarperDB.Inside of
Users.vue, we need to add the template for the elements users will see on the page. Keep in mind that we're applying very little styling, so this will look a little rough in the browser.<template>
<div>
<div class="flex">
<h2>Users</h2>
<button v-on:click="showForm = true">Add new user</button>
</div>
<table class="table">
<thead>
<tr>
<th>Id</th>
<th>Name</th>
<th>Email</th>
<th>City</th>
</tr>
</thead>
<tbody>
<tr v-for="user in users" v-bind:key="user.id">
<th scope="row">{{ user.id }}</th>
<td>{{ user.name }}</td>
<td>{{ user.email }}</td>
<td>{{ user.city }}</td>
</tr>
</tbody>
</table>
</div>
</template>This table already has a few things in place to make it easy to integrate our data. There's the
v-for looping through our users so that we can dynamically generate this table. The v-bind:key is also present because it's used with every instance of v-for so that Vue can track the dependencies of the individual values so it knows which elements to update.We're adding a
v-on:click="showForm = true" to the button so that we show a hidden form we'll make a little later.Next, we'll add the
script to generate some placeholder data in the Users.vue file until we connect to HarperDB.<script>
import axios from "axios";
export default {
name: "Users",
data() {
return {
users: null,
showForm: false
};
},
mounted() {
axios.get("https://jsonplaceholder.typicode.com/users")
.then((res) => {
this.users = res.data;
});
},
};
</script>We have our
data object that allows us to access the users in our template. Then we have a function to fetch the data from this placeholder API using axios.You will need to run
npm i axios in your terminal so that the package is available in your app.Before we try to run this app, we need to update
App.vue to use the Users.vue component. So make the following updates to the App.vue file.<template>
<div id="app">
<users />
</div>
</template>
<script>
import Users from "./components/Users.vue";
export default {
name: 'app',
components: {
Users,
},
};
</script>
<style>
#app {
font-family: Avenir, Helvetica, Arial, sans-serif;
-webkit-font-smoothing: antialiased;
-moz-osx-font-smoothing: grayscale;
text-align: center;
color: #2c3e50;
margin-top: 60px;
}
</style>Now we're importing our
Users component and rendering it when the app starts up. To see what the app looks like so far, run npm run serve in your terminal. You should see something like this in your browser.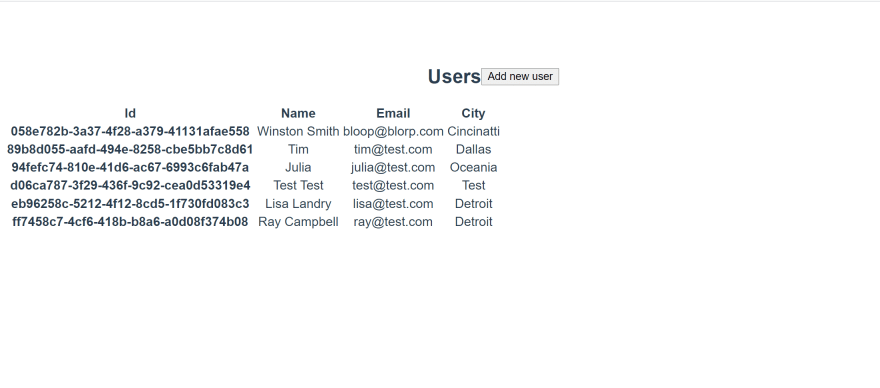
With our basic app in place, we can go ahead and integrate with HarperDB.
The first thing we need to do is replace the placeholder API call with a call to the HarperDB instance we created earlier.
Getting data is where you'll see how HarperDB handles database queries. You can submit database queries as JSON objects which means you don't have to have deep knowledge of SQL or NoSQL syntax.
Let's start by adding a basic form at the bottom of the
template in the Users.vue file.<div v-if="showForm">
<form>
<div>
<label>Name</label>
<input type="text" v-model="formData.name" />
</div>
<div>
<label>City</label>
<input type="text" v-model="formData.city" />
</div>
<div>
<label>Email</label>
<input type="text" v-model="formData.email" />
</div>
<button type="submit" v-on:click="addUser(formData)">Submit</button>
</form>
</div>The
v-if='showForm' is how we will conditionally show the new user form. So when the button is clicked, the showForm state is updated which shows our form.We'll also update the
data function inside of the Users script. to hold a few more values and replace the placeholder API call with a call to our HarperDB instance.export default {
name: "Users",
data() {
return {
users: null,
errored: null,
loading: null,
showForm: false,
formData: {
name: "",
email: "",
city: "",
},
};
},
...Next you'll need to create a
.env file in the root directory of your project to hold your HarperDB authorization key and instance URL. You can get your HarperDB token from HarperDB Studio in the config settings of your instance.We use
.env files to keep our account secrets from being hard-coded on the front-end. These values are usually stored as environment variables in your CI/CD pipeline.We'll call our authorization key
VUE_APP_HARPERDB_TOKEN and the instance URL VUE_APP_HARPERDB_INSTANCE. Here's what the .env file will look like.
Next, we'll need to add the
methods object to our Users component. This will go inside of the script after the data function. The methods object holds the methods we want to call inside of the template.We're adding the
addUser method to make the call to add a user in HarperDB. You'll need to change the URL in the POST request to your cloud instance.methods: {
addUser: function(data) {
axios
.post(
process.env.VUE_APP_HARPERDB_INSTANCE,
JSON.stringify({
operation: "insert",
schema: "staging",
table: "users",
records: [
{
name: data.name,
city: data.city,
email: data.email,
},
],
}),
{
headers: {
"Content-Type": "application/json",
Authorization: process.env.VUE_APP_HARPERDB_TOKEN,
},
}
)
.then((response) => {
console.log(response);
})
.catch((error) => {
console.log(error);
this.errored = true;
});
},
},In the call to the HarperDB instance, we're executing a NoSQL insert operation using JSON. We're able to use the data directly from the form. Let's add a new user now.

You can check that your data is saved in your HarperDB instance at this point because we haven't added the functionality to show it on the page yet.
Once you see your new user in the database, this will give us some data to load and show on the front-end.
Now we'll add a method to get the data from the database. We'll add this in the
mounted lifecycle hook. The mounted lifecycle hook is only called after the component instance has been mounted. That way the data fetching call is only executed once for the component as soon as its mounted.mounted() {
axios
.post(
process.env.VUE_APP_HARPERDB_INSTANCE,
JSON.stringify({
operation: "sql",
sql: "select * from staging.users",
}),
{
headers: {
"Content-Type": "application/json",
Authorization: process.env.VUE_APP_HARPERDB_TOKEN,
},
}
)
.then((response) => {
this.users = response.data;
})
.catch((error) => {
console.log(error);
this.errored = true;
})
.finally(() => (this.loading = false));
},In the
post request, you can see the data in the call to our HarperDB instance is a SQL statement in JSON format. It's executing a SELECT query on our users table in the staging schema.Now that we're pulling from the database, your table should look similar to this. It'll show the info you entered in the form earlier.

You can check out the full code in this CodeSandbox or from this GitHub repo. Working with HarperDB is different from other databases because you're able to spin up an instance quickly and start executing queries with JSON objects instead of long SQL statements. It gives you enough security to work directly with the database from the front-end through simple API calls and it you don't have to spend a lot of time learning how to use the tool.
It doesn't care if you're working with a Vue, React, Angular or any other front-end framework. It's pretty language agnostic as well. You can use it in Python, JavaScript, Ruby, or anywhere else you make API calls from. All you need is an understanding of simple SQL statements and you can get started.
47