
46
Build a Discord Bot with Discord.js (v13) 🤖
Hello there, this sentence will mark the beginning of my first ever article released to the public. In this, and the following articles I will introduce beginners to the magical world of Discord bots. I will be using the new discord.js v13 library. However, there are certain prerequisites.
“It is important to view knowledge as sort of a semantic tree -- make sure you understand the fundamental principles, i.e. the trunk and big branches, before you get into the leaves/details or there is nothing for them to hang on to.” ~ Elon Musk
In order to make something stick and make sense, you'll want to get the basics down (the trunk and big branches). Having a solid foundation is key to understanding and remembering a complex subject. What is discord.js anyways?
discord.js is a powerful Node.js module that allows you to interact with the Discord API very easily. It takes a much more object-oriented approach than most other JS Discord libraries, making your bot's code significantly tidier and easier to comprehend. (discord.js.org)
Let us zoom in on a part of this paragraph: "...interact with the **Discord API* very easily...*". Discord.js is nothing more and nothing less than an abstract layer between you and the Discord API. It takes care of the nasty stuff, like sending and receiving requests. Like most APIs, there is a rate limit. You should keep this in mind when building Discord bots (or any type of application that interacts with an API).
In the current master branch they interact with Discord API version 8. Information about the API can be found here.
I recommend you to have at least 2 tabs open during this series of articles:
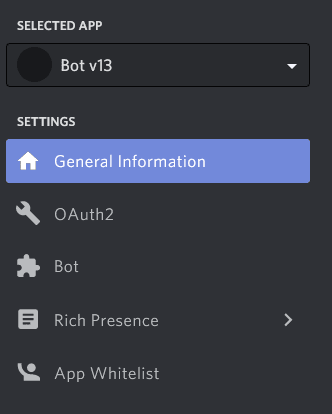
To interact with the API you will need an API key. You can obtain this key by making a new application in the Developer Portal. At the top left there should be a button "New Application", click that. You'll be prompted with a name. You can name the application anything you'd like. Keep in mind that this will also be the name of your bot. This is what you should see now:

However, this isn't actually a Discord bot yet. Go to the Bot tab (At the left on PC. On mobile you'd have to open the navigation bar first by clicking the hamburger menu icon).
Press Add Bot and confirm you want to create a new bot. Congratulations! You've made your first bot! Anyway, what's important now is the token. We will come back and fetch the token soon. But first:
As with any Node project, we will have to prepare a project folder. Create a new folder with a name to your liking. My folder is named "Tutorial".
Open this folder with a terminal to your liking. I will be using the stock command prompt Windows offers. When on Windows, you can open a new CMD window using the shortcut CTRL+R, then typing
cmd and pressing enter. You will want to navigate to your project folder now. This can be done using the cd <path to folder> command.Now we can finally use Node for the first time. Every Node project needs a special file called
package.json. This file holds important information about your project, like the libraries used, its name, etc... The following command makes this file.> npm init -yThe syntax of the above command can be found here.
Now, we have to install discord.js itself. Since we will be using the latest version, we have to install the master branch.
> npm i discord.js@dev --saveThe syntax of the above command can be found here.
--save means we save it in our package.json file. Whenever we run npm i now it will check if discord.js is already installed, if not it will install it.If everything went well, discord.js should now be installed. We can now proceed to make our main file. Usually this file is called
index.js. Let's stick to this convention. Make a new file named index.js. Open this file with your favorite code editor or IDE. Now we can finally get started with:I will give our final code first, and then explain it part by part. You may have noticed that this is the exact code the discord.js docs give!
const { Client, Intents } = require('discord.js');
const client = new Client({ intents: [Intents.FLAGS.GUILDS, Intents.FLAGS.GUILD_MESSAGES] });

client.on('ready', () => {
  console.log(`Logged in as ${client.user.tag}!`);
});

client.on('messageCreate', message => {
  if (message.content === 'ping') {
    message.channel.send('pong');
  }
});

client.login('<place token here>');
Let us now break this chunk of code down in to bite-sized pieces. First we require the parts of the discord.js library we want to use.
const { Client, Intents } = require('discord.js');As you can see in the example code above, we use the Client object and the Intents object. However, this is the same as doing:
const Discord = require('discord.js');
Client = Discord.Client;
Intents = Discord.Intents;
Use which ever floats your boat! I will be sticking to the first one. We will be looking at what each one does now.
const client = new Client({ intents: [Intents.FLAGS.GUILDS, Intents.FLAGS.GUILD_MESSAGES] });Here we define our client, we initialize the Client class.
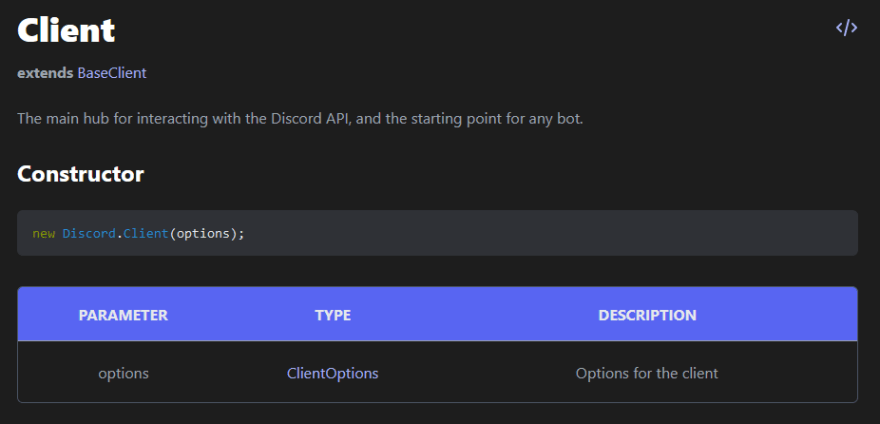
The Client class can take options of type
The Client class can take options of type
ClientOptions. Which are the 'Options for the client'. Note that what I just mentioned is literally described in the docs here! You can specify a lot of options, to view which options you can change, click ClientOptions. There is a lot of other information provided here. Like the properties, methods and events Client has. Take your time to read all of them briefly...When you look at the
ClientOptions here, you can see that one field is required to be set. Namely, the intents. Intents are what you want to access. In our case we want to be able to interact with guilds (servers) and the messages sent in these guilds. Therefore we also require Intents from discord.js. What is Intents, you may (probably not) ask. Why, thank you for asking. It is this. Indeed, I am referring to the docs once more! Everything there is to know is written there afterall. Let us take a look at that piece of code again:const client = new Client({ intents: [Intents.FLAGS.GUILDS, Intents.FLAGS.GUILD_MESSAGES] });We take the
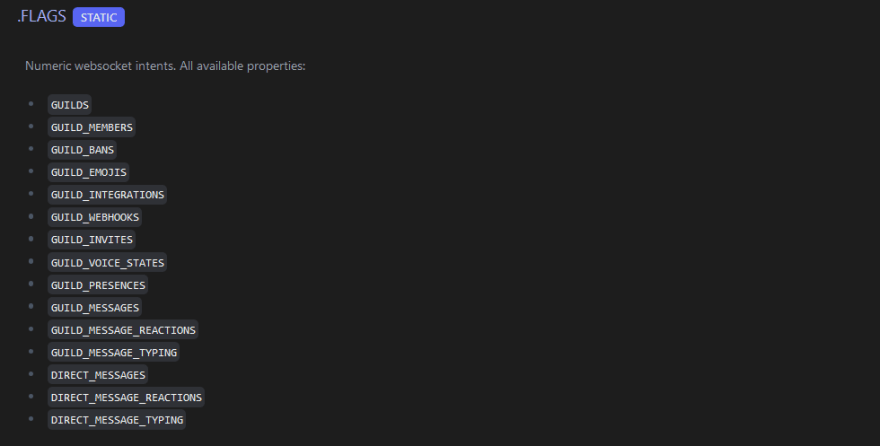
We want to know when our bot is ready to serve us. This can be done using the
FLAGS property of Intents. Which contains all the available intents. We want to know when our bot is ready to serve us. This can be done using the
ready event. This event is 'Emitted when the client becomes ready to start working.'client.on('ready', () => {
console.log(`Logged in as ${client.user.tag}!`);
});We just do a simple console.log to let us know. Nothing special really. How do we make commands, or interact with other users through messages? For this we have to know when a new message is created. If we take a look at the docs we see there are 2 ways to do this. With the
messageCreate event and the message event. Since the latter is deprecated we will be using messageCreate. This event is 'Emitted whenever a message is created'.client.on('messageCreate', message => {
// ...
});Whenever a message is sent in a guild your bot is in, this event will be fired. When this happens we receive a message object, containing a lot of information about said message. You guessed it, this information can be found here.
client.on('messageCreate', message => {
  if (message.content === 'ping') {
    message.channel.send('pong');
  }
});
One of the properties

If someone says "Hello World" in a channel your bot has read access to.
Message has is content. Which, unbelievably, contains the content of the message! If someone says "Hello World" in a channel your bot has read access to.
message.content will also be "Hello World". In the above code, IF the content of the message is (strictly) equal to 'ping', THEN do whatever you want it do to. That whatever we want it to do now is send a message back. We want to send a message in the same channel the sender (or author, as it is named in the docs) sent his message.
message.channel.send('pong');Luckily for us, the
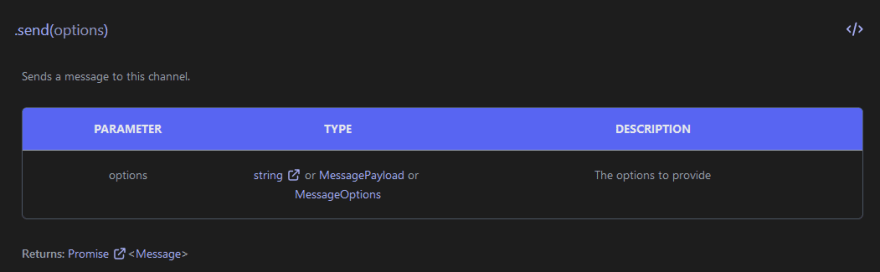
One of the methods is
Message object has a property called channel. This gives us information about exactly that. Assuming you are still at the page about the Message object (here), scroll down until you find the channel property. As you can see it can have several types: TextChannel, DMChannel, NewsChannel, ThreadChannel. We only have to focus on the TextChannel. When you click TextChannel you will, again, see all its properties and methods. One of the methods is
send. Send takes as arguments options. To keep it simple we only give the content of the message we want to send back.Lastly we want to let discord.js know our access code or token.
client.login('<place token here>');Go to your application in the Developer Portal and to the Bot section. There, under the username of your bot, you should see 'TOKEN'. Click Copy and paste it in stead of
<place token here>. DO NEVER SHARE THIS TOKEN WITH ANYONE ELSE Anybody with that token can access your bot. With that done, we can finally move to:Open the console or terminal of your choosing. Make sure you are in your project folder using
cd <path to project folder>. You can now start your bot with:> node .The syntax of above command can be found here.
If everything went right. You should see the message specified in your ready event. Before you can test your bot you'll want to invite it to your server...
Go back to your application in the Developer Portal and instead of Bot, click

Check the
OAuth2. Scroll down to OAuth2 URL Generator. Check the
bot option in the middle. Scroll further down and select permissions you want your bot to have. For now I recommend to just give it Administrator permissions. Copy the URL, paste it in a new browser tab. Accept all, and the bot should now be in the selected server.Go to any channel your bot has access to in Discord. Send
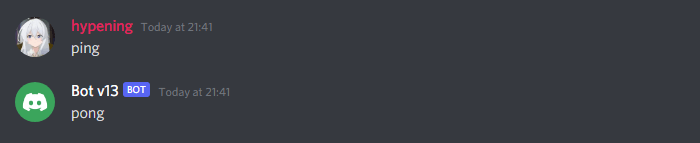
ping in that channel and you should see your bot replying with pong!. Well done, you coded your first Discord bot!You have just made your first ever discord(.js) bot. But more importantly, you've learned how to properly use the documentation. This concludes my first ever article released to the public. I know I am severely lacking, and therefore would like to ask everyone reading to give their honest feedback. Please be as harsh as you feel is needed.
46