
30
How To Make A Custom Video Player in Redwood
Seeing videos on the web is expected at this point. It's one of methods we use to teach ourselves new things or entertain ourselves. With videos being used so commonly, it's important for us to make good user interfaces for them.
When your users are interacting with videos, you want to make sure they can easily control how the video plays and what features they have access to. Most video controls are right there on the video, but it doesn't have to be that way.
In this tutorial, we're going to create custom video player. It'll have multiple options for a user to enter and they'll be saved as user settings. When the page is reloaded, the selected video options will be reloaded as well.
Let's start by talking about what Redwood is. It's a full-stack JavScript framework that uses React, GraphQL, and Prisma to handle everything from the front-end to the database. It has built-in testing and Storybook support, plus a bunch of other great features. You can learn more about it in the Redwood docs.
Now let's create a new Redwood app. You can do that by running:
yarn create redwood-app custom-video-playerOnce that command finishes (it might take a few minutes), you'll have a fully functional full-stack app. The directory it creates has a number of files and subdirectories. The two most important directories are
api and web.The
api folder holds all of the code for the GraphQL back-end and the Prisma model for the Postgres database. The web folder holds all of the React front-end code. We'll be updating the code in these folders throughout this tutorial.You can run the app now to see what it looks like and how it loads with:
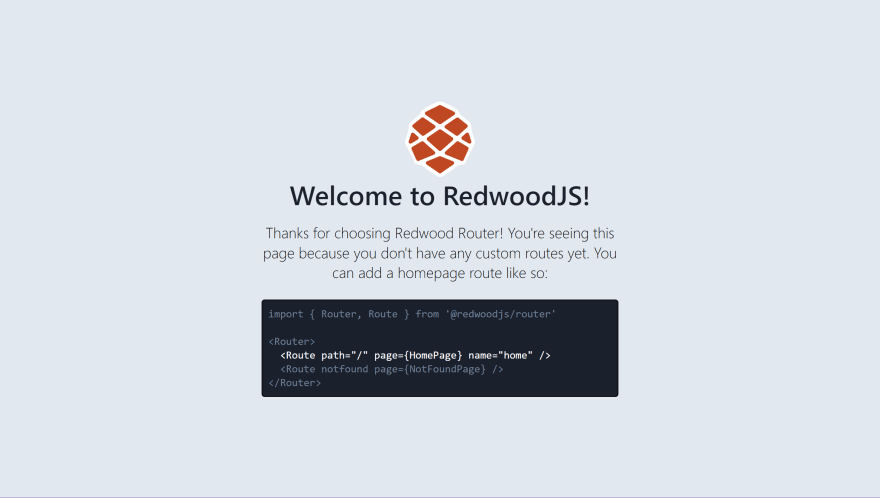
yarn rw devThis command starts the GraphQL server and the front-end. The running app should look like this:
Since we know the app is working, let's update some back-end code.
We want to save a user's preferences for how a video is displayed and how it behaves, like will it run on a loop. To do that, we need to create a Prisma schema for Postgres database we'll connect to. I'll be connecting to a local Postgres instance and you can learn more about how to set that up on the Postgres downloads page.
In the
.env file, uncomment the DATABASE_URL line and update it to match your Postgres instance. Here's an example of what mine looks like. Make sure you remember what your username and password are for your local Postgres server!DATABASE_URL=postgres://postgres:admin@localhost:5432/video_playerNext, we need to update our Prisma schema so open the
schema.prisma file. We're going to create the model for the Setting table we need to hold the user values. Redwood already generated an example model, so we can just swap out the names of everything. Update your file to look like this.datasource db {
provider = "postgresql"
url = env("DATABASE_URL")
}
generator client {
provider = "prisma-client-js"
binaryTargets = "native"
}
model Setting {
id Int @id @default(autoincrement())
videoName String @unique
loop Boolean
volume Float @default(0.5)
controls Boolean @default(false)
playbackRate Float @default(1.5)
}This is how we tell our app to use Postgres as the database and how the tables should be structured. The
Setting model defines the settings we're saving for the user and the data types we expect for them. The last three options have default values so that a video will play whether or not the user picks any particular options.Now we'll add one piece of seed data. When we run our migration, it'll be nice to already have a user setting generated to start with. We aren't creating a new setting each time, we're just updating it. That means we need to have a setting already in place to update.
In the
seed.js file, we're going to add one row of data to the Setting table. Update your file to look like this./* eslint-disable no-console */
const { PrismaClient } = require('@prisma/client')
const dotenv = require('dotenv')
dotenv.config()
const db = new PrismaClient()
async function main() {
console.warn('Please define your seed data.')
const record = await db.setting.create({
data: {
videoName: 'elephant_herd',
loop: false,
controls: true,
volume: 0.2,
playbackRate: 1.5,
},
})
console.log(record)
}
main()
.catch((e) => console.error(e))
.finally(async () => {
await db.$disconnect()
})Now all that's left to do for our database is create and run a migration. To do this, run the following command:
yarn rw prisma migrate devThis creates a new migration and seeds the data. Now when we get ready to connect the front-end, there will already be a setting to update. With the database ready to go, it's time to create our GraphQL server.
Redwood does a lot of things for you pretty quickly.
We're about to run a command that will generate the GraphQL schema and resolvers.
yarn rw g sdl settingIf you take a look in the
api > src > graphql directory, you'll find all of the GraphQL types based on the Prisma schema you need to do some basic operations. Now look in the api > src > services directory. There's a settings folder that has the file for one resolver.Since we're in the
settings.js with the resolver, let's add a couple more resolvers to handle our front-end requests. The first resolver will get an individual setting based on the setting ID. The second resolver will be used to handle updates to the setting.Add the following code after the
settings resolver in the file.export const setting = (input) => {
return db.setting.findFirst({
where: { id: input.id },
})
}
export const updateSetting = ({ input }) => {
console.log(`This is the input: + ${input.volume}`)
return db.setting.update({
where: { id: input.id },
data: {
loop: input.loop,
videoName: input.videoName,
controls: input.controls,
volume: input.volume,
playbackRate: input.playbackRate,
},
})
}Then you'll need to update the
settings.sdl.js file to have the matching schema for these new resolvers.type Mutation {
updateSetting(input: UpdateSettingInput): Setting
}
type Query {
setting(id: Int): Setting!
}You'll also need to add the
id field to the UpdateSettingInput type so that we're able to update based on the setting ID.input UpdateSettingInput {
id: Int
videoName: String
loop: Boolean
volume: Float
controls: Boolean
playbackRate: Float
}With the new resolvers and updated GraphQL schema in place, we can finally move on to the front-end.
This is something else that Redwood handles very well for us. The command we're about to run will create a new page and add the routing for us. We're going to make a new home page that displays at the root URL of the app.
yarn rw g page home /If you take a look in the
web > src > pages directory, you'll see a new HomePage directory. This is where the home page we created with the previous command is located. We're going to make our video player in this file, but if you want to see what the app looks like in the browser now, run:yarn rw devYour page should look similar to this.

Now we'll work on the way our custom video player will look to users. It won't be the fanciest CSS work, but it'll be usable! You'll need to install a couple of packages inside the
web directory. Once you're in the web directory in your terminal, run the following command:yarn add styled-components react-playerWe'll be using
styled-components to add some simple styling to the video player and we're using react-player as the video player component. Let's start by completely updating the Home component.We're going to import some Redwood form components to give users the custom control over their video player. This is how we'll be able to save those settings. The form values will be connected to the video player a little later, but for now we just need the UI in place.
There will be a couple of styled components to space things a little better on the screen. We're also importing the video from Cloudinary and we'll talk about how to set that up in a bit.
Update your
HomePage.js file to have the following code.import {
Form,
Label,
TextField,
CheckboxField,
RangeField,
RadioField,
Submit,
} from '@redwoodjs/forms'
import { useMutation, useQuery } from '@redwoodjs/web'
import styled from 'styled-components'
import ReactPlayer from 'react-player'
const HomePage = () => {
return (
<Container>
<VideoPlayer>
<ReactPlayer
controls={true}
loop={false}
volume={0.5}
playbackRate={1}
url={`https://res.cloudinary.com/milecia/video/upload/c_pad,h_360,w_480,q_70,du_10/elephant_herd.mp4`}
></ReactPlayer>
</VideoPlayer>
<Form>
<FormContainer>
<Label name="videoName">Video Name</Label>
<TextField name="videoName" />
<Label name="loop">Loop</Label>
<CheckboxField name="loop" />
<Label name="controls">Controls</Label>
<CheckboxField name="controls" />
<Label name="volume">Volume</Label>
<RangeField name="volume" />
<Label name="playbackRate">1x</Label>
<RadioField name="playbackRate" value={1} />
<Label name="playbackRate">1.5x</Label>
<RadioField name="playbackRate" value={1.5} />
<Label name="playbackRate">2x</Label>
<RadioField name="playbackRate" value={2} />
<Submit>Save</Submit>
</FormContainer>
</Form>
</Container>
)
}
const Container = styled.div`
width: 100%;
`
const FormContainer = styled.div`
display: flex;
flex-direction: column;
margin: 0 auto;
padding-top: 25px;
width: 500px;
`
const VideoPlayer = styled.div`
display: block;
margin: 0 auto;
width: 50%;
`
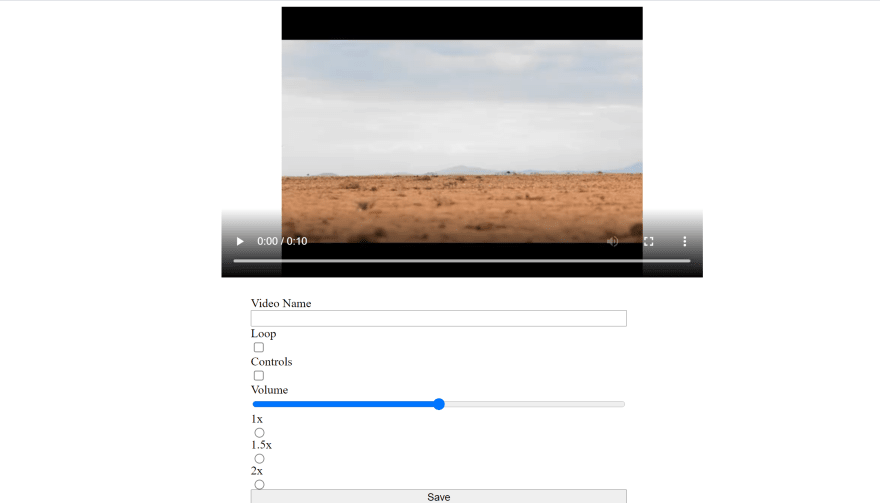
export default HomePageWith this code on your home page, you should see something like this in the browser when you run your app.
Since there's a form, we probably need to connect it to the back-end to store and retrieve data for the custom video player. It's time to add our GraphQL requests on the front-end.
Inside the
HomePage.js file, we're going to add a new import to the others in order to create a query and mutation.import { useMutation, useQuery } from '@redwoodjs/web'Now add the following code inside of the
HomePage component. This will create the methods for updating and retriving the user settings and create the onSubmit method for the form. Since we seeded the database and we're only working with one user, I've hard-coded the setting ID as 1. We even do some state handling for when the data is being fetched in the GraphQL query.const { loading, error, data } = useQuery(SETTING, { variables: { id: 1 } })
const [updateSetting] = useMutation(UPDATE_SETTING)
const onSubmit = (data) => {
updateSetting({
variables: {
id: 1,
videoName: data.videoName,
loop: data.loop,
controls: data.controls,
volume: Number(data.volume),
playbackRate: Number(data.playbackRate),
},
})
}
if (loading) {
return <div>Loading..</div>
}
if (error) {
return <div>{error.message}</div>
}Now we need to add the variables that define the shape of the GraphQL requests we want to execute. We'll use the GraphQL query language syntax to create these requests and define the data we want to send and return. Right after the
HomePage component ends, add the following code.const SETTING = gql`
query Setting($id: Int) {
setting(id: $id) {
id
videoName
loop
controls
volume
playbackRate
}
}
`
const UPDATE_SETTING = gql`
mutation UpdateSetting(
$id: Int
$videoName: String
$loop: Boolean
$controls: Boolean
$volume: Float
$playbackRate: Float
) {
updateSetting(
input: {
id: $id
videoName: $videoName
loop: $loop
controls: $controls
volume: $volume
playbackRate: $playbackRate
}
) {
id
videoName
loop
controls
volume
playbackRate
}
}
`The last things we have to do is update our form to submit the update when we click save and to load the values returned from the query. All we're doing is updating the video URL to use the
videoName we saved and we're adding defaultValue attributes to all of the form fields to show the stored values.<VideoPlayer>
<ReactPlayer>
...
url={`https://res.cloudinary.com/milecia/video/upload/c_pad,h_360,w_480,q_70,du_10/${
  data.setting.videoName || 'elephant_herd'
}.mp4`}
></ReactPlayer>
</VideoPlayer>
<Form onSubmit={onSubmit}>
<FormContainer>
<Label name="videoName">Video Name</Label>
<TextField name="videoName" defaultValue={data.setting.videoName} />
<Label name="loop">Loop</Label>
<CheckboxField name="loop" defaultValue={data.setting.loop} />
<Label name="controls">Controls</Label>
<CheckboxField name="controls" defaultValue={data.setting.controls} />
<Label name="volume">Volume</Label>
<RangeField name="volume" defaultValue={data.setting.volume} />
<Label name="playbackRate">1x</Label>
<RadioField
name="playbackRate"
defaultValue={data.setting.playbackRate}
value={1}
/>
<Label name="playbackRate">1.5x</Label>
<RadioField
name="playbackRate"
defaultValue={data.setting.playbackRate}
value={1.5}
/>
<Label name="playbackRate">2x</Label>
<RadioField
name="playbackRate"
defaultValue={data.setting.playbackRate}
value={2}
/>
<Submit>Save</Submit>
</FormContainer>
</Form>Now you're able to give your users a custom video experience every time they come to your app! There's just one more thing we need to do before we can call this finished.
You need to know how to fetch these videos from Cloudinary.
The video that's currently displaying is being loaded from Cloudinary. The string that we've been using for the
url value of the video player is how where this comes in. That string currently looks like this:url={`https://res.cloudinary.com/milecia/video/upload/c_pad,h_360,w_480,q_70,du_10/${
data.setting.videoName || 'elephant_herd'
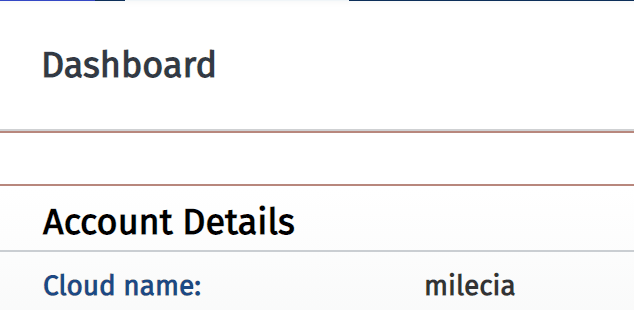
}.mp4`}This is the URL to a video hosted on Cloudinary, but you'll want it to point to your account. If you don't have an account, you can create a free one here. After you've registered, log in and you'll be taken to your Dashboard. You can find your cloud name here.
The next thing you'll need to do is go to your Media Library and upload a few videos. The video names are what a user will be able to enter in the form we created.
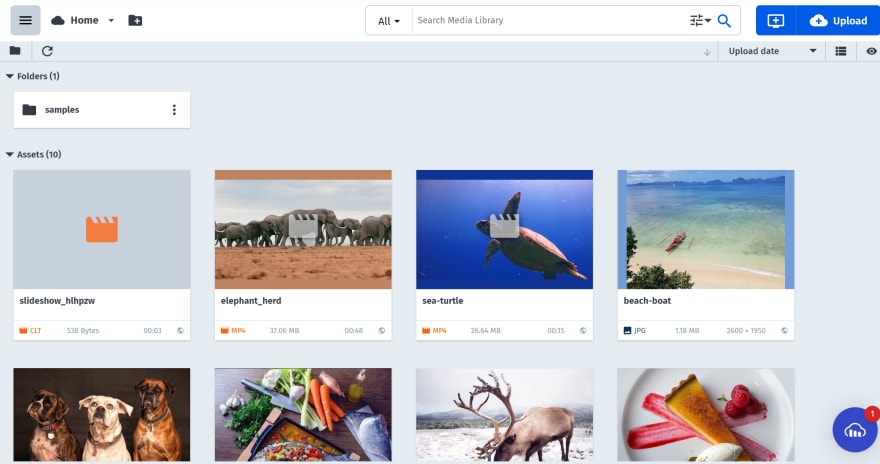
In the
url string, replace milecia with your cloud name and replace elephant_herd with the name of one of your videos. Now when you run your Redwood app, you'll see your own video!If you want to take a look at the front-end with this CodesandBox.
If you want the entire project, including the front-end and back-end, check out the
custom-video-player folder in this repo!Giving your users a good video experience will make them spend more time on your site and lead to less support issues. Plus it only takes a little extra time. Once the functionality is there, you just have to decide on how you want it to look.
30