
39
How to set up a Postgres Database with Heroku
I realized I can only stumble my way through setting up a database and deploying to Heroku. I want to be certain of my steps and set it up from scratch while documenting the steps I take. This is for my own future reference, and to solidify my skills, as well as to guide others who want a step by step introduction to setting up a production database on Heroku.
Git is used for version control. It will provide us
with a convenient command line interface to save
different versions of our code and commit them to github
Github is a code hosting platform that hosts a Remote
Repository of our code. We can use Git to push our code
to Github and share it with the world.
Postgres is the database system we will be using for
this project. There are others like SQLite, MySQL,
Oracle, and more. But I know Postgres so that is what I
will be showing in this guide.
pgAdmin is technically not necessary for any part of
this process. I use it in my workflow because I like the
GUI it provides to manage the database and write SQL
queries.
Heroku CLI is the command line interface for Heroku.
This is going to allow us to push our git code to Heroku,
and there are other useful functions for dealing with
Heroku in there.
You can use your text editor of choice, mine is VSCode
This is javascript runtime to run javascript code
outside of the browser. This will also allow us to run
npm commands to install dependencies into our project.
Those are the main tools we will need and the appropriate installation links for each.
Side note: For those still a little unsure, here is a very quick video explaining the difference between Git and GitHub.
And for those who need a longer introduction to git and GitHub here's this.
Once we have all of this installed and configured we can get started on the project!
First we have to create a new project. This depends on your system. For me, I use Linux and I have a side-projects folder on my desktop. In it I created a new folder called
production-db-tutorial. To do this I open a new terminal.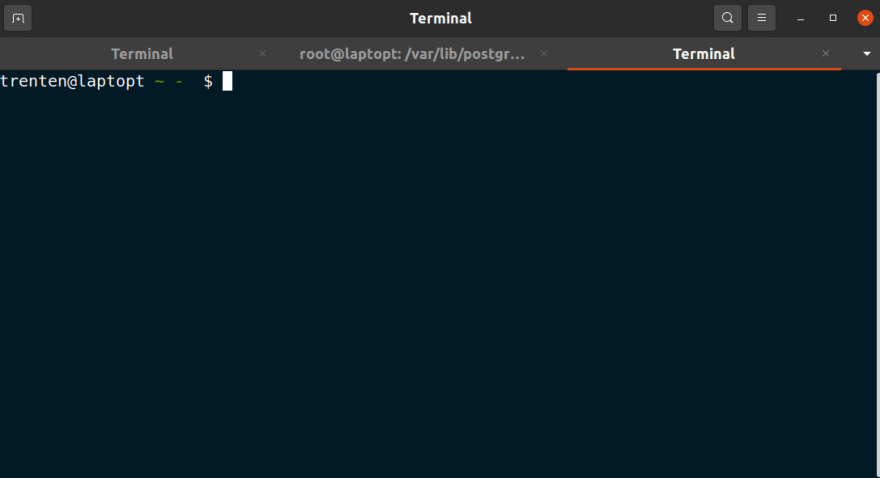
and run
cd ~/Desktop/side-projects to change directories.once here I run
mkdir production-db-tutorial to create the new project directory.next I can
cd production-db-tutorial to move to my newly created project folder and run code . to open it in Visual Studio Code.All of those commands looked a little something like this.

That
code . command opened a new VSCode window.
Once we have our VS Code window open we can open a new terminal to the project directory. Right off the bat I will add a file called
.env and a file called index.js to the root of the project. Then we can run npm init -y to create a new package.json file as well. This is where we will track the metadata of our application and can add npm scripts to shorten our command line syntax later. I will start by installing all the dependencies needed for this tutorial.
First add start and server scripts to the
package.json so we will be able to run the application. My scripts object looks like this."scripts": {
"start": "node index.js",
"server": "nodemon index.js",
"test": "echo \"Error: no test specified\" && exit 1"
}Then run
npm i -D nodemon and this will install nodemon as a dev dependency. Finally run npm i cors dotenv express knex pg to install cors, dotenv, express, knex, and pg as your normal dependencies. After that your package.json should look a little like this. 
Take note of the newly added dependencies section and devDependencies section in your
package.json file. Also take note of the package-lock.json and the node_modules folder. If you have followed up to this point you are currently on track to setting up a database!I like to start any node project by creating a basic server to make sure everything is running smoothly up to this point.
Within the
.env file lets create some environment variables for the project (these will be explained when we implement them later)PORT=5000
NODE_ENV=developmentIn your file it will look like this

Once that's done open up the
index.js file and create the server.require('dotenv').config()
const express = require('express')
const cors = require('cors')
const server = express()
const port = process.env.PORT || 8000
server.use(cors())
server.use(express.json())
server.get('/', (req, res) => {
    res.send('<h1>This is a test application</h1>')
})
server.listen(port, () => {
    console.log(`\n=== Server listening on port ${port} ===\n`)
})Woah woah woah lets slow down there and go through this line by line real quick just in case this looks foreign to anyone.
require('dotenv').config()This line allows us to access the 'environment variables' that we defined in our
.env file.const express = require('express')
const cors = require('cors')Express.js is a web framework that will assist us in creating our HTTP server. Cors stands for Cross-Origin-Resource-Sharing and, at a basic level, allows servers from different origins to request information from each other.
const server = express()
const port = process.env.PORT || 8000Here we are using express to create a server, and then defining our port variable. port is going to look at
process.env.PORT first, so in this case it will access PORT=5000 from the .env file we created earlier and use 5000 as the port. But if the server doesn't find a PORT in the .env then it will default to use port 8000 as a backup by default.server.use(cors())
server.use(express.json())Here we are telling our server to use cors (remember that talk about cross origin resource sharing earlier? This is enabling that within our server) and we are also telling our server to use express.json() which is a body-parser. This will parse incoming requests with JSON payloads. Here is a quick explanation that goes more in depth than I want to in this guide if you really want to know more about it.
Next we have our basic route.
server.get('/', (req, res) => {
res.send('<h1>This is a test application</h1>')
})This route is how we will access the application in the browser as I will demonstrate very shortly.
Lastly we have our listener.
server.listen(port, () => {
console.log(`\n=== Server listening on port ${port} ===\n`)
})This chunk of code is using our port variable, and telling our server to listen on that port, while its listening on that port the console will display that text to let us know its working.
When all that is put together it should look like this in your Visual Studio Code.

Now that is all squared away and everyone is up to speed we can actually run the server and access the route from the internet browser to make sure our code is actually working and doing something. Make sure everything is saved, then open a new terminal to the project directory. Run
npm run server to start the server with nodemon. 
If you see this then you've successfully started your server. Now if you open your internet browser to
http://localhost:5000/ you should see this.
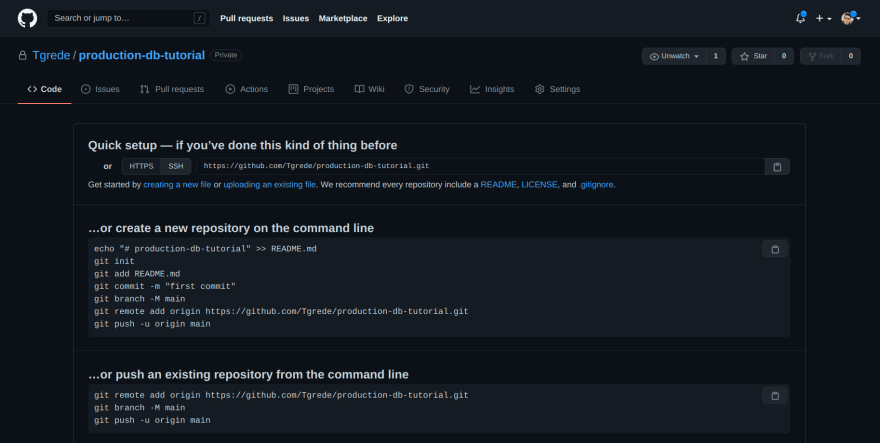
At this point you have confirmation that your code is working and you've configured things correctly so far. Now is a perfect time to make a first Git commit and upload to GitHub. Create a new GitHub Repo and it should look a little something like this before you've uploaded your code.
Now back in the local terminal we are going to turn our project into a local Git repository.
Run the command
npx gitignore node. This will create a .gitignore file that tells git what we don't want it to save in version control. This is very useful to store secrets like API keys. Then run git add . to add all of our current files, and git commit -m 'first commit' to commit our changes with a commit message. git branch -M main changes our primary branch from master to main. Follow this by adding our remote repository locally. I did this by running git remote add origin https://github.com/tgrede/production-db-tutorial.git. Once added you can push by running git push -u origin main I essentially followed these steps provided by github, except instead of
git add README.md I used git add . to add all the changed files.
Once all those commands have been run you should see that initial repository page turn into this.

Following the push we can start setting up our database. As I said earlier, I use pgAdmin 4 as a GUI and Postgres as the database. If you are unfamiliar with these at all or just want a different take on it, here is a good video tutorial on setting both up.
Once you have Postgres installed and pgAdmin 4 installed we can move on. When you log in to PG Admin for the first time you'll see a screen like this.

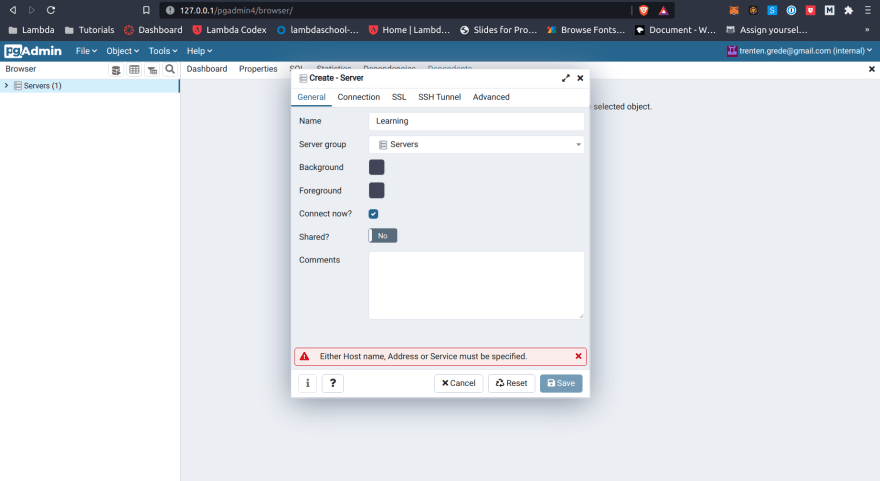
Right click on servers, click create, click server.

You should see a pop up in the middle of your screen with configuration options for your new database server.
I entered a name like 'learning' and then under the second tab set the host to 'localhost' and the port to 5432. The username for mine is postgres and I needed to enter the password I created for postgres in the password box. This is all I needed to enter to create the server
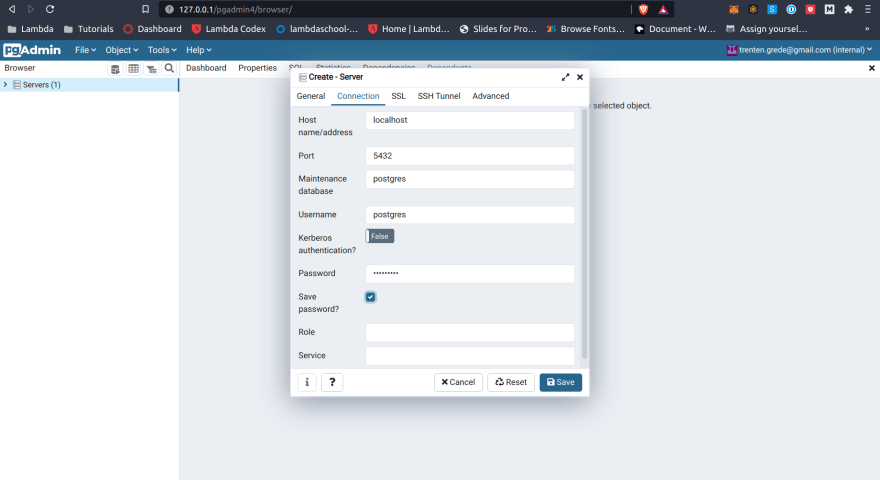
This might take some playing around with to get it working as it depends how you set up postgres on install. But once it accepts your server configuration you are all set to start connecting to it.
Next open servers, open your new server, and you'll see 'Databases'. Right click Databases, then click create. This will bring up the dialogue to create a new database on the database server

This should open a pop up where you can enter the name of the new database. I'll just call mine tutorial-db.

After saving you'll see in the side bar on the left your new database listed in the server.

This is all we need to do within pgAdmin for the moment. Back in our code its time to write the configuration files to actually migrate and seed our database.
Update your environment variables in your
.env file to match the information from your database configuration that you just went through. 
DB_HOST should be the host/address from when you created your server, in my case I used localhost as my host. DB_USER by default should be postgres. postgres is a superuser that is created when you install postgres and so by default postgres is the owner of the postgres database server.DB_PASS I blurred for obvious reasons but should be the password you set in pgAdmin4 when setting everything up.DB_NAME is the name of the database you created, in my case it was tutorial-dband those should be all the environment variables to set on your local machine.
We need to start by running the command
knex init. This command uses the knex library we installed earlier to create a default knexfile.js in the root of our project.Open
knexfile.js and replace the code with thisrequire('dotenv').config()
const pg = require('pg');
if (process.env.DATABASE_URL) {
  pg.defaults.ssl = { rejectUnauthorized: false }
}
const sharedConfig = {
  client: 'pg',
  migrations: {directory: './data/migrations'},
  seeds: {directory: './data/seeds'},
}
module.exports = {
  development: {
    ...sharedConfig,
    connection: {
      host: process.env.DB_HOST,
      user: process.env.DB_USER,
      password: process.env.DB_PASS,
      database: process.env.DB_NAME
    }
  },
  production: {
    ...sharedConfig,
    connection: process.env.DATABASE_URL,
    pool: { min: 2, max: 10 },
  },
};Once again I will not leave you in the dark and will explain our code and how it all connects.
require('dotenv').config()This line is there to allow the code to access our .env file to get our environment variables.
const pg = require('pg');Pretty self explanatory but this imports our pg library into the code for our next code block to make use of
if (process.env.DATABASE_URL) {
pg.defaults.ssl = { rejectUnauthorized: false }
}This is standard and required by the production database. Notice we never set a
DATABASE_URL environment variable. that's because this code snippet wont do anything in development but is necessary when we run this all on Heroku later where there is a DATABASE_URL environment variable.After that we have a variable we define to simplify things.
const sharedConfig = {
client: 'pg',
migrations: {directory: './data/migrations'},
seeds: {directory: './data/seeds'},
}This sets the client as pg. This also sets our migrations directory and seeds directory so that knex knows where to look in our repository when we run migrate and seed commands.
The reason we set that as a
sharedConfig variable is because those config variables are shared between our development and production environments. It saves us some typing down here in the last piece of code.module.exports = {
development: {
...sharedConfig,
connection: {
host: process.env.DB_HOST,
user: process.env.DB_USER,
password: process.env.DB_PASS,
database: process.env.DB_NAME
}
},
production: {
...sharedConfig,
connection: process.env.DATABASE_URL,
pool: { min: 2, max: 10 },
},
};this piece of code sets the connection configuration settings for the development and production environment.
...sharedConfig is our variable from before setting the client, migration, and seed configurations. then we have a connection variable. connection tells knex where the database lives and creates a connection with the database server allowing us to populate it with data and interact with it using our code. The last unexplained bit is this.pool: { min: 2, max: 10 }This photo explains it pretty well honestly.

So now that explains our
knexfile.js and it should look like this now.
Now we can work on migrating and seeding our development database. Run the commands to create new migration and seed files.
knex migrate:make first-migration
knex seed:make 001_first-seed
Here is my terminal view as an example.

Remember in the
knexfile.js where we did this?const sharedConfig = {
client: 'pg',
migrations: {directory: './data/migrations'},
seeds: {directory: './data/seeds'},
}That was telling knex where to place our newly created migration and seed files as shown here.
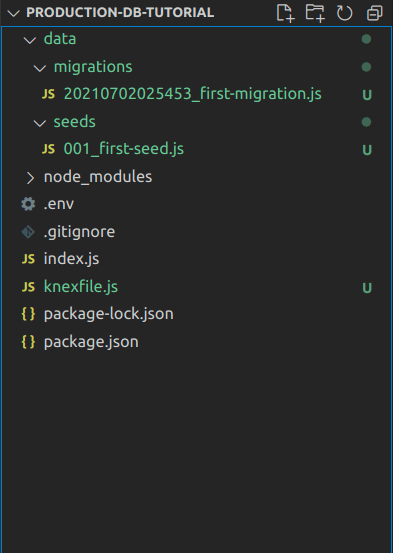
Now we can add code to these new files. Open your new file in your migrations folder and change the code to this.
exports.up = (knex) => {
    return knex.schema
        .createTable('profiles', function (table) {
            table.increments('profile_id');
            table.string('name', 128).notNullable();
        });
    };

exports.down = (knex) => {
    return knex.schema.dropTableIfExists('profiles');
};
This is not a Knex Tutorial but if you want to read some more knex documentation you can find it here
This code is essentially a basic migration that adds a new table to our database, giving an auto incrementing profile_id column as well as a name column. Your migration file will look something like this if you're following along.

Then we can add our seed code.
const profiles = [
  {
    name: 'John'
  },
  {
    name: 'Abigail'
  },
  {
    name: 'Patty'
  },
  {
    name: 'Sally'
  },
  {
    name: 'Gary'
  }
];

exports.seed = function (knex) {
  return knex('profiles').del()
  .then(() => {
    return knex('profiles').insert(profiles)
  })
};
This code will just add a bunch of names to our development database to test it out. It should leave your seed file looking like this.

Now we have our migration file written and seed file written we can actually RUN the migration and seed commands to populate the database.
knex migrate:latest
knex seed:run
These commands will take your migration file and create the table. Then it will take your seed file and pre-populate the table with data.

Next open pgAdmin and look at the left side bar. Right click
Databases and click refresh. You should now be able to expand your database, then schemas, then tables, to see your newly created database tables. It should look like this
You can now right click on
profiles and click view/edit data and then click all rows to view your seed data in your table.
If you have made it this far you have successfully set up a development database. At this point you could use this knowledge and keep practicing your Knex skills outside of a production environment. However, we now want to deploy this database to Heroku. How do we do that?
First lets re commit our code to GitHub so everything is up to date.
git add .
git commit -m 'second commit'
git push
Then login to Heroku where we will be deploying our application.
When logged into Heroku I see a list of apps and a
new button in the top right corner. I create a new app using the new button in the top right and click create new app.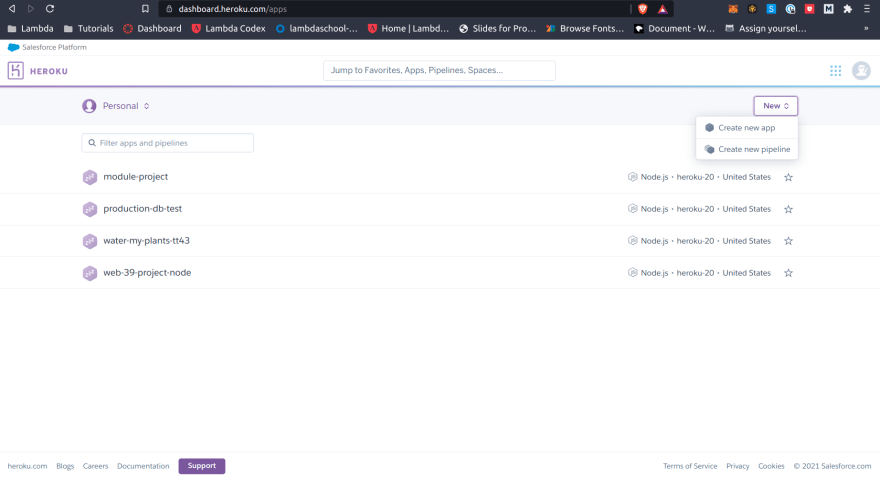
Then name your Heroku app. I will call mine the same thing I have called it this whole time, 'production-db-tutorial'.

Once created you'll be greeted with a screen that looks like this.

I would follow the first instruction that says to Login.

Then I would follow the instruction that says how to add a remote heroku repository to your local git repository.

Lastly deploy your application with this command.
git push heroku mainAnd just like that our back end code is pushed to Heroku.
here is the site I just deployed! Hopefully you have been able to deploy your own application up to this point. Now we can create the database!
here is the site I just deployed! Hopefully you have been able to deploy your own application up to this point. Now we can create the database!
Scroll back up in Heroku and find the resources tab in your project then use the search bar to find
heroku postgres. 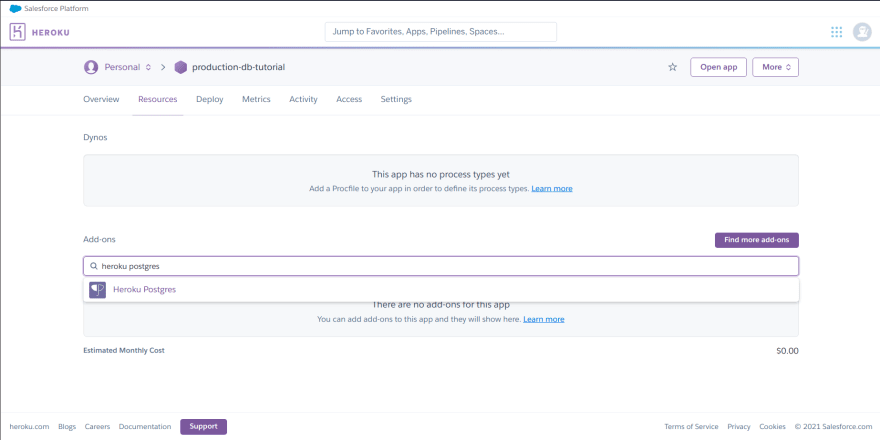
When you add it to your project an order form will pop up, I'll be using a free database.

After submitting my order it shows up as an add-on in my resources.

I can now Click on this database link and see it created a database within Heroku. How do we access this database now? Well you pushed your code to your Heroku repository, so Heroku has your migration and seed files ready to go. If you now go to your settings tab instead of resources you'll see this.
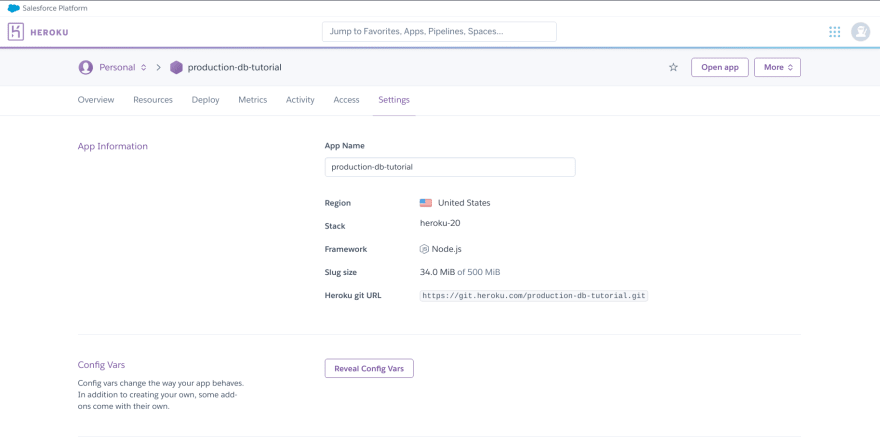
Click reveal config vars to see that Heroku auto generated a DATABASE_URL for you. Then add production as a value with NODE_ENV as a key to the config variables as well so your code base knows that this is the production environment (remember on your local machine your NODE_ENV environment variable is set to development).
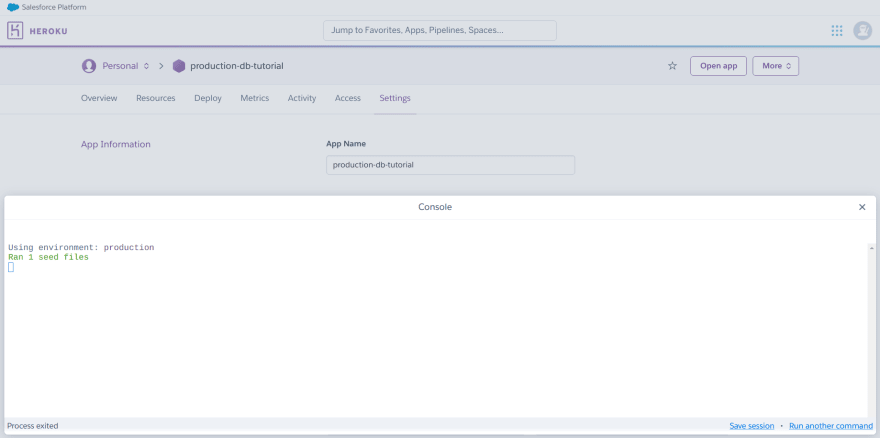
Once this is all done you can click
more in the top right, and click run console to open a console command box. Where it says bash you run your knex migrate:latest and knex seed:run commands. This will migrate and seed your Heroku database.If your migration was successful you'll see this.

And after successful seeding you'll see this.
Congrats! We now have a database on Heroku. Now how do we communicate with it? I will build the most basic model and route I can to demonstrate. We have to build out models and routes to communicate with our database using code. To communicate with the database we need to create a database configuration file. In the
data directory create a file called db-config.js and paste this code.require('dotenv').config();
const knex = require('knex');
const dbEnvironment = process.env.NODE_ENV || 'development';
const configs = require('../../knexfile')[dbEnvironment]
module.exports = knex(configs)This code figures out what database environment we are using based on our NODE_ENV environment variable and sets it to
dbEnvironment and then uses our configuration from our knexfile.js for that environment and sets it to a configs variable. We are using either development or production in this project. Then it exposes that database configuration so that our code can query the correct database and preform basic operations within our app.
Once our db config file is set up we can create a
model.js and route.js file at the root of the project. Normally I would put model and route files within an API folder but for the sake of speed and simplicity I will put them in the main project folder. Open the newly created model.js and add this code.const db = require('./data/db-config');
const findAll = () => {
return db('profiles')
}
module.exports = {
findAll
}First we are taking our database configuration, and then creating a model function
findAll that returns all entries of the profiles table we created. Lastly we export the model function so our routes can use it. Then we open our
route.js file and add a basic route to return this database information.const router = require('express').Router()
const Profiles = require('./model')
router.get('/', async (req, res) => {
const profiles = await Profiles.findAll()
res.json(profiles)
})
module.exports = routerThis code uses express to create a router, and pulls our model function from the model function file. Then it creates a route that uses a GET request that responds with our profile information from the database. Your model and route file should look like this if you are following this guide exactly.


Once you have your
db-config.js, model.js, and route.js all set up, the last thing to do is connect it to your index.js file and test itadd a few lines to your
index.js to make this work.const testRouter = require('./route')This imports our route from the
route.js file we just worked on.server.use('/test', testRouter)This tells our server to use that router and allow us to access it with the '/test' route.
All of this should make your
index.js look like this when its properly updated.
Once all this code as been done save it all and lets go test it!
Open up your internet browser and go to your site. My local site is currently at
http://localhost:5000. To access the data using the new code we just wrote, add your /test route at the end of the URL. http://localhost:5000/test. If done correctly your web browser should now be showing you the information from your database.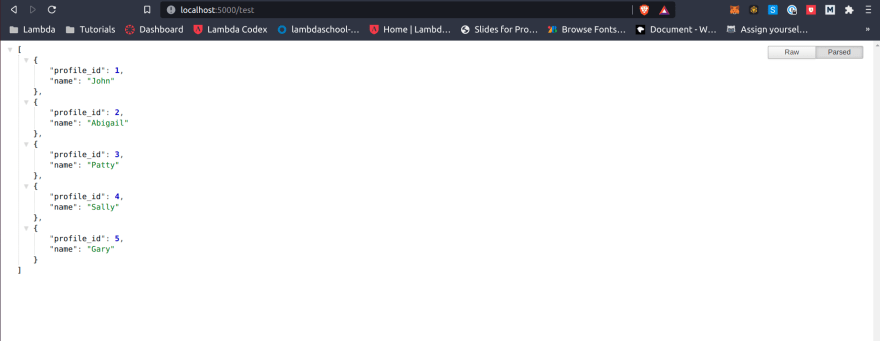
Personally I prefer postman for testing my APIs as it gives a clean interface to test your site.

If you are interested in postman and want to test your API in a dedicated application rather than your browser, Here is a link to download it.
To round out this guide I am going to push all my code to Github and Heroku to make sure everything is up to date.
git add .
git commit -m 'last commit'
git push
git push heroku main
Now my GitHub repo has the most up to date code, and Heroku is up to date with the Git Repo. I was able to verify it by going to my new production site at https://production-db-tutorial.herokuapp.com/test

And that Concludes this guide! We started with absolutely nothing, created a new project, configured a development and production database, and built a basic model and route to interface with that database from our back end code. I hope you find this useful to get up and running with Postgres and Heroku.
39