
32
Setup travis CI builds directly from the API
Executing a CI Build using an API built with no-code backend platform! These truly are craziest of times. The need for APIs triggering Builds actually eliminates a lot of hassle that often come with using tools like jenkins or travis. They offer a lot more CI features but are often difficult to setup & maintain for smaller projects.
If you have a SPA website hosted that depends on the content of your backend, well, you're in luck because you can attach a webhook to your API endpoint, which will trigger a build everytime the API is called.
Creating project on low-code tool
We head over to Canonic and sign in using our social accounts. Next, we click on Create New to create a project for our application. Click on next, then click on create to complete the process.

Create new project screen
A popup asking your first table name will appear. If not, you can click on the + icon in the header to create a new table. Let's name our first & only table for this project - RepoBuilds.

We create a text field named "Repo Branch" as we need the branch name against which we want to trigger the build.

We hit deploy on the top right, and we'll be provided with a hosted backend. a database & basic CRUD endpoints per table.
Click on the API tab on the left to start adding the Travis CI webhook. We select + button that's attached to the createRepoBuilds block in mutations. It'll open up a new webhook settings on the right hand side.
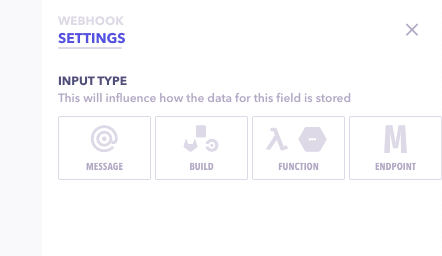
Select Build type → Choose Travis CI from the list of providers & you'll be provided with fields for settings.
API Key → This is the API key of Travis account.
Repo Url → Git URL for the Repo we want to trigger the build
Repo Branch → Branch to be selected for building

For Repo Branch → We want to trigger the build against the text found in the repo branch field of the API payload. So we can make use of Handlebars templates & simply write {{repoBranch}} in that field. This will extract the repoBranch field from the API payload and forward it to Travis.
And we're ready with our API to start triggering builds. Managing an API access is easier than managing CI access, so you can directly start consuming this API both by yourself & teammates.
Integrating our existing app with this API:
This will require a combination of things that we need for securely connecting our application with this API.
Access Tokens
Click on Settings using left side menu. Go to Access tokens tab.

Click on Create a new token, and provide it a suitable name and permissions. Click on Create.
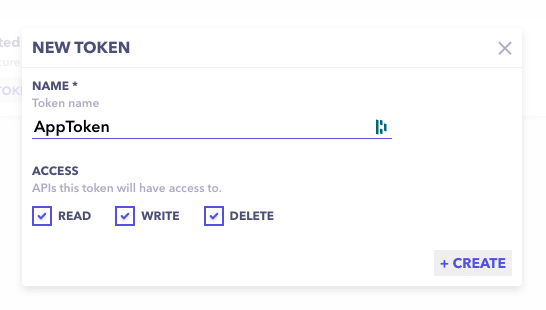
You've successfully generated an access token for your API. Copy it & save it some place safe as you won't be able to see it again.

Documentation
Head over to the docs tab using the left-hand side, and you'll find documentation for createRepoBuilds API (the API block where we added our Travis webhook).
Testing
After completing all the necessary steps, we're finally ready to deliver our first SMS using our Travis-connected API.
Our curl command will look something like this.
➜  ~ curl 'https://xxxx.hem.canonic.dev/api/repoBuilds' \
  --request POST \
  --header "Content-type: application/json" \
  --header "Authorization: xxxxxx-xxxxx-xxxx" \
  --data '{
    "input": {
      "repoBranch": "newFixes",
    }
  }'
A successful response will look like this:
{"data":{"repoBranch":"newFixes","_id":"60bf30ee2529700009fd2a4a","createdAt":"2021-06-08T08:57:18.316Z","updatedAt":"2021-06-08T08:57:18.316Z","__v":0,"id":"60bf30ee2529700009fd2a4a"},"error":null,"success":true}%
You should check on Travis, and you'll find the latest build in progress. Having an API saves a lot of trouble of maintenance and boilerplate setup while leaving plenty of room for rapid innovation. Find more information about this feature here - https://docs.canonic.dev/concepts/webhook-providers/travis-ci
You also add other integrations depending on your business needs like sending a message on slack, etc. Check out the slack guide here.
32