

57
Building a full-stack Aavegotchi minigame - Part 1: Set up + Phaser 3
In this 3 part tutorial series, I will be taking you through each step required to build and deploy an Aavegotchi minigame. There is a lot to cover, so each section will have to be very high-level.
We will be using the Aavegotchi Minigame Template as a starting block for this series, as it already sets up the structure of the repo, as well as handles the Web3 logic required to retrieve the players Aavegotchi's from the polygon network.
If you don't own an Aavegotchi, or don't have a wallet to connect to Web3 that also isn't a problem, as in dev mode the template gives you an option to run the app off-chain, therefore allowing you to use a default (but not real) Aavegotchi. (However, its always more fun when you get to build alongside your digital frens).
As all great game developers have started before you, the end result of this multipart series will be a full stack Flappy Bird clone (Flappigotchi).
Part 1 will take you through the basics of setting up the Aavegotchi Minigame template and using Phaser 3 to create riveting gameplay.

You can find the code for the end result of Part 1 here
The bulk of the app is written in Typescript, so I would suggest first acquiring a foundational understanding of Typescript before starting.
The minigame template consists of both a frontend and a backend directory.
The frontend directory consists of both ReactJs + Phaser3 and is where you will most likely spend the bulk of your time building your game.
React Js allows for a more intuitive main menu design + hooks for both web3 and database hookups.
Phaser3 is a 2D game framework for building games in JS on the HTML5 canvas. It has a very active community and is also the framework in which the Aavegotchi Reaalm is being built.
The backend directory is written in nodejs and utilises socket.io to take advantage of websockets. This is necessary for building multiplayer games. If you are building a single player game, a server is still necessary if you want to introduce some sort of Leaderboard + Reward system into your game. This is due to the fact users of your game can easily exploit the client side code to tamper and send false scores to your database. So if you handle the score submissions server side, with some logic to flush out illegitimate scores, then your games leaderboard will be safer.
To get started using the template, first install GitHub client, so you can simply run the following command to create your own GitHub project using the template:
gh repo create flappigotchi --template="https://github.com/aavegotchi/aavegotchi-minigame-template.git"
cd flappigotchi
git pull origin main
If you are authenticated, you will be presented with various options for setting up your repo. Just press Enter to go through each step. You will now have your own flappigotchi repo setup on Github.
Now in your code editor of choice (I personally use VSCode) open up the new
Flappigotchi directory where you should see the following folder structure.
For this stage of the tutorial we will be only working in the app directory. So go into app and install the dependencies:
cd flappigotchi/app
npm install
Once everything is installed, you can start the app either by running
npm run start or npm run start:offchain depending if you want to connect to web3 and use your personal Aavegotchi's or not.If you are Windows and you want to run the app offchain, you will need to update
app/package.json with the following:"scripts": {
...
- "start:offchain": "REACT_APP_OFFCHAIN=true react-scripts start",
+ "start:offchain": "set REACT_APP_OFFCHAIN=true && react-scripts start",
...
},You should now be able to view the app running in your browser at http://localhost:3000/.

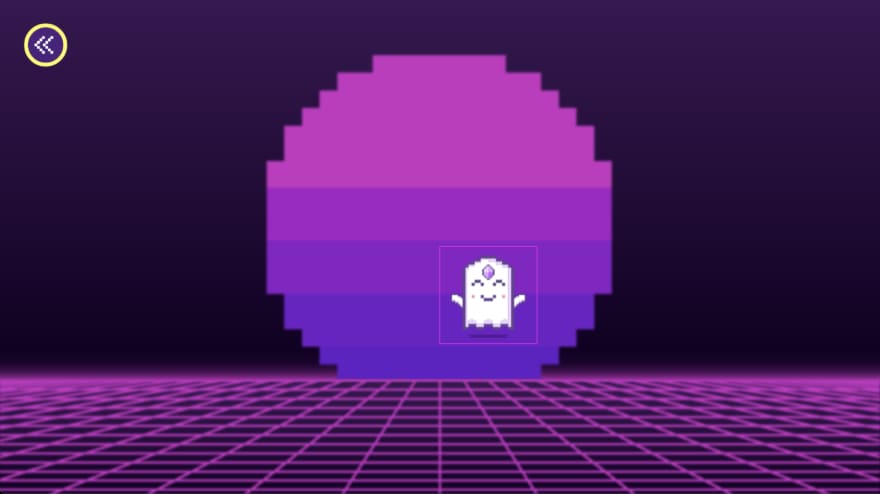
You will be greeted with the menu screen which includes a home, a leaderboard and a settings page. For the scope of part 1 of the tutorial we wont be touching too much React, so don't worry about these pages for now. Instead, click START on the Game page to boot up your game.

You will notice that the loading bar gets stuck at connecting to server. This is because the game is waiting for a connection to the server before starting the game.
To run the server, open up a new terminal, and go into the server directory and run
npm install to install the dependencies:cd flappigotchi/server
npm installIf this is your first time using Typescript in nodejs, then you will need to run npm i -g ts-node to install ts-node on your machine.
Then when everything is installed, you run
npm run start to run the server on port 443.If you are on a Windows, you will need to update
server/package.json to the following:"scripts": {
"test": "echo \"Error: no test specified\" && exit 1",
- "start:prod": "NODE_ENV=production nodemon server.ts",
+ "start:prod": "set NODE_ENV=production && nodemon server.ts",
- "start": "NODE_ENV=development nodemon server.ts"
+ "start": "set NODE_ENV=development && nodemon server.ts"
},You should now be able to run the game without any problems!
For Flappigotchi we need to acquire two different sprites. The
Aavegotchi and the Pipes. Due to the magic of blockchain and more importantly Aavegotchi, the Aavegotchi svg comes straight from the Aavegotchi Smart Contract (Unless of-course you are using the default Aavegotchi, they just exist on your computer unfortunately).For the pipe sprite-sheet, you have to download it from here and place it into a
app/public/assets/sprites directory so that the Phaser scenes have access to it.To use your asset within your Phaser game scenes, go into
src/game/assets/index.ts and assign a unique key that will reference the pipe spritesheet. This is used within the Phaser scenes to fetch the correct assets.Now add an object with your key, src, and asset type into the assets array. Assets of type
SPRITESHEET also require a frameWidth and frameHeight value. This is the size of the frame of each sprite. So seeing as our spritesheet is 80x217, but it is 1 tile across and 3 tiles down, we can set the frame data to frameWidth: 80 /1 and frameHeight: 217 / 3.Our file should now look like the following:
// src/game/assets/index.tsx

export interface Asset {
  key: string;
  src: string;
  type: 'IMAGE' | 'SVG' | 'SPRITESHEET' | 'AUDIO';
  data?: {
    frameWidth?: number;
    frameHeight?: number;
  };
}

export interface SpritesheetAsset extends Asset {
  type: 'SPRITESHEET';
  data: {
    frameWidth: number;
    frameHeight: number;
  };
}

export const BG = 'bg';
export const FULLSCREEN = 'fullscreen';
export const LEFT_CHEVRON = 'left_chevron';
export const CLICK = 'click';
export const PIPES = 'pipes';

// Save all in game assets in the public folder
export const assets: Array<Asset | SpritesheetAsset> = [
  {
    key: BG,
    src: 'assets/images/bg.png',
    type: 'IMAGE',
  },
  {
    key: LEFT_CHEVRON,
    src: 'assets/icons/chevron_left.svg',
    type: 'SVG',
  },
  {
    key: CLICK,
    src: 'assets/sounds/click.mp3',
    type: 'AUDIO',
  },
  {
    key: PIPES,
    src: 'assets/sprites/spritesheet.png',
    type: 'SPRITESHEET',
    data: {
      frameWidth: 80 / 1,
      frameHeight: 217 / 3,
    }
  }
];
The boot-scene uses the
assets array to ensure each asset is loaded in before starting the game.The way we are going to simulate movement in this game is to have the pipes move. Therefore, every 2 seconds or so we need to add a new pipe row to the right of the screen, which then move towards the left of the screen.
We are also going to be utilising a game dev mechanic called Object Pooling. This is so that when people play the game and get ridiculous scores, all the pipes don't accumulate in memory and slow down their machine.
To do this we we first create the Pipe game object that we want to construct in our group. So inside
game/objects create a new typescript file called pipe.ts and inside it put:// src/game/objects/pipe.ts
import { getGameHeight } from '../helpers';
import { PIPES } from 'game/assets';
export class Pipe extends Phaser.GameObjects.Image {
constructor(scene: Phaser.Scene) {
super(scene, -100, -100, PIPES, 0);
this.setOrigin(0, 0);
this.displayHeight = getGameHeight(scene) / 7;
this.displayWidth = getGameHeight(scene) / 7;
}
}This class extends the
Phaser.GameObjects.Image class. When this object is constructed the x and y value of its placement is both -100. This means that the pipe will be rendered off the screen. This is useful for object pooling as it means we can load in all the pipes we need at the start of the game and not have it interfere with the gameplay.For tidy codebase reasons I tend to export the class from
game/objects/index.ts so that we can import all our objects from the same file:// src/game/object/index.ts
export * from './pipe';
export * from './player';Now we have our Pipe class, we can import it into game-scene.ts and construct our
group within the create() method:// src/game/scenes/game-scene.ts
...
import { Player, Pipe } from 'game/objects';
...
export class GameScene extends Phaser.Scene {
private player?: Player;
private selectedGotchi?: AavegotchiGameObject;
private pipes?: Phaser.GameObjects.Group;
...
public create(): void {
...
// Add pipes
this.pipes = this.add.group({
maxSize: 25,
classType: Pipe,
});
...
}
...This will construct a maximum of 25 pipes using our Pipe class.
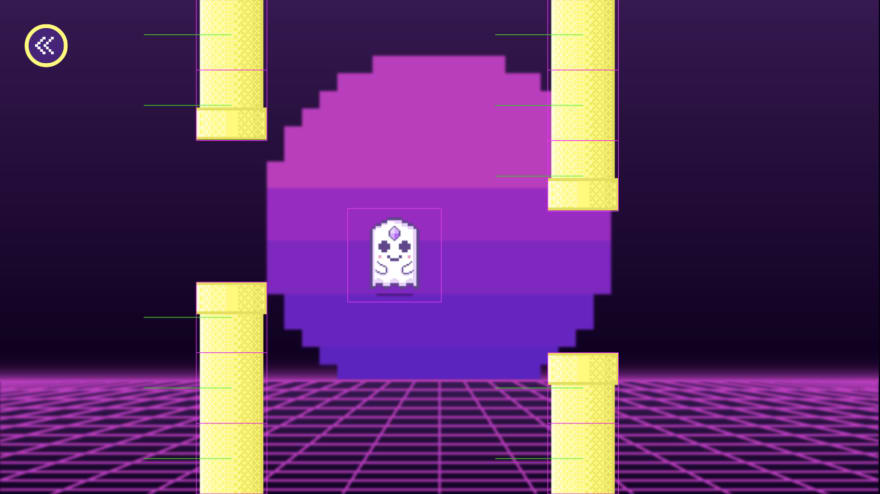
If you was to run the game now, nothing will happen and you will be disappointed. What we have to do is use these pre-constructed pipes to create a Pipe Row with a randomly generated gap for the Aavegotchi to fly through. To do this lets create a new function in our
GameScene called addPipeRow():// src/game/scenes/game-scene.ts
...
export class GameScene extends Phaser.Scene {
...
private addPipeRow = () => {
const size = getGameHeight(this) / 7;
const x = getGameWidth(this);
const velocityX = -getGameWidth(this) / 5;
const gap = Math.floor(Math.random() * 4) + 1;
for (let i = 0; i < 7; i++) {
if (i !== gap && i !== gap + 1) {
const frame = i === gap - 1 ? 2 : i === gap + 2 ? 0 : 1;
this.addPipe(x, size * i, frame, velocityX);
}
}
};
...Our pipe rows are made up of 5 pipes and a gap the size of two pipes. You may also notice for all size and velocity related things I create it in proportion to the game screen dimensions. This is so that the game will work automatically on all screen sizes.
Essentially what this function is doing, is randomly generating a number between 1 and 4 and using that number to determine the gaps placement. Then it loops through from 0 to 6 constructing a pipe with its position and spritesheet frame depending on its placement. On the gap indexes, it does nothing (for now).
Now that we have our logic to construct the pipes, let's create our
addPipe() function:// src/game/scenes/game-scene.ts
...
export class GameScene extends Phaser.Scene {
...
private addPipe = (x: number, y: number, frame: number, velocityX: number): void => {
const pipe: Pipe = this.pipes?.get();
pipe.activate(x, y, frame, velocityX);
};
...As our pipes already exist in a group, we need to use Phaser's
get() method to pull an active pipe object from our object pool. We then need to activate it by setting its position, frame and velocity.For this lets go back into our Pipe class and add the activate method:
// src/game/objects/pipe.ts

...

export class Pipe extends Phaser.GameObjects.Image {
  ...

  public activate = (x: number, y: number, frame: number, velocityX: number) => {
    // Physics
    this.scene.physics.world.enable(this);
    (this.body as Phaser.Physics.Arcade.Body).setVelocityX(velocityX);

    this.setPosition(x, y);
    this.setFrame(frame);
  }
}
All we got to do now is call the
addPipeRow() method upon the games start as well as in intervals of 2 seconds:// src/game/scenes/game-scene.ts
...
export class GameScene extends Phaser.Scene {
...
public create(): void {
...
this.addPipeRow();
this.time.addEvent({
delay: 2000,
callback: this.addPipeRow,
callbackScope: this,
loop: true,
});
}
...
}Now run the game again.
You should notice that after 5 rows have been constructed the game crashes. At this point you are either panicking, or nodding to yourself smugly as you remember that we set the
maxSize of the pipe pool to 25. Therefore when our game tries activating pipe number 26, it cannot, as it does not exist. Therefore we need a way to deactivate our pipes and add them back into the pool.Therefore, in our
Pipe class we need to add a method that allows the Pipe to destroy itself upon going off the screen:// src/game/objects/pipe.ts
...
export class Pipe extends Phaser.GameObjects.Image {
...
public update = () => {
if (this.x < -2 * this.displayWidth) {
this.destroy()
}
}
}We need to call this method every time
GameScene updates. To do this, inside the object where we constructed out group add runChildUpdate: true:// src/game/scenes/game-scene.ts
// Add pipes
this.pipes = this.add.group({
maxSize: 25,
classType: Pipe,
runChildUpdate: true,
});We will now be able to construct pipes for all eternity, hurrah!
Out the box, the aavegotchi-minigame-template comes with basic controls and an idle animation for your Aavegotchi. However for our Flappigotchi game, all we want is click/space bar to flap.
So every time we press the space bar or click, we want our
Player to move up. However we only want this to occur on the initial press. So we also need an isFlapping property that toggles on press and release.With this being said, update
player.ts with the following:// src/game/objects/player.ts
import { getGameHeight } from 'game/helpers';
interface Props {
scene: Phaser.Scene;
x: number;
y: number;
key: string;
frame?: number;
}
export class Player extends Phaser.GameObjects.Sprite {
private jumpKey: Phaser.Input.Keyboard.Key;
private pointer: Phaser.Input.Pointer;
private isFlapping = false;
constructor({ scene, x, y, key }: Props) {
super(scene, x, y, key);
// sprite
this.setOrigin(0, 0);
// physics
this.scene.physics.world.enable(this);
// input
this.jumpKey = this.scene.input.keyboard.addKey(Phaser.Input.Keyboard.KeyCodes.SPACE);
this.pointer = this.scene.input.activePointer;
this.scene.add.existing(this);
}
update(): void {
// handle input
if ((this.jumpKey.isDown || this.pointer.isDown) && !this.isFlapping) {
// flap
this.isFlapping = true;
(this.body as Phaser.Physics.Arcade.Body).setVelocityY(-getGameHeight(this.scene) * 0.6);
} else if (this.jumpKey.isUp && !this.pointer.isDown && this.isFlapping) {
this.isFlapping = false;
}
}
}If you was to play the game now, upon pressing jump, the
Player will continue to fly up. This is because we have nothing to counteract the upwards velocity. For that we need to add gravity to our Player. Luckily, Phaser handles the physics for us, we just need to apply it to our Player like so:// src/game/objects/player.ts
...
export class Player extends Phaser.GameObjects.Sprite {
...
constructor({ scene, x, y, key }: Props) {
...
// physics
this.scene.physics.world.enable(this);
(this.body as Phaser.Physics.Arcade.Body).setGravityY(getGameHeight(this.scene) * 1.5);
...
}
...
}Now that we have the controls down, let's bring our Aavegotchi to life with some animations. As our Aavegotchi's image data comes straight from the blockchain, we construct our spritesheet on the client side when the user loads in the other assets. To assist with this, there is a swanky custom built
constructSpritesheet() function that takes a spriteMatrix as an argument. We can add different poses to the spriteMatrix using the customiseSvg() function.Inside
boot-scene.ts we are going to construct two animations for our Aavegotchi, one for flapping and one for death. (Don't worry, the Aavegotchi is a ghost so can't actually die).// src/game/scenes/boot-scene.ts
...
export class BootScene extends Phaser.Scene {
...
/**
* Constructs and loads in the Aavegotchi spritesheet, you can use customiseSvg() to create custom poses and animations
*/
private loadInGotchiSpritesheet = async (
gotchiObject: AavegotchiGameObject
) => {
const svg = gotchiObject.svg;
const spriteMatrix = [
// Flapping animation
[
customiseSvg(svg, {
armsUp: true,
removeBg: true,
removeShadow: true
}),
customiseSvg(svg, { removeBg: true, removeShadow: true }),
],
// Dead frame
[
customiseSvg(svg, { removeBg: true, removeShadow: true, eyes: 'sleeping', mouth: 'neutral' }),
]
];
const { src, dimensions } = await constructSpritesheet(spriteMatrix);
this.load.spritesheet(gotchiObject.spritesheetKey, src, {
frameWidth: dimensions.width / dimensions.x,
frameHeight: dimensions.height / dimensions.y,
});
this.load.start();
};
}As you develop your game, you may want to add more frames into your Aavegotchi animation repertoire. To do that you can just add extra options into customiseSvg() with your own custom SVG manipulations.
Now that we are loading in our new spritesheet, in the
Player object, let's add in our two new animations:// src/game/objects/player.ts
...
export class Player extends Phaser.GameObjects.Sprite {
...
constructor({ scene, x, y, key }: Props) {
super(scene, x, y, key);
// Animations
this.anims.create({
key: 'flap',
frames: this.anims.generateFrameNumbers(key || '', { frames: [ 1, 0 ]}),
frameRate: 2,
});
this.anims.create({
key: 'dead',
frames: this.anims.generateFrameNumbers(key || '', { frames: [ 2 ]}),
});
...
}
...
}To play the animation, all you have to do is call
this.anims.play('ANI_KEY'). We want to call the 'flap' animation when the Player flaps, and we want to call the 'dead' animation upon death. For that we want to add in setDead() method and call this method upon the Player flying too high or too low.The final result of the
Player class will look like this:// src/game/objects/player.ts
import { getGameHeight } from 'game/helpers';
interface Props {
scene: Phaser.Scene;
x: number;
y: number;
key: string;
frame?: number;
}
export class Player extends Phaser.GameObjects.Sprite {
private jumpKey: Phaser.Input.Keyboard.Key;
private pointer: Phaser.Input.Pointer;
private isFlapping = false;
private isDead = false;
constructor({ scene, x, y, key }: Props) {
super(scene, x, y, key);
// Animations
this.anims.create({
key: 'flap',
frames: this.anims.generateFrameNumbers(key || '', { frames: [ 1, 0 ]}),
frameRate: 2,
});
this.anims.create({
key: 'dead',
frames: this.anims.generateFrameNumbers(key || '', { frames: [ 2 ]}),
});
// physics
this.scene.physics.world.enable(this);
(this.body as Phaser.Physics.Arcade.Body).setGravityY(getGameHeight(this.scene) * 1.5);
(this.body as Phaser.Physics.Arcade.Body).setSize(90, 120);
// sprite
this.setOrigin(0, 0);
this.setDisplaySize(this.displayHeight * getGameHeight(scene) / 1200, this.displayHeight * getGameHeight(scene) / 1200);
// input
this.jumpKey = this.scene.input.keyboard.addKey(Phaser.Input.Keyboard.KeyCodes.SPACE);
this.pointer = this.scene.input.activePointer;
this.scene.add.existing(this);
}
public getDead(): boolean {
return this.isDead;
}
public setDead(dead: boolean): void {
this.isDead = dead;
this.anims.play('dead');
}
update(): void {
// handle input
if ((this.jumpKey.isDown || this.pointer.isDown) && !this.isFlapping) {
// flap
this.isFlapping = true;
this.anims.play('flap');
(this.body as Phaser.Physics.Arcade.Body).setVelocityY(-getGameHeight(this.scene) * 0.6);
} else if (this.jumpKey.isUp && !this.pointer.isDown && this.isFlapping) {
this.isFlapping = false;
}
// check if off the screen
if (this.y > getGameHeight(this.scene) || this.y < 0) {
this.setDead(true);
}
}
}I also added a change to the body size, to reduce the hitbox and make the game more fair. You will be able to see this by playing the game with debug mode on (this is on by default whilst running the app in development mode).

At the moment, our Aavegotchi fittingly floats through the pipes. However this doesn't make for a very fun game, so we need to add collisions between the
Player and the Pipes object:// src/game/scenes/game-scene.ts
...
export class GameScene extends Phaser.Scene {
...
public update(): void {
if (this.player && !this.player?.getDead()) {
this.player.update();
this.physics.overlap(
this.player,
this.pipes,
() => {
this.player?.setDead(true);
},
undefined,
this,
);
} else {
Phaser.Actions.Call(
(this.pipes as Phaser.GameObjects.Group).getChildren(),
(pipe) => {
(pipe.body as Phaser.Physics.Arcade.Body).setVelocityX(0);
},
this,
);
}
if (this.player && this.player.y > this.sys.canvas.height) {
window.history.back();
}
}
}In the update method, we are checking if there is an overlap between the player and the pipes. If so, set the player to
dead using setDead(true). If the player is dead, then we prevent the player from updating and set the pipes velocity to 0.The Aavegotchi will then drop off the bottom of the scene, which is when we will call some sort of
GameOver method, however for the scope of this tutorial we are using native Javascript to go back to the home screen.To give the player more feedback on this brutal collision, we can add a sound to play on collision.
Within
src/assets/sounds we already have a bunch of mp3 files. So what we will do is copy boop.mp3 from src/assets/sounds and paste it into the public/assets/sounds directory. Like we did before with the pipes spritesheet, we can import our sound into the game by adding it to the assets array in src/game/assets/index.tsx:// src/game/assets/index.tsx
...
export const BOOP = 'boop';
export const assets: Array<Asset | SpritesheetAsset> = [
...
{
key: BOOP,
src: 'assets/sounds/boop.mp3',
type: 'AUDIO',
},
];Now on collision we can play our boop sound.
// src/game/scenes/game-scene.ts

import { LEFT_CHEVRON, BG, CLICK, BOOP } from 'game/assets';

...

export class GameScene extends Phaser.Scene {
  ...

  // Sounds
  private back?: Phaser.Sound.BaseSound;
  private boop?: Phaser.Sound.BaseSound;

  ...

  public create(): void {
    ...
    this.back = this.sound.add(CLICK, { loop: false });
    this.boop = this.sound.add(BOOP, { loop: false });

    ...
  }

  ...

  public update(): void {
    if (this.player && !this.player?.getDead()) {
      this.player.update();
      this.physics.overlap(
        this.player,
        this.pipes,
        () => {
          this.player?.setDead(true);
          this.boop?.play();
        },
        undefined,
        this,
      );
    }

...Now that we have a losing condition, let's add in our scoring logic. First, we need a visual indicator of the players current score. For this we are going to create some simple text in the
GameScene. Then we can add a function to add to the score and edit the text like so:// src/game/scenes/game-scene.ts
...
export class GameScene extends Phaser.Scene {
...
// Score
private score = 0;
private scoreText?: Phaser.GameObjects.Text;
...
public create(): void {
...
this.scoreText = this.add
.text(getGameWidth(this) / 2, getGameHeight(this) / 2 - getRelative(190, this), this.score.toString(), {
color: '#FFFFFF',
})
.setFontSize(getRelative(94, this))
.setOrigin(0.5)
.setDepth(1);
...
}
...
private addScore = () => {
if (this.scoreText) {
this.score += 1;
this.scoreText.setText(this.score.toString());
}
};
...To make sure we can see the score in front of the Pipes, we set the depth to 1.
In our game, we want to call
addScore() every time the Player passes through the gaps in the pipes. Therefore we need to add an invisible game object called a Zone:// src/game/objects/scoreZone.ts
interface Props {
scene: Phaser.Scene;
x: number;
y: number;
width: number;
height: number;
velocityX: number;
}
export class ScoreZone extends Phaser.GameObjects.Zone {
constructor({ scene, x, y, width, height, velocityX }: Props) {
super(scene, x, y);
this.setOrigin(0, 0);
this.displayHeight = height;
this.displayWidth = width;
// Physics
this.scene.physics.world.enable(this);
(this.body as Phaser.Physics.Arcade.Body).setVelocityX(velocityX);
this.scene.add.existing(this);
}
public handleOverlap = () => {
this.destroy();
}
}Now let's create a new group in
GameScene for the ScoreZone. We then construct a ScoreZone and add to this group for every gap in addPipeRow():/// src/game/objects/index.ts
export * from './player';
export * from './pipes';
export * from './scoreZone';// src/game/scenes/game-scene.ts
...
import { Player, Pipe, ScoreZone } from 'game/objects';
...
export class GameScene extends Phaser.Scene {
...
private scoreZone?: Phaser.GameObjects.Group;
public create(): void {
...
this.scoreZone = this.add.group({ classType: ScoreZone });
this.addPipeRow();
...
}
private addPipeRow = () => {
const size = getGameHeight(this) / 7;
const x = getGameWidth(this);
const velocityX = -getGameWidth(this) / 5;
const gap = Math.floor(Math.random() * 4) + 1;
for (let i = 0; i < 7; i++) {
if (i !== gap && i !== gap + 1) {
const frame = i === gap - 1 ? 2 : i === gap + 2 ? 0 : 1;
this.addPipe(x, size * i, frame, velocityX);
} else if (i === gap) {
this.addScoreZone(x, size * i, velocityX);
}
}
};
private addScoreZone = (x: number, y: number, velocityX: number): void => {
const height = 2 * getGameHeight(this) / 7;
const width = getGameHeight(this) / 7;
this.scoreZone?.add(
new ScoreZone({
scene: this,
x,
y,
width,
height,
velocityX
})
)
}
...
}The ScoreZone is 2 times the height of the pipe to fill the space.
Despite the
ScoreZone being invisible, you will still be able to see the hit-box in debug mode.
Finally, all we have to do it add a new collision callback in the
update() method between the Player and the ScoreZone to add to score:// src/game/scenes/game-scene.ts
public update(): void {
if (this.player && !this.player?.getDead()) {
this.player.update();
this.physics.overlap(
this.player,
this.pipes,
() => {
this.player?.setDead(true);
this.boop?.play();
},
undefined,
this,
);
this.physics.overlap(
this.player,
this.scoreZone,
(_, zone) => {
(zone as ScoreZone).handleOverlap();
this.addScore();
}
)
}
...
}This overlap function has extra parameters in the callback function, as we need to remove the correct
ScoreZone from the group upon coming into contact with it to avoid duplicate points.In this lesson you have learnt how to use the aavegotchi-minigame-template, had a high level overview of Phaser3 and have been introduced to game development concepts such as Object Pooling.
Huzzuh! You now have the knowledge you need to create the singleplayer game of your dreams.
Now that you have your scores it would be great if you could store them in a leaderboard so you can compete with yourself and other Aavegotchi owners. To handle this, we will need to handle some server side logic:
You can find the code for the end result of Part 1 here
Make sure to follow me @ccoyotedev or @gotchidevs on Twitter for updates on future tutorials.
If you have any questions about Aavegotchi or want to work with others to build Aavegotchi minigames, then join the Aavegotchi discord community where you can chat and collaborate with other Aavegotchi Aarchitects!
57