
40
Social Authentication with Strapi and Nuxt.js: Getting Started
Social Authentication is becoming popular in the software industry because of the convenience it provides to the Users.
In this tutorial, we'll be learning how to integrate social authentication into our Strapi Application, and we'll be building simple Notes Sharing Application with Strapi backend and Nuxt.js frontend, we'll also use Quill.js as our text editor, Nodemailer for emails, we'll integrate infinite scrolling and many more features.
What you will need for this tutorial:
Here's what the final version of our Application looks like


You can find the GitHub repository for the frontend application here and the repository for the backend application.
Let's get started with our Strapi Backend setup:
The Strapi documentation says that "Strapi is a flexible, open-source Headless CMS that gives developers the freedom to choose their favorite tools and frameworks while also allowing editors to manage and distribute their content easily."
By making the admin panel and API extensible through a plugin system, Strapi enables the world's largest companies to accelerate content delivery while building beautiful digital experiences.
The documentation walks you through installing Strapi from the CLI, the minimum requirements for running Strapi, and how to create a quickstart project.
The Quickstart project uses SQLite as the default database, but we want to use MongoDB as our database, so we will do things a little differently here and head over to Strapi docs for MongoDB.
Make sure that you have the MongoDB server running before you start the process and leave the username and password options blank by pressing enter when prompted for them.
For latest updates on Strapi and MongoDB, please reference this blog post.
yarn create strapi-app my-project //using yarn
npx create-strapi-app my-project //using npx
Replace
my-project with the name you wish to call your application directory. Your package manager will create a directory with the name and will install Strapi.If you have followed the instructions correctly, you should have Strapi installed on your machine.
yarn develop //using yarn
npm run develop //using npm
To start our development server, Strapi starts our app on
http://localhost:1337/admin.Strapi provides an admin panel to edit, create APIs, and provide editable code, and it's easy to edit the code and use JavaScript.
On the Strapi admin panel, we have the
collection types, and these are similar to models or schema in a database. A collection type has fields that are like properties. Strapi offers a wide range of options for fields, including Text, Short Text, Relations, and many more.We also have the
Plugins section, which contains the content-type builder and the media library. The Content Builder allows users to create different content types, while the Media Library contains all the media uploads done by users.
Finally, we have the
General section, which has the marketplace, the plugins, and settings. The settings section allows us to set the user permissions, roles, and many more essential functions.Strapi also provides us with code generated based on the User's setting and actions in the admin panel, and we can open up this code with our favorite code editor to explore it more.
I'm using visual studio code.
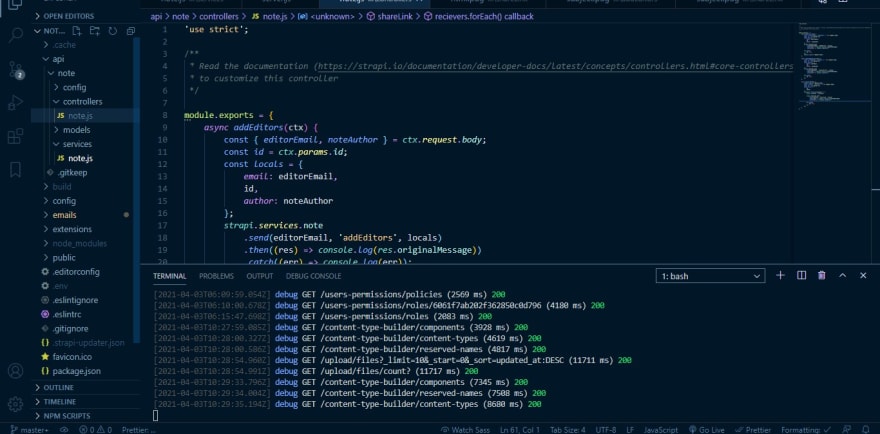
The
API section (directory) contains the different Content-Type present in our Application. It has a code to edit depending on what goals we plan to achieve with our Application. We can edit default settings, and we can create new services, routes, endpoints, add environment variables and do so much more all from the code.
For more information about the code composition of Strapi and what each section (directory) does, feel free to look at the Strapi project structure.
Now that the Strapi backend is up and running, we can start building the backend API. We'll create the backend using the Strapi admin panel.

Next, we are going to create the Notes Collection Type. Follow these steps below to create your first Collection Types.
note and then click Continue.Next, we are going to choose all the fields on the Notes Collection Type. Follow the step below to choose your types.
Text, name the field title, leave the type selection as Short Text, and add another field.Rich Text, name the field content, then click on add another fieldJSON, name the field Editors, then click on add another fieldRelations, and then click on the dropdown that's on the right side of the popup window, select User (from: users-permissions-user), then click on Users have many notes. It should look like the image below.
If you follow the steps above correctly, the final notes collection type schema should look like the image below.
Setting the permissions
Now, we have successfully created our Notes Content Types, let's add and assign a permission level on the notes Collection-Type for authenticated User by following the steps below.
GENERAL in the side menuCount and Find.Setting user-permissions for authenticated user
Next, we will also create and assign user permissions for an authenticated user by following the steps below.
findOne and me.Setting the permissions on the notes collection-type for public user
Next, we will also create and assign permissions on notes collection-type for our public users by following the steps below.
Setting the upload permissions for public user
We will also create and assign upload permissions for our public users by following the steps below.
Setting user-permissions for public user
Lastly, we will also create and assign user permissions for our public users by following the steps below.
Up until now, we used our local Mongo DB server on our local machine as the database for our application. However, if we want to successfully host our Strapi Application, we need a database that is hosted somewhere on the web because hosting providers cannot talk to your localhost.
To get started with MongoDB Atlas, follow the instructions below:
Create a Mongo DB account on the MongoDb website.
Create a Project and a Cluster
Click on Create a new Project.
Then click Build a Cluster, from the options page:
- Choose AWS as your Cloud Provider & Region.
- Select a Region that has a free tier
- Under Cluster Tier, select Shared Sandbox, Tier
MO. - Under Cluster Name, name your cluster.
Click the green Create Cluster button.
Under Overview click on the Database Access in the left menu :
- Click the green
+ ADD NEW USERbutton:- Enter a
username. - Enter a
password. - Under
User PrivilegesensureRead and write to any databaseis selected. Then clickAdd User.
- Enter a
Click on Network Access, under Security in the left menu:
- Click the green
+ ADD IP ADDRESS - Click
ADD CURRENT IP ADDRESSor manually enter in an IP address towhitelist. - Next add
0.0.0.0/0in theWhitelist Entry. - Leave a comment to label this IP Address. E.g.
Anywhere. - Click
Confirm. Then wait until the status turns fromPendingtoActive.
Retrieve database credentials
In order to retrieve your database credentials do the following:
- Under
Atlasin the left-hand, click onClusters. - Click
CONNECTand thenConnect Your Application. - Under
1. Choose your driver version, selectDRIVERasNode.jsandVERSIONas3.6 or later. - Your
CONNECTION STRINGshould be similar to this:
mongodb+srv://alecGodwin<password>@cluster0.5gjqw.mongodb.net/myFirstDatabase?retryWrites=true&w=majorityPlease replace
<password> with your Mongo DB Atlas password.Open up your config/database.js file and add the following lines of code
module.exports = ({ env }) => ({
defaultConnection: 'default',
connections: {
default: {
connector: 'mongoose',
settings: {
uri: env('DATABASE_URI'),
},
options: {
ssl: true,
},
},
},
});
Open up your .env file then add your connection string from instruction 5 as your DATABASE_URI .
Installing Nuxt.js
Next, we will install and configure NuxtJs to work with our Strapi backend.
To install Nuxt.js, visit the Nuxt.js docs or run one of these commands to get started.
yarn create nuxt-app <project-name> //using yarn
npx create-nuxt-app <project-name> //using npx
npm init nuxt-app <project-name> //using npm
The command will ask you some questions (name, Nuxt options, U.I. framework, TypeScript, linter, testing framework, etc.).
We want to use Nuxt in SSR mode, Server Hosting, and Tailwind CSS as our preferred CSS framework, so select those, then choose whatever options for the rest.
Preferably leave out C.I., commit-linting, style-linting, and the rest but do whatever you like. All we'll be needing in this tutorial is what I've mentioned above.
Once all questions are answered, it will install all the dependencies. The next step is to navigate to the project folder and launch it.
cd <project-name

yarn dev //using yarn
npm run dev //using npm
We should have the Nuxt.js Application running on
[http://localhost:3000](http://localhost:3000).That should be all for now. The following article will examine how we can add various providers (Facebook, GitHub) to our Strapi backend and build the appropriate frontend pages to handle redirects.
This tutorial is divided into 3 parts
40