
52
Syncing user data: Hasura & Auth0 for authenticated database access
Adding authenticated database access to your project can be a cool but tedious task. In this blog post (and the next), I'll try and explain how to add an authenticated database to your project. The article assumes (dangerously) that you have no experience with hasura or auth0 or node.js. If you've worked with both Hasura and auth0, you can go straight to the integration.
In this post, we'll focus on syncing user data across the identity provider (Auth0) and the GraphQL engine (Hasura). Whenever a user creates/ updates an account on Auth0, we'll make sure the necessary changes are reflected on a
users table in our database.Most of my projects involve a database and when it is at a sideproject level, I didn't really care about the authentication bit. For a Todo app, A database URL is used to talk to the DB directly and primary keys like
user_id is used to query from a unified table like tasks. The problem with this approach is that when the project gets out there, hoarding all those github stars, malicious users could easily query the DB using it's URL and pretend to be other another user just using their user_id. We could prevent this by implementing a robust identity management system and some access control at the database level. Let's see how we can implement exactly that.Create a new Hasura cloud account here if you don't already have one. Once you have logged in to the Hasura dashboard, create a new project. Choose the free tier. Once the project is created, Click on
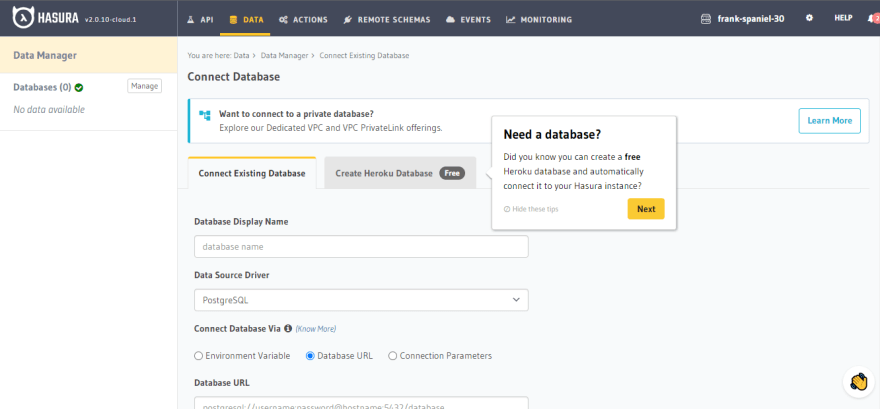
Launch Console. This will open up a new tab where you can interact with the Hasura console. We need a provider to host our PostgreSQL database. We will be using Heroku for this tutorial. While the Hasura console is booting up go to Heroku and create an account.
After the console opens up, click the
Click on
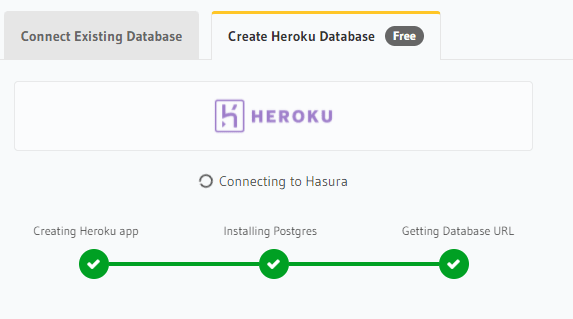
Once the database is created, click on
Here we create a
Setting federated_id as unique will generate some necessary indexes that we'll require later. Finalize table creation by clicking

Don't worry about adding data into this table just yet. We'll set up an automated flow so that the users table is automatically updated when a user signs up with Auth0.
Data tab at the top Click on
Create Heroku Database. You'll be shown some prompts regarding Hasura's connection to Heroku; approve the connections Once the database is created, click on
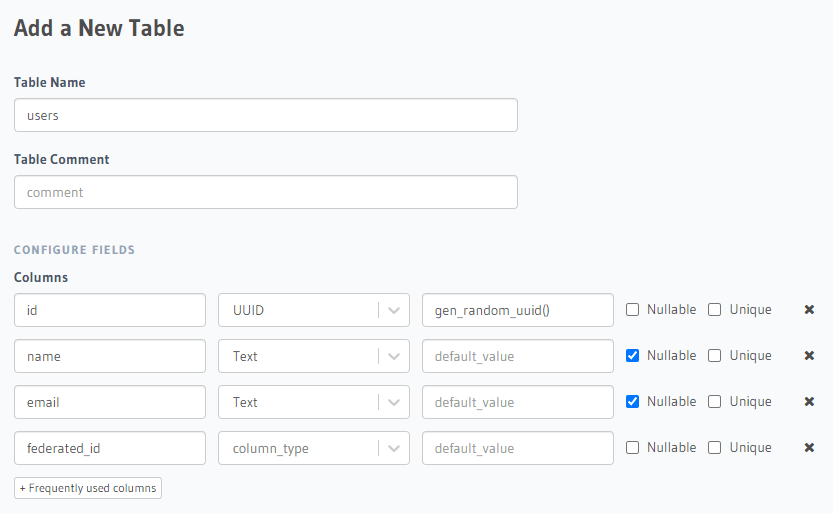
public on the Data Manager tab to the left. Create a table using the Create table button and add the necessary attributes (click on + Frequently used columns to add common columns) Here we create a
users table with attributes: id, name, federated_id. Make sure id and federated_id are set as unique.Setting federated_id as unique will generate some necessary indexes that we'll require later. Finalize table creation by clicking
Add table. Don't worry about adding data into this table just yet. We'll set up an automated flow so that the users table is automatically updated when a user signs up with Auth0.
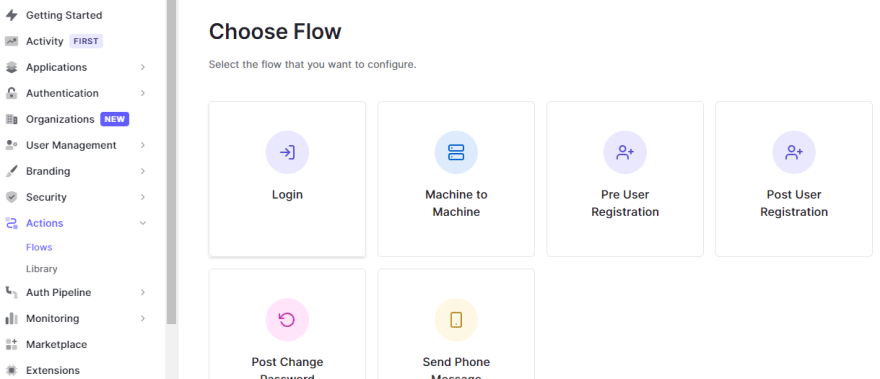
Create an account and then log in to Auth0. On the dashboard, Click

Click on the
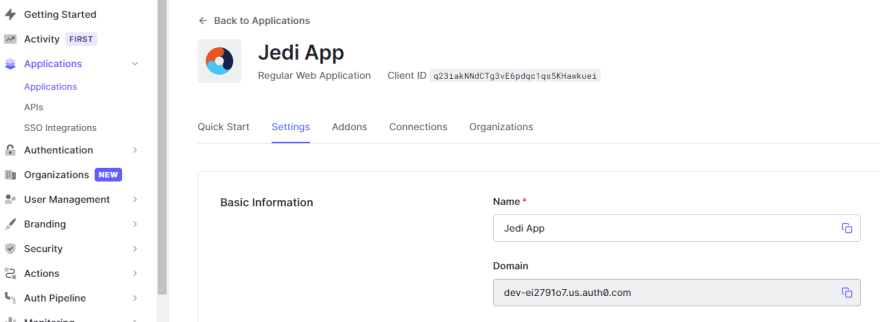
Applications under Applications in the left sidebarClick on the
Create Application button and enter the name of the application, let's call it Mini twitter. If you're using a framework like Next.js on the frontend, select Regular Web Applications as the application type. Select technology that you're using (this will let Auth0 recommend settings and instructions on how to set up the application); In our case, select Next.jsNow we'll connect our Auth0 application to the Hasura project. To get started, get your auth0 project domain from
By default, Hasura creates an admin secret to secure the project GraphQL endpoint. We now need to instruct Hasura to use Auth0 public keys. The config for the JWT can be easily created by using the tool here.
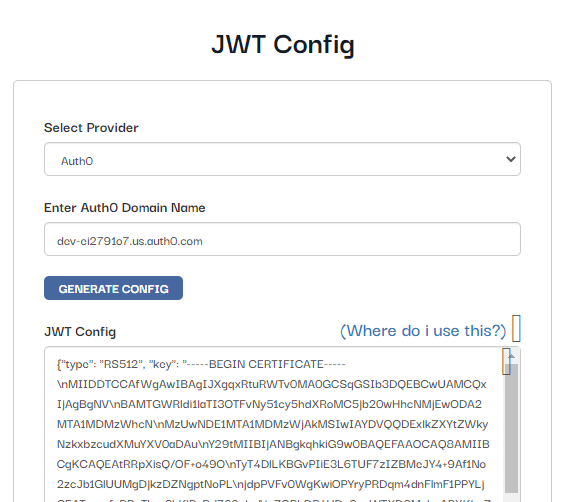
Paste in the domain name you got from the Auth0 dashboard and generate the config. Copy the generated config, go to hasura dashboard, click on the gear icon on the project. The project settings will now open up. Click on
Applications > Applications > Settings > Domain By default, Hasura creates an admin secret to secure the project GraphQL endpoint. We now need to instruct Hasura to use Auth0 public keys. The config for the JWT can be easily created by using the tool here.
Paste in the domain name you got from the Auth0 dashboard and generate the config. Copy the generated config, go to hasura dashboard, click on the gear icon on the project. The project settings will now open up. Click on
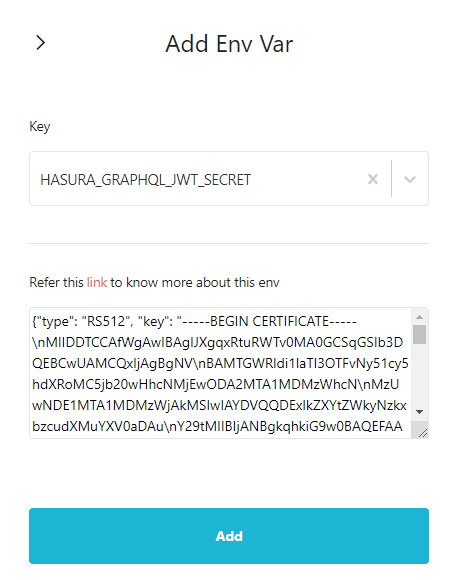
Env vars on the left side and add a new env var HASURA_GRAPHQL_JWT_SECRET. Paste in the config you copied into the field, click on Add. Now we need to make sure that the users who log in through Auth0 are synced with the user data on the database managed by Hasura. When th user signs up with their email and password, we want to make sure that a new row is added to the
users table in Hasura DB. We'll implement the syncing using Auth0 actions. In the Auth0 dashboard, click Actions on the left sidebar and click on Library. This page will show all the actions that you've created. Click on the Build Custom button. Enter a name for the action, like
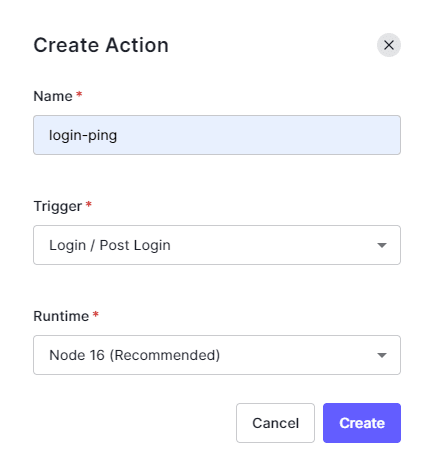
login-ping. Select the trigger as Login / Post Login. Choose the Node 16 runtime. Now click on the
Custom tab and then click on the newly created action. A code editor will open up. Paste the following code into the editor./**
* Handler that will be called during the execution of a PostUserRegistration flow.
*
* @param {Event} event - Details about the context and user that has registered.
*/
const axios = require("axios");
exports.onExecutePostLogin = async (event) => {
const federated_id = event.user.user_id;
const username = event.user.nickname;
const email = event.user.email;
const admin_secret = event.secrets.HASURA_SECRET;
const url = "https://YOUR_HASURA_ENDPOINT";
const query = `mutation ($federated_id: String!, $email: String, $username: String) {
insert_users(objects: {federated_id: $federated_id, email: $email, username: $username}, on_conflict: {constraint: users_federated_id_key}) {
affected_rows
}
}`;
const variables = {
federated_id: federated_id,
email: email,
username: username,
};
const config = {
headers: {
"content-type": "application/json",
"x-hasura-admin-secret": admin_secret,
},
};
const data = JSON.stringify({
query: query,
variables: variables,
});
await axios.post(url, data, config);
};Edit the
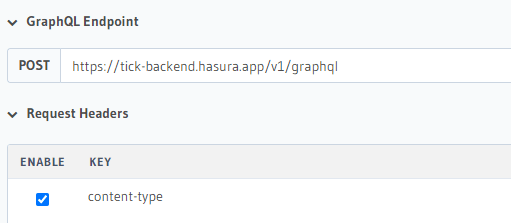
Click on the key icon on the left side of the editor to add the
url with the URL of the Hasura graphql endpoint. You can get this from the Hasura dashboard Click on the key icon on the left side of the editor to add the
HASURA_SECRET environment variable. Copy the x-hasura-admin-secret and set it as the HASURA_SECRET variable. Click Deploy.Earlier we secured the Hasura graphql endpoint. This means that we have to do some additional steps to make sure our requests get accepted by Hasura. Hasura evaluates the request sender's
role to determine the permissions allowed to the user. Furthermore, the user-id is also evaluated to enable a more granular permission system. Thus we need to embed the role and user_id in the user token that we'll be using to gain access to Hasura.To embed the user details in the token, we are going to create another custom action
login-hasura-token with a Login / Post Login trigger. Add the following code into the action editor./**
* Handler that will be called during the execution of a PostLogin flow.
*
* @param {Event} event - Details about the user and the context in which they are logging in.
* @param {PostLoginAPI} api - Interface whose methods can be used to change the behavior of the login.
*/
exports.onExecutePostLogin = async (event, api) => {
api.idToken.setCustomClaim("https://hasura.io/jwt/claims", {
"x-hasura-default-role": "user",
"x-hasura-allowed-roles": ["user"],
"x-hasura-user-id": event.user.user_id,
});
};To add the actions to the authentication flow, on the Auth0 dashboard, click on
The action that we've coded is designed to be executed after a user logs in. Click on the
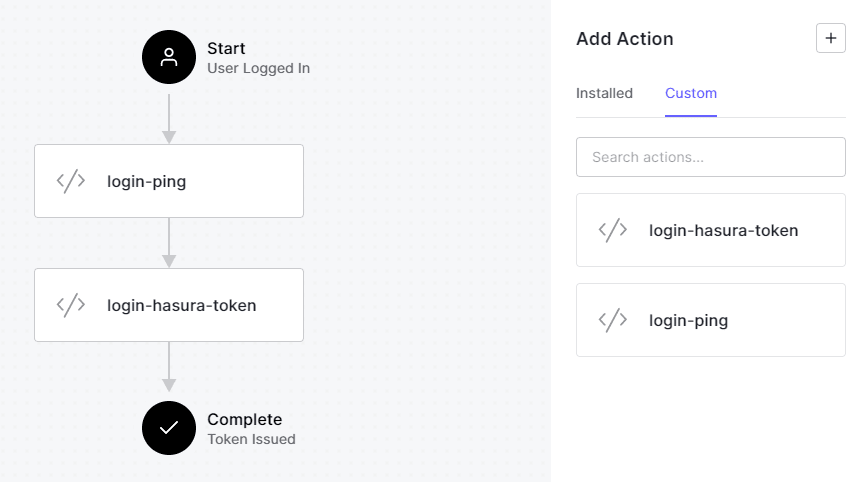
Actions and then Flows on the left sidebar. The action that we've coded is designed to be executed after a user logs in. Click on the
Login option. A flow chart showing the login flow will be shown. Add the newly created actions by selecting them from the menu on the right. Drag the actions and place them into the flow chart. Make sure login-ping is placed first. Click on apply. Let's test if a new user sign-up adds the user data into the DB. On the sidebar, click on

You'll be redirected to a login page, switch to sign up mode, and enter an email and a password. You should be redirected to a screen that tells you the sign-up has been successful. Now go to your Hasura console and see if the user details have been added to the table.
Getting Started then click Try it out -> in the Try your Login box dialog box. You'll be redirected to a login page, switch to sign up mode, and enter an email and a password. You should be redirected to a screen that tells you the sign-up has been successful. Now go to your Hasura console and see if the user details have been added to the table.
In this post, we saw how we can sync the data in Auth0 with the data in our database. But we're not done. We still need to enable access controls to ensure that authenticated users won't be allowed access to the data of other users. We'll implement this in the next post.
52