
51
Step By Step Guide To Create A Twitter Bot Using Nodejs Hosted On DigitalOcean For Free
Original Post Link => https://webbrainsmedia.com/blogs/twitter-bot-using-nodejs-hosted-on-digitalocean
Recently, I posted the tweet shown below. The special thing about this tweet is that when the like or retweet counter gets updated my profile name will also get updated to show the current likes and retweet value. This is done by the Nodejs script running behind the scene on a DigitalOcean Droplet.
To see this in action you need to like and retweet the below tweet (It will take a minute to reflect the changes in the profile name)
So, In this article i will explain all the steps that i took to create this twitter bot from scratch and also explain how you can host it on the DigitalOcean Droplet for free.
Firstly, If you are new to DigitalOcean. Then, you need to create a new digitalocean account using this Link.
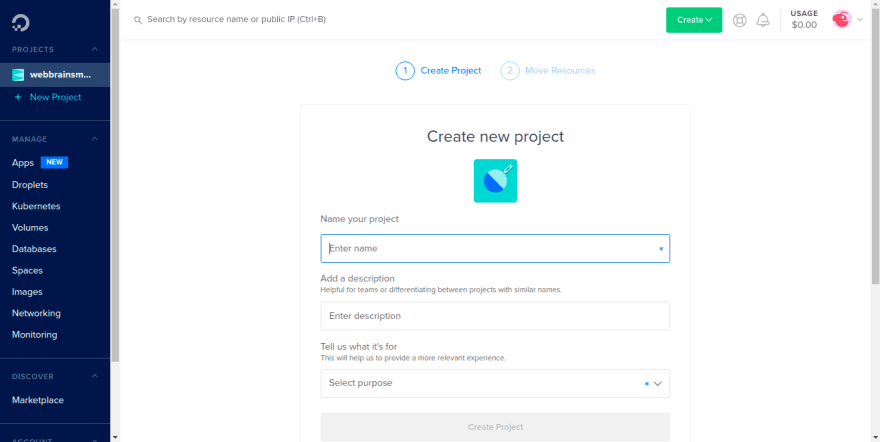
Complete the simple signup process and visit the DigitalOcean dashboard by clicking on the DigitalOcean Logo. After that click on the 'New Project' option to create a new project.
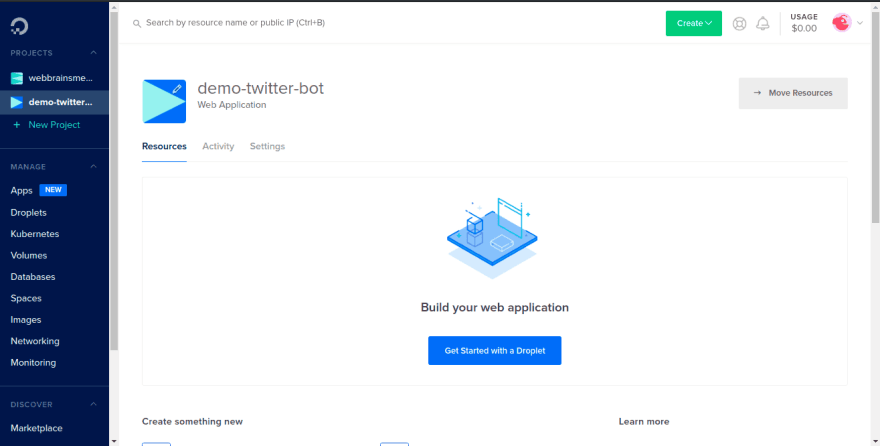
After creation, You will see your project been added on the left sidebar. Now, click on the 'Get Started with a Droplet' Button to create your new Droplet (DigitalOcean Droplets are simple Linux-based virtual machines (VMs) that run on top of virtualized hardware)
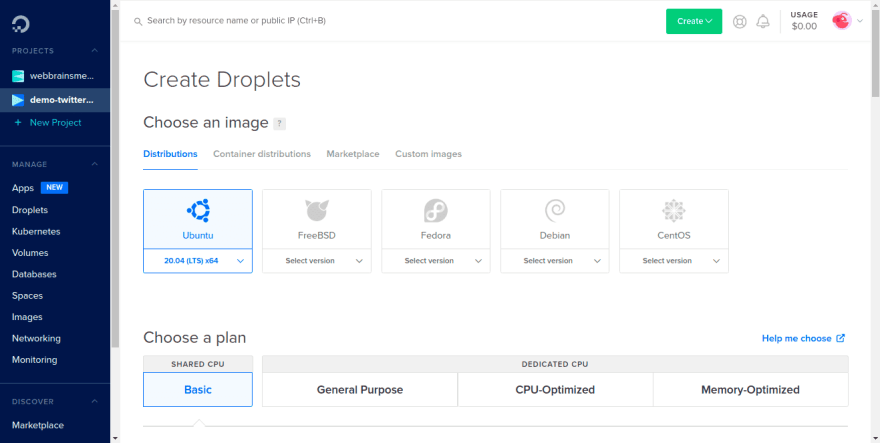
After this, You will be asked to configure your droplet. For image selection we will start with a fresh 'Ubuntu 20.04(LTS)x64' image.
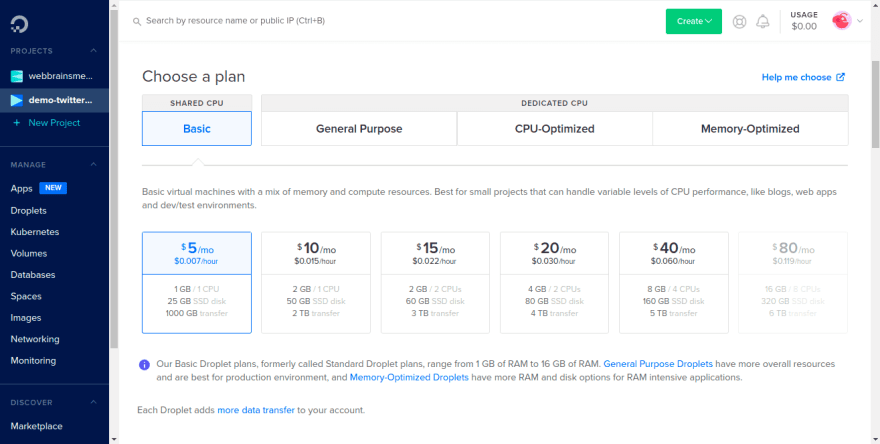
Now, Select the Basic $5 Plan for our Droplet.
Now, Scroll down directly to 'Authentication' Section and select SSH Keys as the Authentication Method. Click on 'New SSH Key' Button to add a new SSH Key. After clicking, A modal will open asking for your public SSH key.
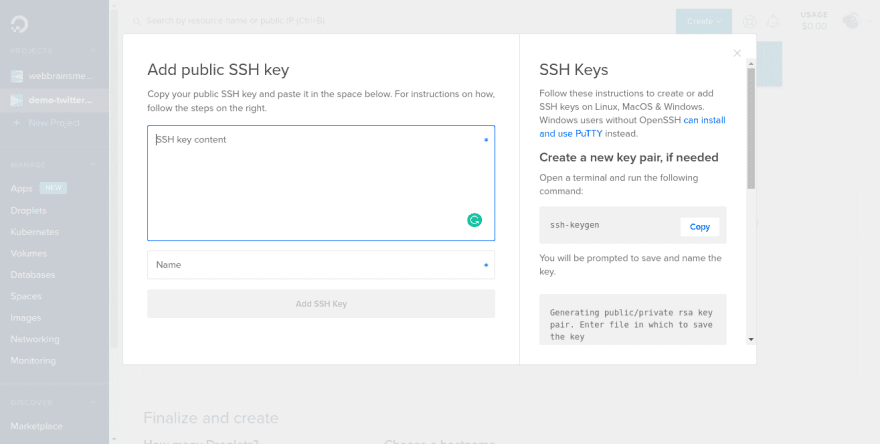
To create a new SSH Key pair just type the below command in your terminal.
ssh-keygen -o -t rsa -C "[email protected]"(Remember to replace the comment with your own email)
After That, you will be asked for the path to save the keys. hit enter to accept the default location.
Generating public/private rsa key pair.
Enter file in which to save the key (/home/sj/.ssh/id_rsa):
Next, you will get an option to provide the passphrase to make your keys more secure. This is optional and you can skip it by pressing enter two times.
Enter passphrase (empty for no passphrase):
Enter same passphrase again:
Finally, After your keys are generated. You will see the below message.
Your identification has been saved in /home/sj/.ssh/id_rsa
Your public key has been saved in /home/sj/.ssh/id_rsa.pub
The key fingerprint is:
SHA256:40XYRaLv66J9UVk1wrMVgMFQh0/BaV5OhJG2ZsOsbEU [email protected]
The key's randomart image is:
+---[RSA 3072]----+
|         .=+O*O=o|
|         + *.Eo+.|
|        o o XoO  |
|         o  o% . |
|        S +.= .  |
|       . +.+     |
|        . o.     |
|       .. ..     |
|      ...+o      |
+----[SHA256]-----+
So, we have generated our
SSH key pairs. Now, we can access content of our public key by using cat command.cat ~/.ssh/id_rsa.pubOutput:
ssh-rsa AAAAB3NzaC1yc2EAAAADAQABAAABgQDOXmwRpIsoXEQsKgw1Y43+yJ8JaU2iY1uc45pg7VcD9Pim748LcUzoa8YHF14yE6LeD9YVZcdu1PHC2xOJP5/eVzweBEFHq4onzNZZ5mO04+2WZQB72d6drJKJce+JXtHv8S3PWZQFYXA6cueBZwpiSeMI1Bu5Sz+idafsw4QY01E9JBDWOtx8d468u2uLeMl8rlFj+0uiN/K9tDlMuiH3U8B3XcH3bYBky0C2bQxeSZ4l3o/X76rt0tythOxxd/Xasw461wFQYYNYqLRZKHxryg/5uTBzOMIVXBykTzH1ffBx/BoZioBVsWeH/uPC5i6zle800MZEBylWDpHh8VBp7NBrEQEwJqPrHEtchIyiFkBSMUKoAUku2EzyT7aFxM+O0hAJMZ9wqHX0qdF0zJb0U4rMysyuAs+MVK54e6dMXqV0ai03jOde9/TibDMdeKYZ8SygxhbKH8ibNIwwoF/YtyJoqsBRiOj8R2YN/GCnijNlB8sMq6J4XRcfl7JKyp0= [email protected] ~/.ssh/id_rsa.pubCopy your public
SSH key and paste it in the 'SSH key content' Box and also give a name to your key. I am going to give 'Droplet SSH' Name to my key for this tutorial. After that click on 'Add SSH Key' Button.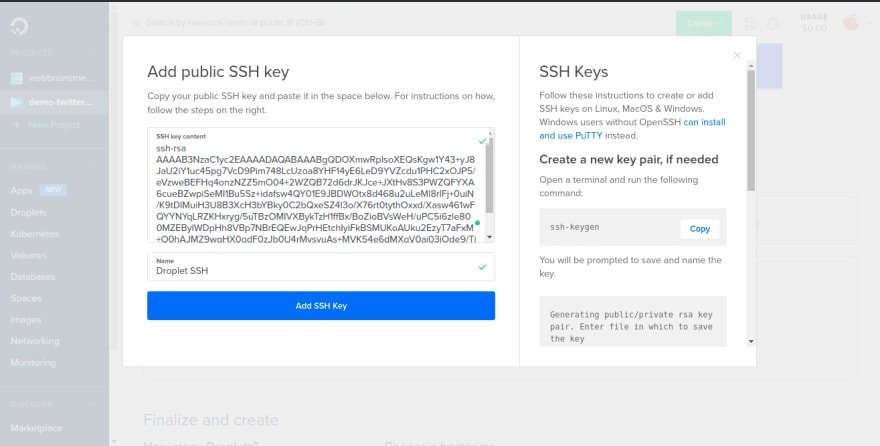
Select your new key.

Next, Under 'Choose a hostname' Section give your droplet a name that you want. I am going to call it 'twitter-bot' for this tutorial.

Now, You are all set to go. Just click on the 'Create Droplet' Button and wait for DigitalOcean to create your droplet.

Okay, Now to access your droplet via SSH, copy your ipv4 address. In my case it is
206.189.183.112 and in your terminal type the below command with your ipv4 address.After that, You will be asked if you trust the host. Just enter 'yes' and click enter. If you see the prompt then, you have successfully logged in to your droplet.

Okay, Now will create our new user in ubuntu. We can do that by typing the below command.
adduser wbmYou will be prompted for a new password. Give a new password, retype it and click enter.
Next, you will be asked some user information. You can fill it if you want otherwise, Just click enter. Finalise the information by typing 'y' and clicking enter.
After this, You will get back to your root prompt again. To verify your new user just type the below command.
id wbmOutput:
uid=1000(wbm) gid=1000(wbm) groups=1000(wbm)Now, You will notice that our user is not in the sudo group. We want to put our user in sudo to run things as administrator. So, to do thar type the below command with your username.
usermod -aG sudo wbmNow, If you run
id wbm Command. You will see your user in sudo group.uid=1000(wbm) gid=1000(wbm) groups=1000(wbm),27(sudo)Okay, Now to login with the user just type the below command.
sudo su - wbmAfer this, You will see the prompt being changed to
wbm@twitter-bot. You can also double check by typing the below command.whoamiOutput:
wbmNow, Logging into our user like this is a very cumbersome process. To directly login into our user via SSH we need to authorize our SSH Key with our new user. For that we need to first make a directory by running the below command.
mkdir ~/.sshNext, Change the permission to 700 by typing the below command.
chmod 700 ~/.sshNow, We will create a new file named 'authorized_keys'.
nano ~/.ssh/authorized_keys'authorized_keys' file will open up in the nano editor. Now we just need to paste our SSH Key into it that we previously saved while configuring our droplet with name 'Droplet SSH' (Make sure that whole key comes in single line without spaces).

After pasting, Press
ctrl + x and y to save and exit.Now, Change the permission of the file to 600 by typing the below command.
chmod 600 ~/.ssh/authorized_keysNow, Restart the SSH Service to apply the changes.
sudo service ssh restartOkay, Now we are all done. To test it out, Close your terminal and start a new one. Then, type the below command to login to the user via SSH.
So, Now you must be logged into your droplet with your user. Next step is to install Nodejs on our server. To do that run the below commands.
curl -sL https://deb.nodesource.com/setup_14.x | sudo -E bash -
sudo apt-get install -y nodejs
After this, Nodejs is successfully installed on our server. We can run
node -v to see the node version and confirm the installation.Okay, Now lets proceed to create our bot application. For that first create a directory in which we will store our code.
mkdir ~/twitter-botNow, cd into the directory.
cd twitter-bot/Initialize Npm. This will create a package.json file.
npm init -yNow, create a new file named 'server.js'
touch server.jsOpen server.js using nano editor.
sudo nano server.jsPaste the bot script in the editor. You can also get the application files from the Github Repo .
const Twitter = require('twitter-lite')
let cron = require('node-cron');

const client = new Twitter({
    consumer_key: "paste_your_key",
    consumer_secret: "paste_your_key",
    access_token_key: "paste_your_key",
    access_token_secret: "paste_your_key"
});

const getTweetLikesAndUpdateProfile = async () => {
    const tweetData = await client.get("statuses/show", {
        id: "1315114170933628929"
    }).catch(err => {
        console.log(err)
    })

    if ("favorite_count" in tweetData && "retweet_count" in tweetData) {
        const name = `SJ - this tweet has ${tweetData.favorite_count} likes and ${tweetData.retweet_count} retweets`
        await client.post("account/update_profile", {
            name
        }).catch(err => {
            console.log(err)
        })
    }

}

cron.schedule('*/1 * * * *', () => {
    console.log('running a task every 1 minutes');
    getTweetLikesAndUpdateProfile()
});

console.log('started')
After this, you just need to replace the given id with the id of the tweet that you want to track (You can easily get the id of the tweet by visiting the tweet on twitter and copying the id from the URL).
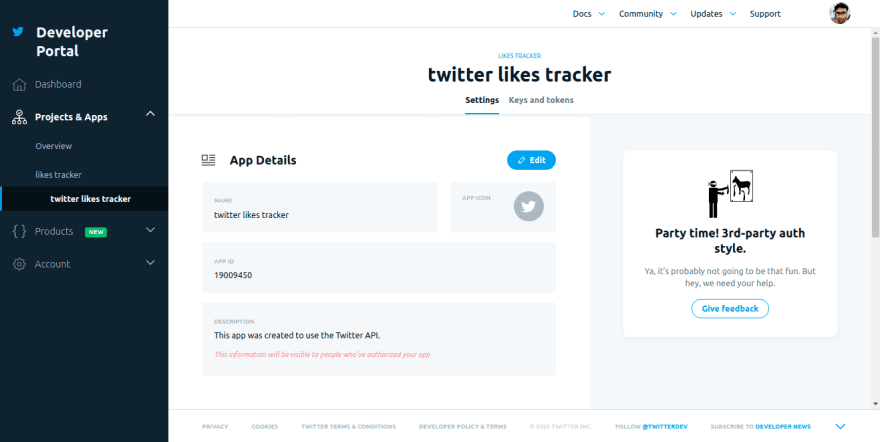
As for the Keys part, You have to first visit this Link and apply for a developer account. Once you are granted access, Create a new project and app by visiting the Twitter Developer Portal.
After this, visit the 'Keys and tokens' section and generate + copy your keys.
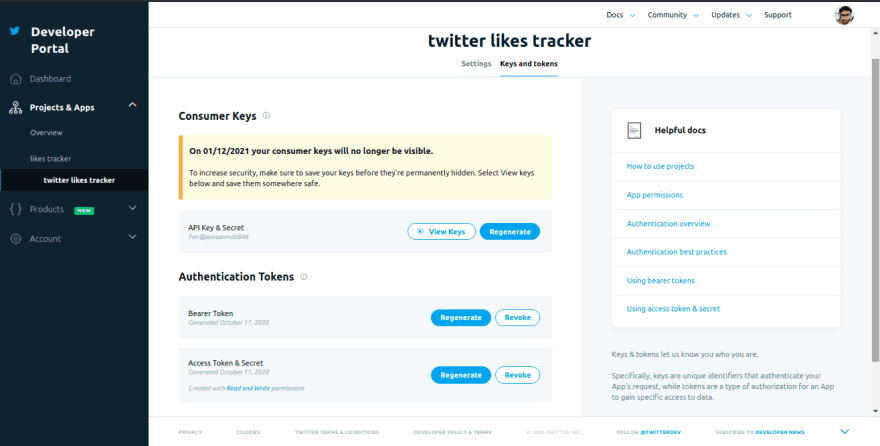
So, now paste your
API Key And Secret in consumer_key and consumer_secret and Access Token & Secret in access_token_key and access_token_secret Respectively.Save the changes and exit the server.js file by pressing
ctrl + x and y. After this, Open the package.json file in nano editor by running the below command.sudo nano package.jsonDelete the test script and add the start script like this.
"scripts": {
-    "test": "echo \"Error: no test specified\" && exit 1"
+    "start": "node server.js"
  },
Also, Add the node dependencies that we have in our server.js file.
"author": "",
"license": "ISC",
+ "dependencies": {
+     "node-cron": "^2.0.3",
+     "twitter-lite": "^0.14.0"
+ }
Save the changes and exit the package.json file by pressing
ctrl + x and y. Next, we also need to install the node dependencies. To do that run the below command.npm installNow, our script is ready and we can start the script by running the below command. After successfull startup you will see the log
started in the console.npm startYou can exit by pressing
ctrl + c. It is recommended to use a service known as pm2 to run our application as a process. To install pm2 Run the below command.sudo npm install pm2 -gNow, We can start the server by running the command.
pm2 start server.jsAfter this, You can see our server is online and the terminal is also freed. You can now exit the server by typing
exit command. Anytime, you want to see your pm2 processess use
pm2 ls command or if you want to stop a process use pm2 stop {id}.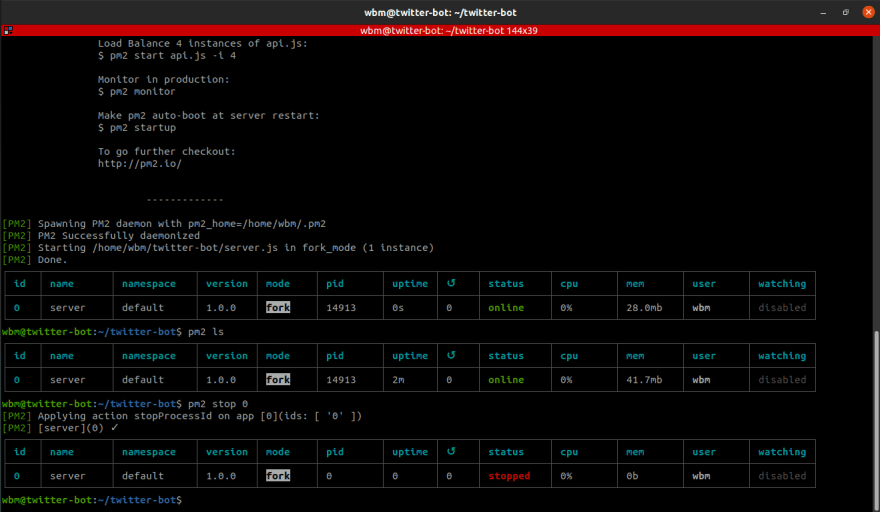
Congrats, You have successfully deployed your first nodejs application to the cloud. If you have any problem, Comment it down and i will try to resolve it ASAP.
Cheers 🍻!!
Original Post Link => https://webbrainsmedia.com/blogs/twitter-bot-using-nodejs-hosted-on-digitalocean
51