28
loading...

npx create-next-app or yarn create next-app in your terminal followed by the name of your application. The previous commands will set everything up for you automatically. Afterwards, it will return a few commands you may use to do things such as start the server. The commands that you will see are as follows:npm run dev
Starts the development server.
npm run build
Builds the app for production.
npm start
Runs the built app in production mode.index. This will give you the root page that you're used to that looks like www.mywebapp.com/ or www.mywebapp.com/movies. Nested routes are easy to create as well. "How?" you may ask. Create a folder in the pages directory and viola! A nested route appears. Now, what if you want your link to be more dynamic? In the pages directory you will use bracket syntax (pages/[username]/settings.js) which will allow you to match parameters in your routes. This also makes linking between pages easier! You will need to import the React component Link to allow for client-side transitions. With Link imported you'll be able to set href equal to the desired page path.<Link href="/movies">
<Link href="/">req(instance of http.IncomingMessage) and res(instance of http.ServerResponse) parameters. The request method is always GET, so you will need to tell your function when/if you need it to process a POST, PATCH or DELETE request by setting your request method to your specified method (i.e. req.method === 'PATCH'). According to the documentation, if you're like me and you're using an existing API you "do not need to forward calls through an API Route." Other options are masking the URL of an external service or using environment variables on the server.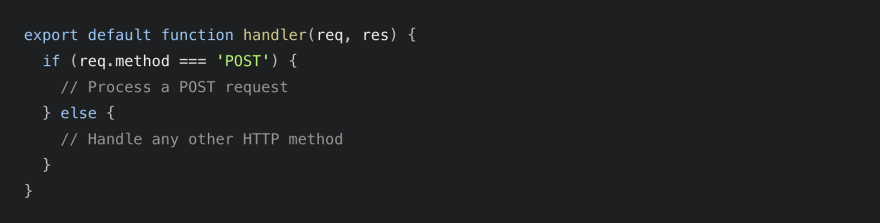
28