
40
Part-1: A Beginner's Practical Guide to Containerisation and Chaos Engineering with LitmusChaos 2.0
This blog is part one of a two blog series that details how to get started with containerization using Docker and Kubernetes for deployment, and later how to perform chaos engineering using LitmusChaos 2.0. Find Part-2 of the blog here.
So you’ve just come across this term called Containerisation and now you’re wondering that as an aspiring software product engineer, or a DevOps engineer, what role will it play in your day-to-day work. After all, applications can be deployed without containers, and in fact, that has been the norm for a long time until containerization technologies like Docker, Kubernetes came into the big picture. So what’s all the fuss about?
In this blog, I’d try to answer all your questions, starting from what are containers, how containers got themselves into the limelight, why one should use them, what is container orchestration, advantages of container orchestration, and finally we will deploy a Node.js application using Docker and Minikube Kubernetes. Please take note that this blog will try to put more emphasis on the practical aspect of using Containers, and won’t encompass the basic theoretical concepts of Docker and Kubernetes at a large, but only those concepts which are necessary to understand the demo.
As Docker defines it:
A container is a standard unit of software that packages up code and all its dependencies so the application runs quickly and reliably from one computing environment to another.
Simply said, containers allow applications to run in an isolated environment of their own, along with all its dependencies. This decoupling makes it simple and consistent to bundle and deploy container-based applications along with all their dependencies, regardless of whether the target environment is a private data center, the public cloud, or even a developer’s personal laptop.
A hypervisor virtualizes physical hardware in conventional virtualization. As a result, each virtual machine has a guest OS, a virtual copy of the hardware that the OS needs to run, and an application with all of its related libraries and dependencies. On the same physical server, multiple virtual machines running different operating systems will coexist. A VMware VM, for example, can coexist with a Linux VM, which in turn can coexist with a Microsoft VM, and so on.
Containers virtualize the operating system (typically Linux or Windows) rather than the underlying hardware, so each container only contains the portable and its libraries and dependencies. Containers are small, fast, and portable since, unlike virtual machines, they do not need a guest OS in every instance and can instead rely on the host OS’s features and resources.
Containers, like virtual machines, allow developers to make better use of physical machines’ CPU and memory. On the other hand, Containers go much further because they support microservice architectures, which allow for more granular deployment and scaling of application components. This is a more appealing option than scaling up an entire monolithic framework because a single component is experiencing load issues.
Faster time to market: Keeping the competitive advantage needs new software and services. Organizations may use growth and organizational agility to accelerate the implementation of new services.
Deployment velocity: Containerization allows a quicker move from production to implementation. It allows DevOps teams to reduce deployment times and frequency by breaking down barriers.
Reduction of IT infrastructure: Containerization increases the density of device workloads, improve the utilization of your server compute density, and cut software licensing costs to save money.
Performance in IT operations: Containerization allows developers to streamline and automate the management of multiple applications and resources into a single operating model to improve operational performance.
Obtain greater freedom of choice: Any public or private cloud can be used to package, ship, and run applications.
As VMware defines it:
Container orchestration is the automation of much of the operational effort required to run containerized workloads and services. This includes a wide range of things software teams need to manage a container’s lifecycle, including provisioning, deployment, scaling (up and down), networking, load balancing and more.
Running containers in production can easily become a huge effort due to their lightweight and ephemeral nature. When used in conjunction with microservices, which usually run in their own containers, a containerized application will result in hundreds or thousands of containers being used to construct and run any large-scale system.
If handled manually, this can add a lot of difficulties. Container orchestration, which offers a declarative way of automating much of the job, is what makes the organizational complexity manageable for creation and operations, or DevOps. This makes it a natural match for DevOps teams and cultures, which aim for much greater speed and agility than conventional software development teams.
If handled manually, this can add a lot of difficulties. Container orchestration, which offers a declarative way of automating much of the job, is what makes the organizational complexity manageable for creation and operations, or DevOps. This makes it a natural match for DevOps teams and cultures, which aim for much greater speed and agility than conventional software development teams.
Improved Resilience: Container orchestration software can improve stability by automatically restarting or scaling a container or cluster.
Simplification of Operations: The most significant advantage of container orchestration, and the primary explanation for its popularity, is simplified operations. Containers add a lot of complexity, which can easily spiral out of control if you don’t use container orchestration to keep track of it.
Enhanced Security: Container orchestration’s automated approach contributes to the protection of containerized applications by reducing or removing the risk of human error.
Let’s get our hands dirty by deploying a simple Node.js application using a Docker container, followed by deploying the container image in a Minikube Kubernetes cluster in our own development machine.
Before we move on to the actual demo, let's check a few pre-requisites off the list so that we will all be on the same page:
Before we move on to the actual demo, let's check a few pre-requisites off the list so that we will all be on the same page:
It's worth mentioning that I will be using a machine running on Ubuntu 20.04 for this demo, though you should be fine with a Windows machine too. For this demo, we’ll not cover the installation part of Docker and Minikube since they are pretty straightforward and require no special instruction, and focus on the deployment part only.
Let’s start with a very basic Node.js “Hello World” application for this demo. The application has been developed as any other Node.js application, after initializing an empty repository using
npm init. The package.json generated is as follows:Once that’s done, we can set up our
index.js as follows:Here we have a pretty basic Node.js server and all it does is serve the string ‘Hello World’ when a GET request is sent to the loopback address, at port 3000. Upon executing the above code using node index.js we obtain the following output:
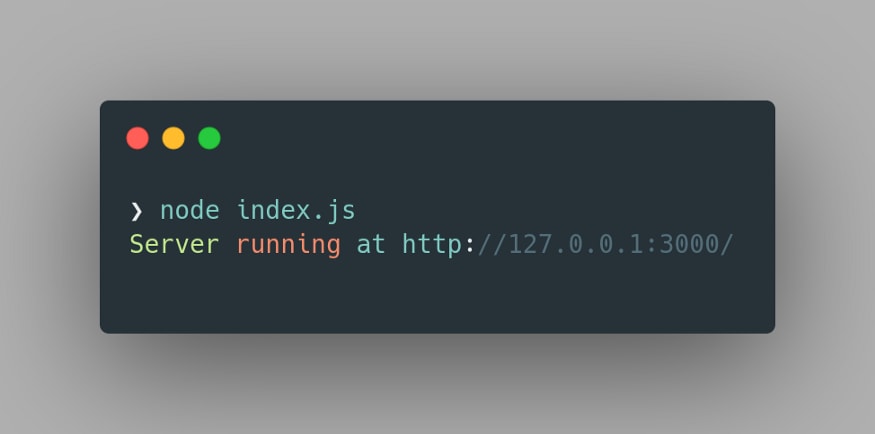
And we do get our Hello World at
http://127.0.0.1:3000/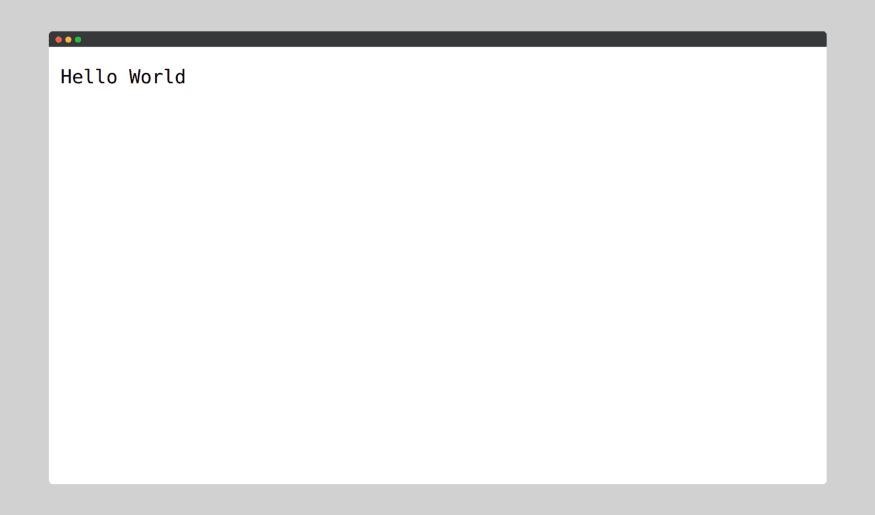
Simple, right? Once that’s done, let’s move on to the sweet part, creating a container image of our application using Docker.
Once we have our application up and running, we can proceed to dockerizing the application. But before we do that, let us initialize a startup script in our
package.json so that our application can be readily executed by Docker. Therefore, we’d modify our package.json as follows:Now we are all set to Dockerize our application! To do that we need to simply create a Dockerfile in the same directory as of our
index.js. A Dockerfile is simply a set of instructions required for building the container image of the application. Our Dockerfile looks something like this:Let us walk through each of these commands to better understand their purpose.
The
FROM instruction initializes a new build stage and sets the Base Image for subsequent instructions. A Base Image is simply a Docker image that has no parent image, which is created using the FROM scratch directive. As such, a valid Dockerfile must start with a FROM instruction. Here we are using the node v12.0 slim Base Image.The
WORKDIR command is used to set the working directory for all the subsequent Dockerfile instructions. If the WORKDIR is not manually created, it gets created automatically during the processing of the instructions. It does not create new intermediate Image layers. Here we set our working directory as /app.The
COPY instruction copies new files or directories from <src> and adds them to the filesystem of the container at the path <dest>. Here we are copying the package.json file to /app directory. Interestingly, we don’t copy the rest of the files into /app just yet. Can you guess why? This is because we’d like Docker to cache the first 3 commands so that every time we run docker build we won’t need to execute those commands, and thus improve our build speed.RUN command can be used in two ways; either through a Dockerfile as shown here, otherwise through the Docker CLI. The RUN instruction will execute any commands in a new layer on top of the current image and commit the results. The resulting committed image will be used for the next step in the Dockerfile. To install the Node.js app dependencies from the package.json file, we use the RUN command here.Next, we use COPY to move all the remaining files to the
/app directory.Finally, we use the
CMD command to execute the Node.js application. The main purpose of a CMD is to provide defaults for an executing container. These defaults can include an executable, or they can omit the executable, in which case we must specify an ENTRYPOINT instruction as well. There can only be one CMD instruction in a Dockerfile. If we list more than one CMD then only the last CMD will take effect.And we’re done with the
Dockerfile. Now we’re all set to build our container image, which can be done using the command docker build -t hello-world:1.0 .The only important takeaway here is that we MUST tag our image via
-t flag, as it’d be very much beneficial for us to deploy and manage the container image later on. Here we have specified the name of our container image as hello-world and tagged it with its version 1.0. We had seen a similar practice with our Base Image node:12-slim as well. Lastly, we specified the directory from where the Dockerfile is located using the . path.Upon building the image, Docker tries to fetch the Base Image if it's not present in the local registry. Next, it executes the set of instructions given in the
Dockerfile in a sequential order to complete the build process. Here’s the build output: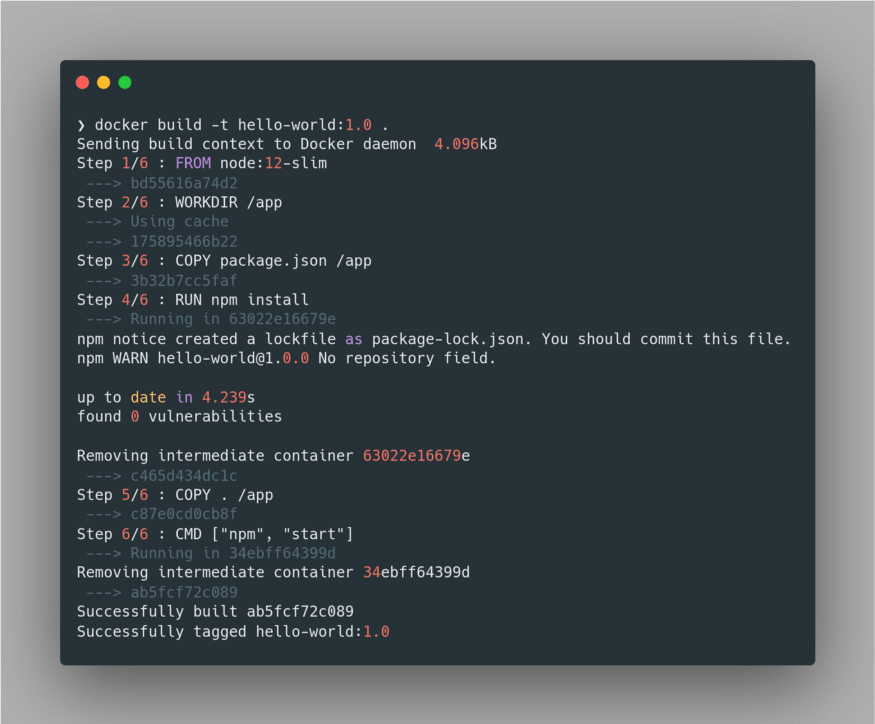
Upon a successful build, we can view our image using the command
docker images: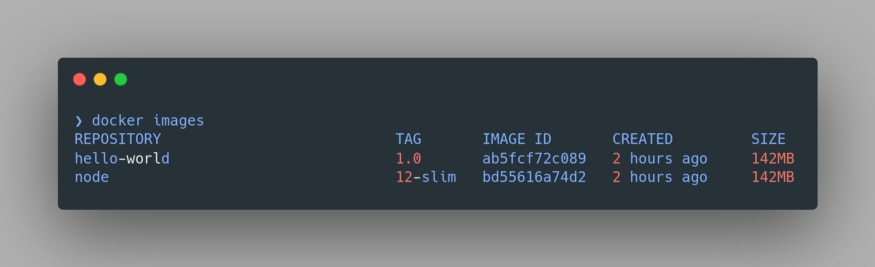
Notice the node image is also present here since we have used it as our Base Image. Now we’re all set to run our application. Let’s run our docker container using the command
docker run -it -p 3000:3000 hello-world:1.0Here we’re specifying that we want to run the container image in an interactive mode using the flag
-it. Further, we specify the port mapping of our container using the -p flag, where we direct that the 3000 port of the host machine is mapped to the 3000 port of the container. Finally, we specify the name and tag of the image to be run. Hence we obtain: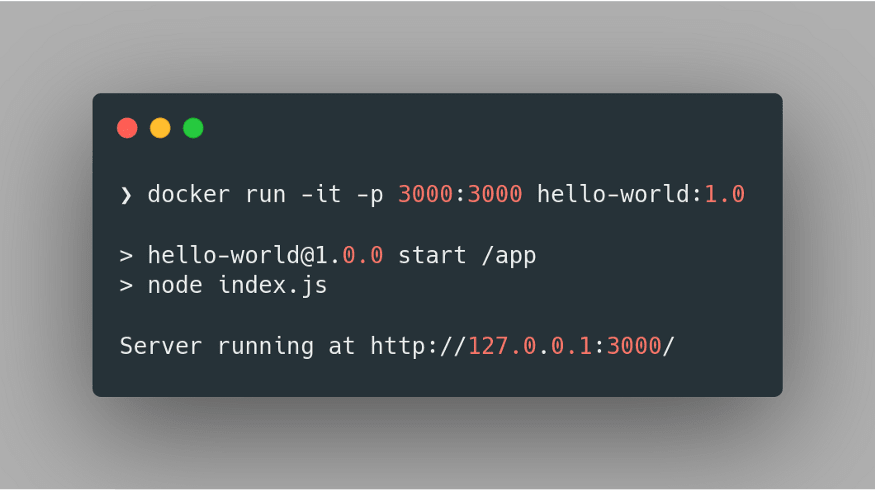
Thus, we have successfully deployed a container image of our application using Docker, which we can verify by visiting
http://127.0.0.1:3000/:
Further, we can run the container in detached mode by specifying
-d flag in place of -it in the previous command: docker run -d -p 3000:3000 hello-world:1.0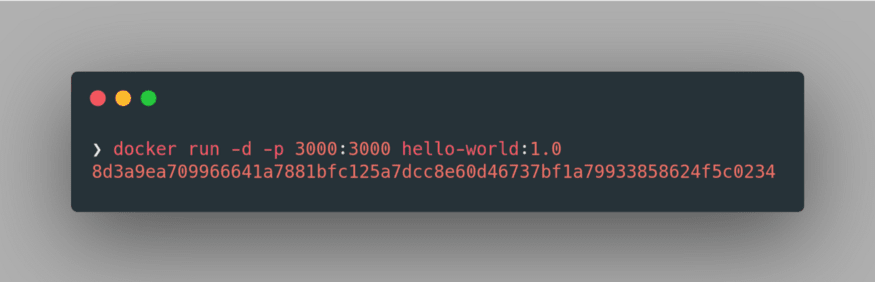
The long alphanumeric string output is nothing but the UUID long identifier of the running container. We can further inspect the properties of this container using the command
docker container ls: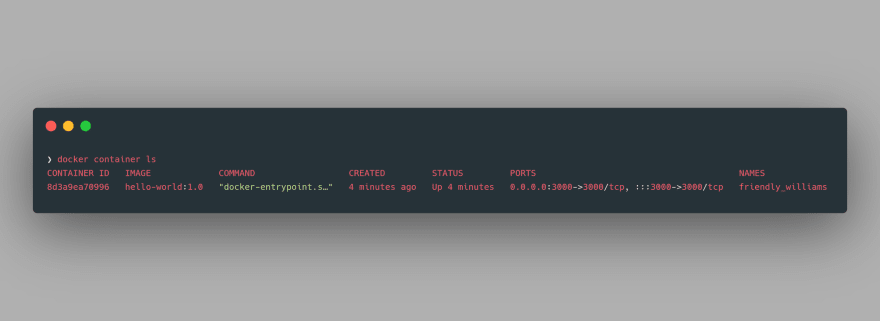
Amazing! We have just deployed our very first Docker container and now we’re all set for our next destination: Kubernetes.
As the container image of our application is now ready, all that’s left is to deploy our container image to a Kubernetes deployment. We’d use a Minikube cluster for the deployment of our container image locally.
It's important to take note that a Minikube cluster would have only one worker node, which will be created using a virtual machine, and the control plane will reside in our own machine only.
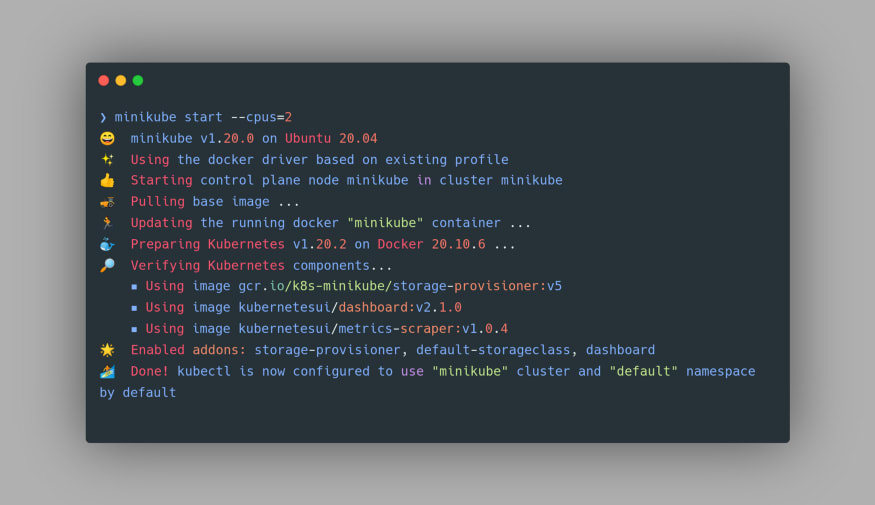
To start Minikube, we can use the command minikube start. It's worth pointing out that a minimum of 2 CPUs, 2GB RAM, and 20GB Disk Space is required for starting a Minikube cluster using this command. One may check the number of processing units in their machine using the
npoc command: 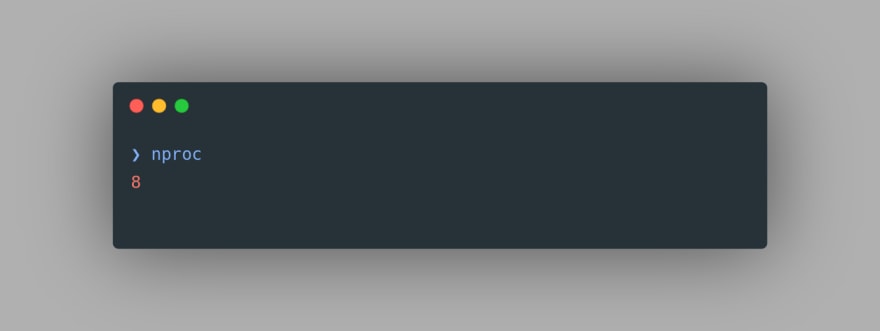
Once the Minikube cluster starts up, you’d get the following output in the terminal:
Now that our Minikube cluster is up and running, let’s devise a deployment strategy for our container image.
Currently, our container image is stored locally in our own Docker Local Registry which is present in our machine. The Registry is nothing but a stateless, highly scalable server-side application that stores and allows the distribution of Docker images. So, either we can use the image directly from the Local Registry to deploy it in the Minikube server, or we can first push our image to a Hosted Registry such as Docker Hub and later pull it for the image deployment. The latter is a more suitable approach when working in a team.
The former approach, however, has an unnoticed aspect. Minikube comes with its own Docker ecosystem when we install it on our machine. If we create Docker images on our computer and try to use them in a Kubernetes deployment, we will get the ErrImageNeverPull error since it always tries to get the image from its own Local Registry or Docker Hub, resulting in an error as the pod is started.
To verify this, let’s do a small experiment. We can still view our Local Registry images using the command
To verify this, let’s do a small experiment. We can still view our Local Registry images using the command
docker images: 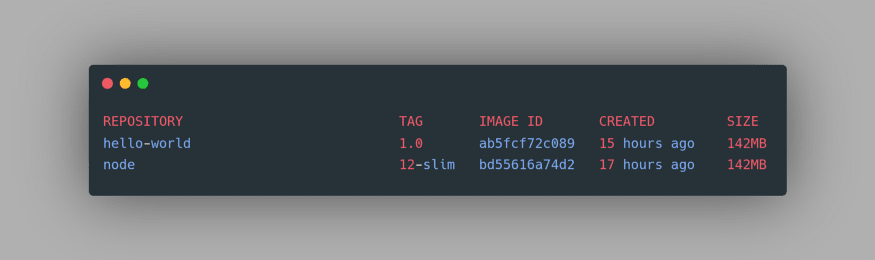
Now, let’s try to access the Docker Images of Minikube. To do that we need to first SSH into the Minikube’s VM. To do that, we can use the command
minikube ssh: 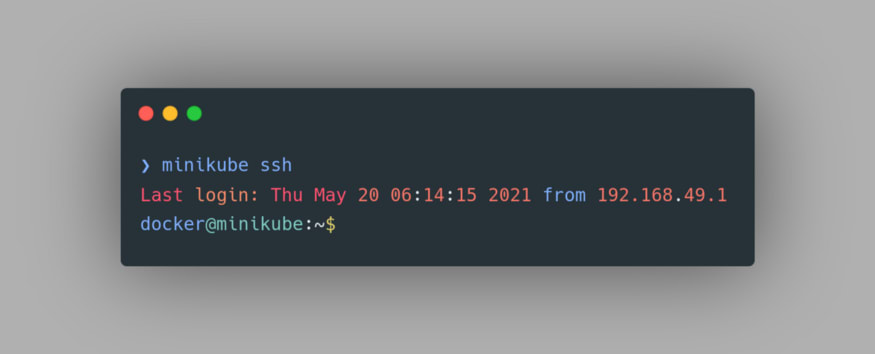
Now that we are inside the Minikube’s VM, we can again use the
docker images command and this time the hello-world image or the node image is nowhere to be found: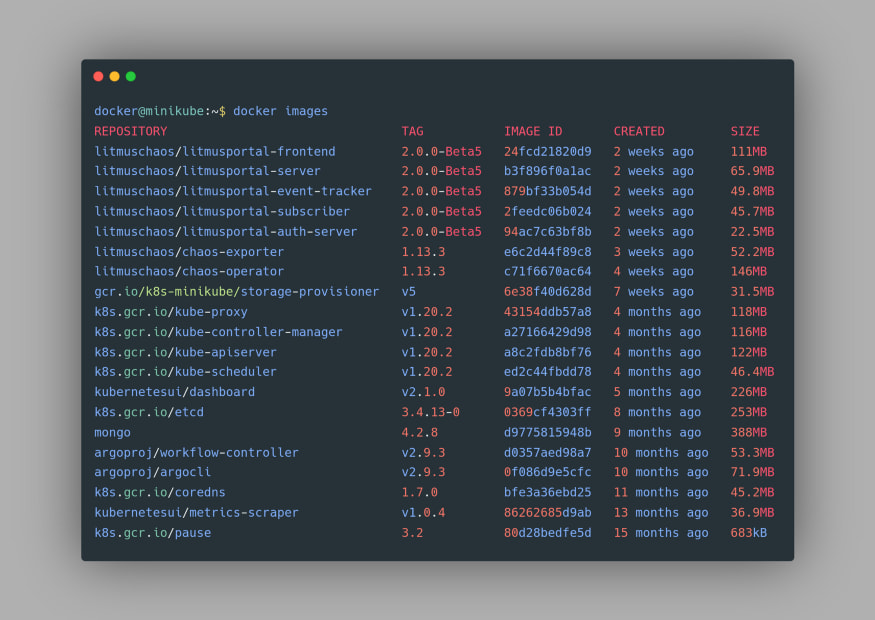
The SSH can be exited using the
To get around this issue, we have two options. Either we can push our image first to a Hoster Registry and then pull it into our Minikube VM’s Docker, or we can directly build our Docker image using Minikube’s Docker daemon. Let’s try to deploy our container image using the second approach.
exit command.To get around this issue, we have two options. Either we can push our image first to a Hoster Registry and then pull it into our Minikube VM’s Docker, or we can directly build our Docker image using Minikube’s Docker daemon. Let’s try to deploy our container image using the second approach.
Firstly, we need to set the environment variable using the eval command as
eval $(minikube docker-env). This will allow us to use the Docker daemon of Minikube to be used for the subsequent command. You can confirm that now the Minikube’s Docker is being used by using the docker images command again and this time you’d find the images from your Minikube Docker: 
Next, use the build command for docker image as you’d normally do using the command
docker build -t hello-world:1.0 .:
Now that our Docker image is in the right Registry, we can proceed towards the actual deployment. We can deploy our image either using a deployment manifest file or by using
kubectl create deployment command directly. The first approach is a better approach since it gives us much more flexibility to specify our exact Pod configuration.Let’s define our
deployment.yml manifest:A few interesting observations are to be made over here. Notice that
replicas has been set to 1 for the time being. This means that there will always be exactly one pod for our deployment under the present configuration. The imagePullPolicy is set to “Never” as the image is expected to be fetched from the Minikube Docker’s Local Registry. Finally under ports, the containerPort has been set to 3000 because our Node.js application listens on that port.Now, let’s create the container deployment using the following command
kubectl create -f deployment.yml, assuming that the terminal is open in the directory where deployment.yml file is present. We get the following output: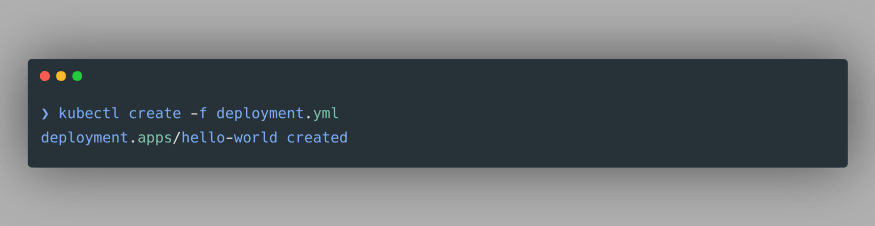
Woohoo! We just deployed our container image in the Kubernetes cluster! To verify our deployment, we can see all the deployments in our cluster using the command
kubectl get deployments: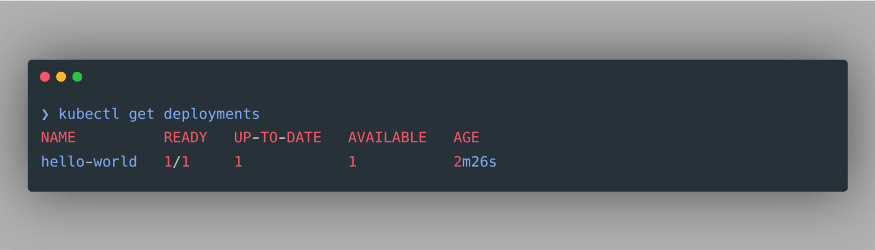
As we can see, our deployment is successfully created. We can also inspect the pods associated with this deployment using the command
kubectl get pods: 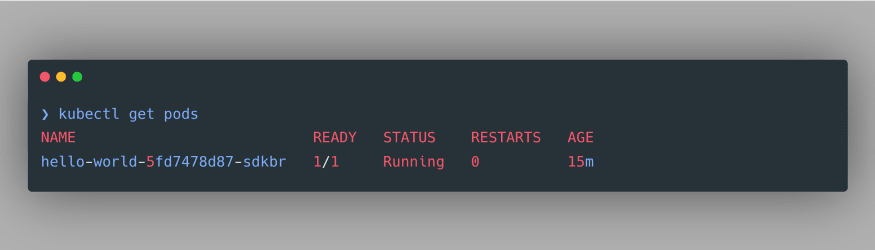
As per our manifest file, only one pod is created. Though, we can still increase or decrease the number of Pod replicas in our deployment using the following command
kubectl scale --replicas=3 deployment hello-world. This command will create 2 more Pods which will be exact replicas of the Pod that we have created: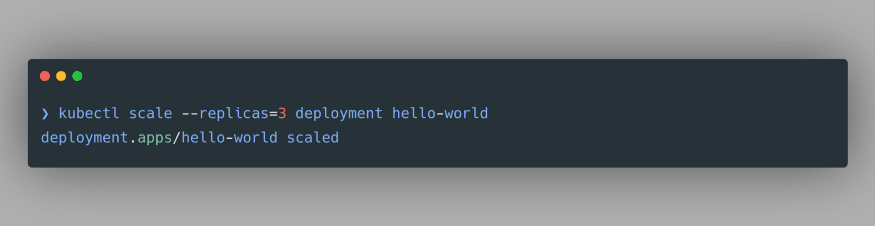
We can verify the newly created Pods by again using the command
kubectl get pods: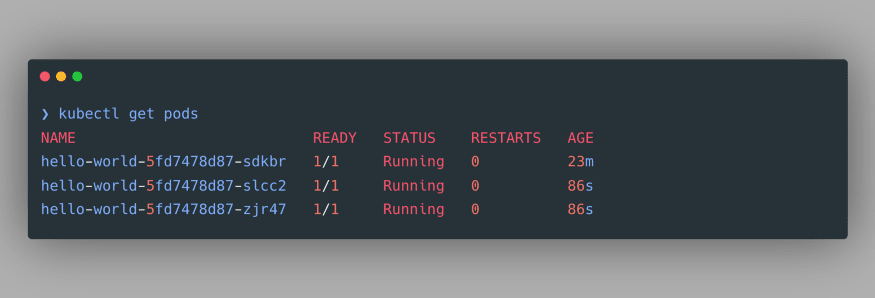
Though we have deployed our container image, still we can’t access the application just yet, for the lack of a Service. As we know, Service in Kubernetes is an abstraction that defines a logical set of Pods and a policy by which to access them. Services enable a loose coupling between dependent Pods. For our purpose, we’d create a NodePort Service to be able to access our deployment. A NodePort exposes the Service on the same port of each selected Node in the cluster using NAT.
Let’s define a
service.yml manifest:A few points to notice: Under
ports, we have defined the port and targetPort in relation to the Service itself i.e. port refers to the port exposed by the service and targetPort refers to the port used by our deployment aka. the Node.JS application.To create this Service we’d use the following command
kubectl create -f service.yml, assuming that the terminal is open in the directory where service.yml file is present. We get the following output: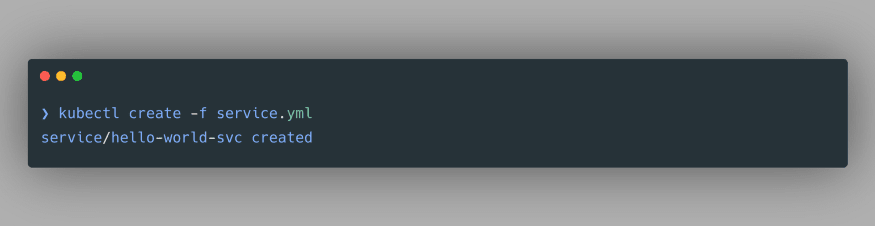
We just created our NodePort service, which we can verify using the command
kubectl get services: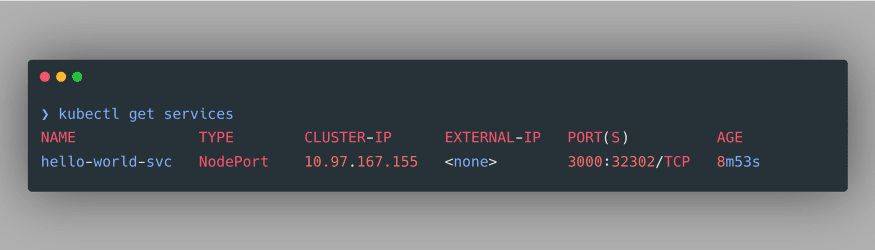
As evident, we have successfully created a NodePort Service. Noticeably, it doesn’t have an external IP, therefore we can use port-forwarding to access our deployment at a specified port. The command to do so is specified as
kubectl port-forward svc/hello-world-svc 3000:3000: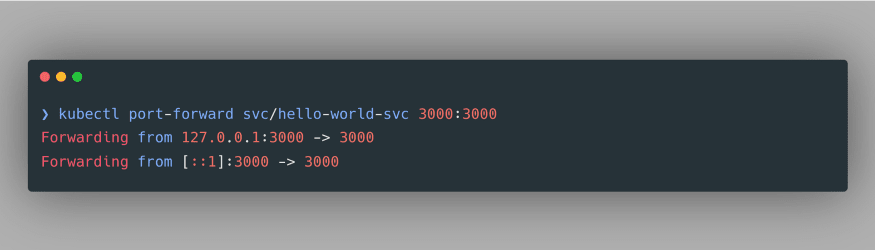
And now if we go to
http://127.0.0.1:3000: 
Congratulations! You have just deployed a containerized application using Docker and Kubernetes by adhering to the best practices. Though we have touched only the tip of the iceberg, I hope this demo has made you a little bit more familiar with the containers, and how Docker and Kubernetes can be used for containerizing and deploying applications.
In the next part of this series, we’d explore the world of Chaos Engineering using Litmus Chaos! We’d understand the best principles of Chaos Engineering and witness how Litmus Chaos performs Kubernetes-Native Chaos Engineering for attaining unparalleled resiliency in our Kubernetes application.
With that, I’d like to welcome you to the world of containers and chaos engineering. Come join me at the Litmus community to contribute your bit in developing chaos engineering for everyone. Stay updated on the latest Litmus trends through the Kubernetes Slack channel (Look for #litmus channel).
Don’t forget to share these resources with someone who you think might benefit from them. Thank you. 🙏
40